

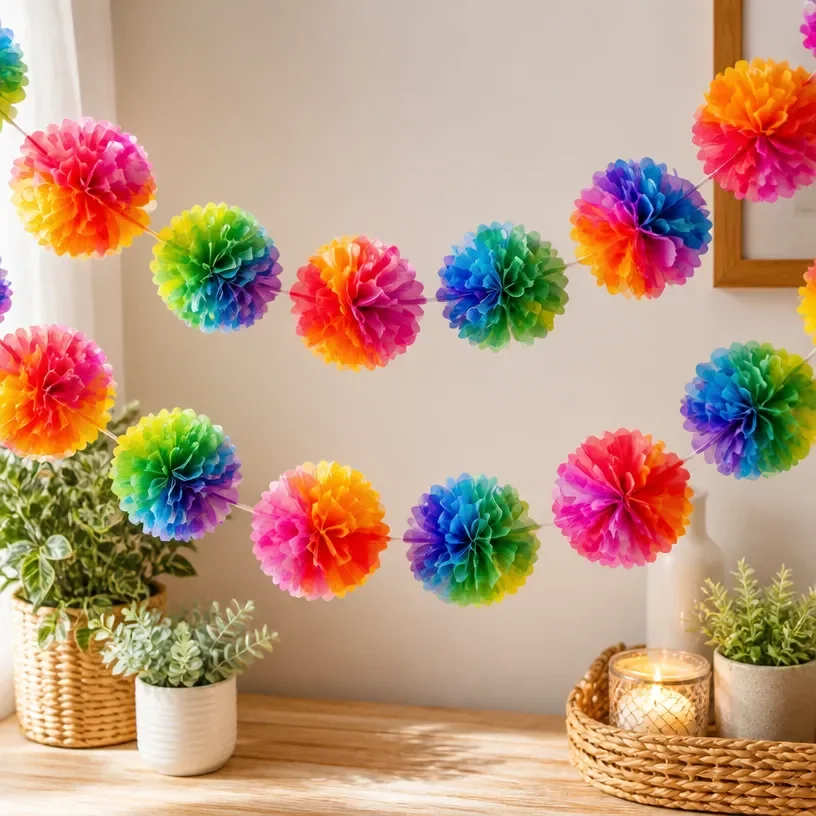
Creating a Rainbow Coffee Filter Dahlia Garland can be the perfect solution for a busy afternoon when kids are eager to get creative. Picture this: a last-minute need for a fun and engaging activity that won’t take hours to set up. The rainbow coffee filter garland fits the bill beautifully. With simple supplies and an easy process, you can have the kiddos decorating their space in no time. Plus, it’s a colorful way to brighten up any room during back-to-school season or for festive occasions. You may also find Diy Rainbow Coffee Filter Ghost Garland Halloween Decor useful.
Why You’ll Love Making Rainbow Coffee Filter Dahlia Garland
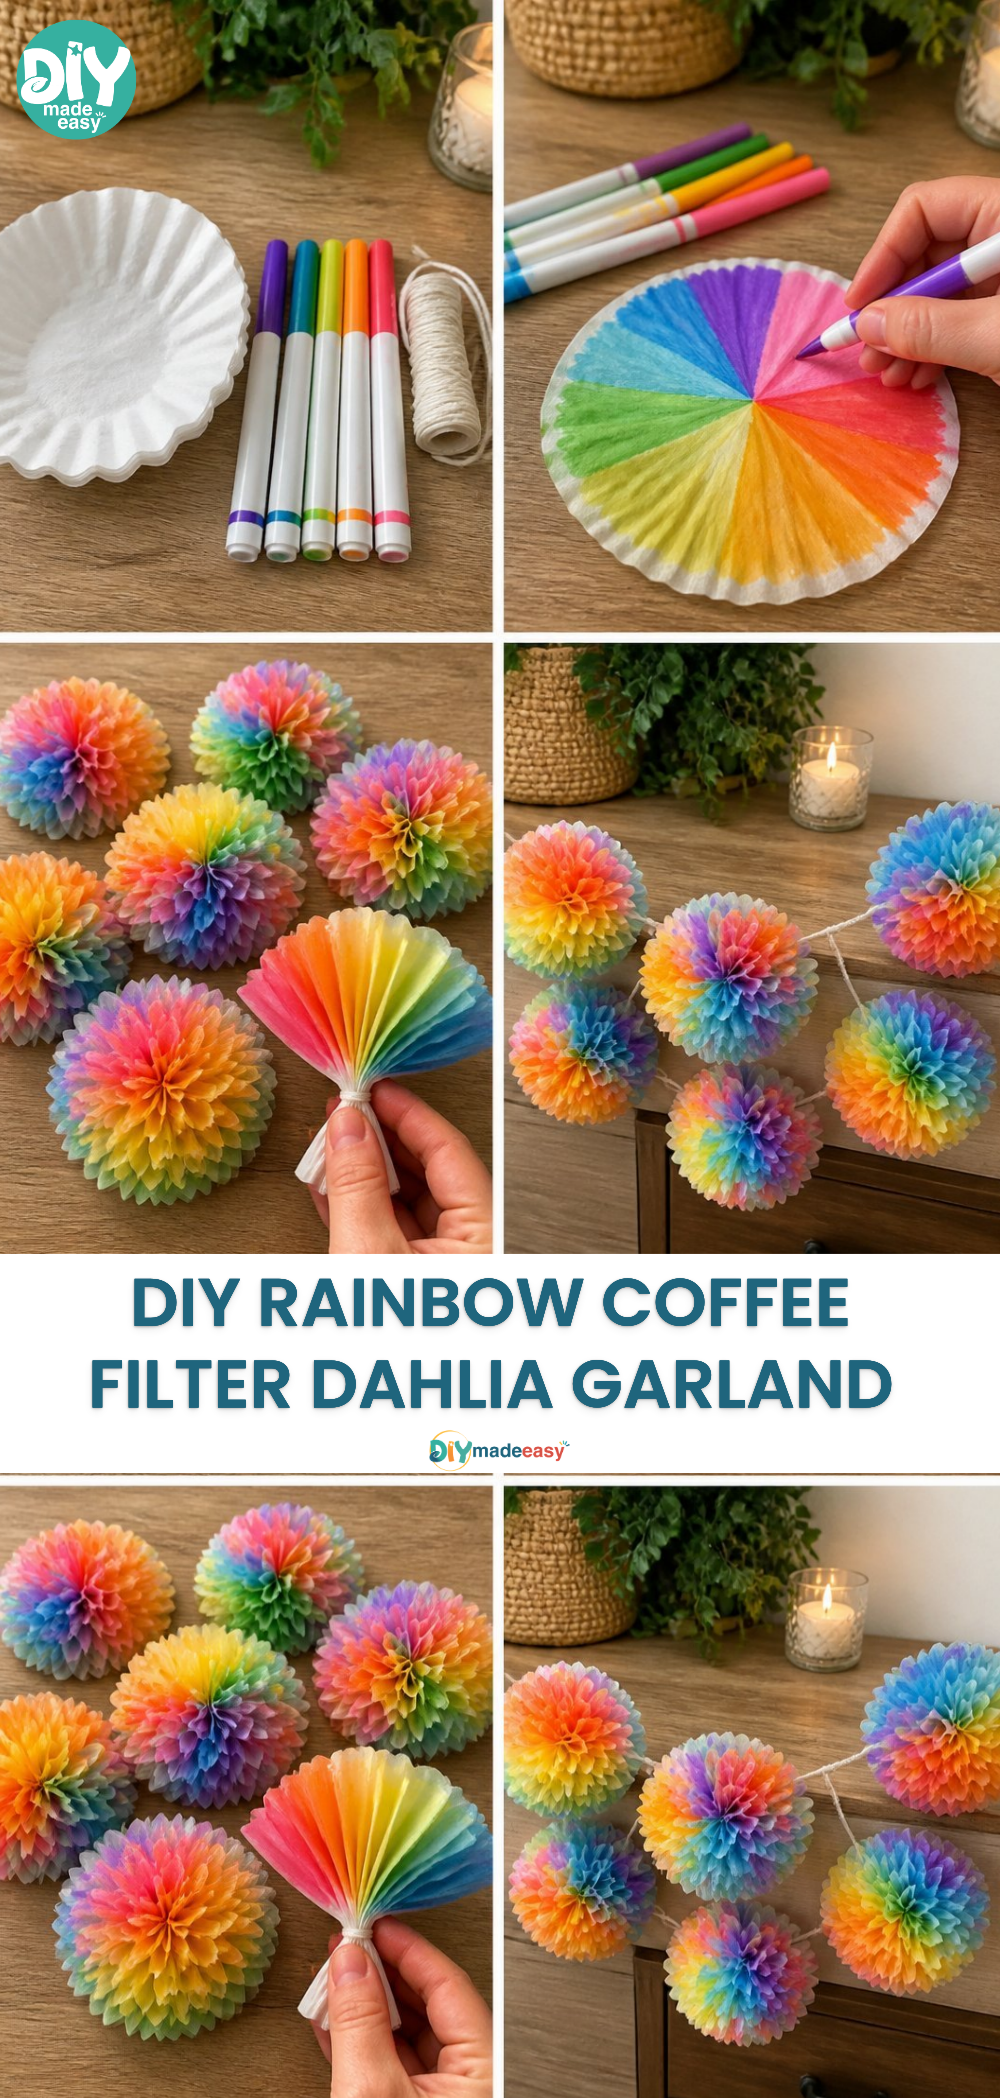
This project stands out because it’s extraordinarily low-prep and yields impressive results with minimal effort. The materials are common household items, making it easy to gather everything you need quickly. Kids can participate in the entire process, from coloring the filters to stringing them together, giving them ownership of their creation. This ensures that you can fit this delightful activity into even the busiest of days while keeping everyone engaged. You may also find Diy Bat Garland Tie Dye Coffee Filters useful.
A Quick Look Before You Begin
Before diving into making your garland, let’s take a moment to consider what to expect. Setting aside about 30 minutes to an hour generally allows plenty of time for the kids to get creative and for the filters to dry properly. The mess level is low, especially if you spread out some newspaper to catch any color drips, making the cleanup process simple. Adult involvement can be minimal, mostly just to supervise and assist with the more delicate steps of crafting. You may also find Diy Rainbow Coffee Filter Bouquet useful.
Materials You’ll Need
- Coffee filters (the larger, round type work best)
- Markers or food coloring (these add vibrant colors)
- Craft string or twine (to hang the garland)
- A spray bottle (filled with water for blending colors)
- Scissors (for trimming)
- A plate or tray (for drying the filters)
Gather these items ahead of time, and you’ll be ready to start without a hitch. Most of these materials are easy to find, whether they are tucked away in a kitchen drawer or lurking in the back of the craft cupboard. You may also find Chromatography Coffee Filter Butterflies Bloom useful.
Step-by-Step Directions
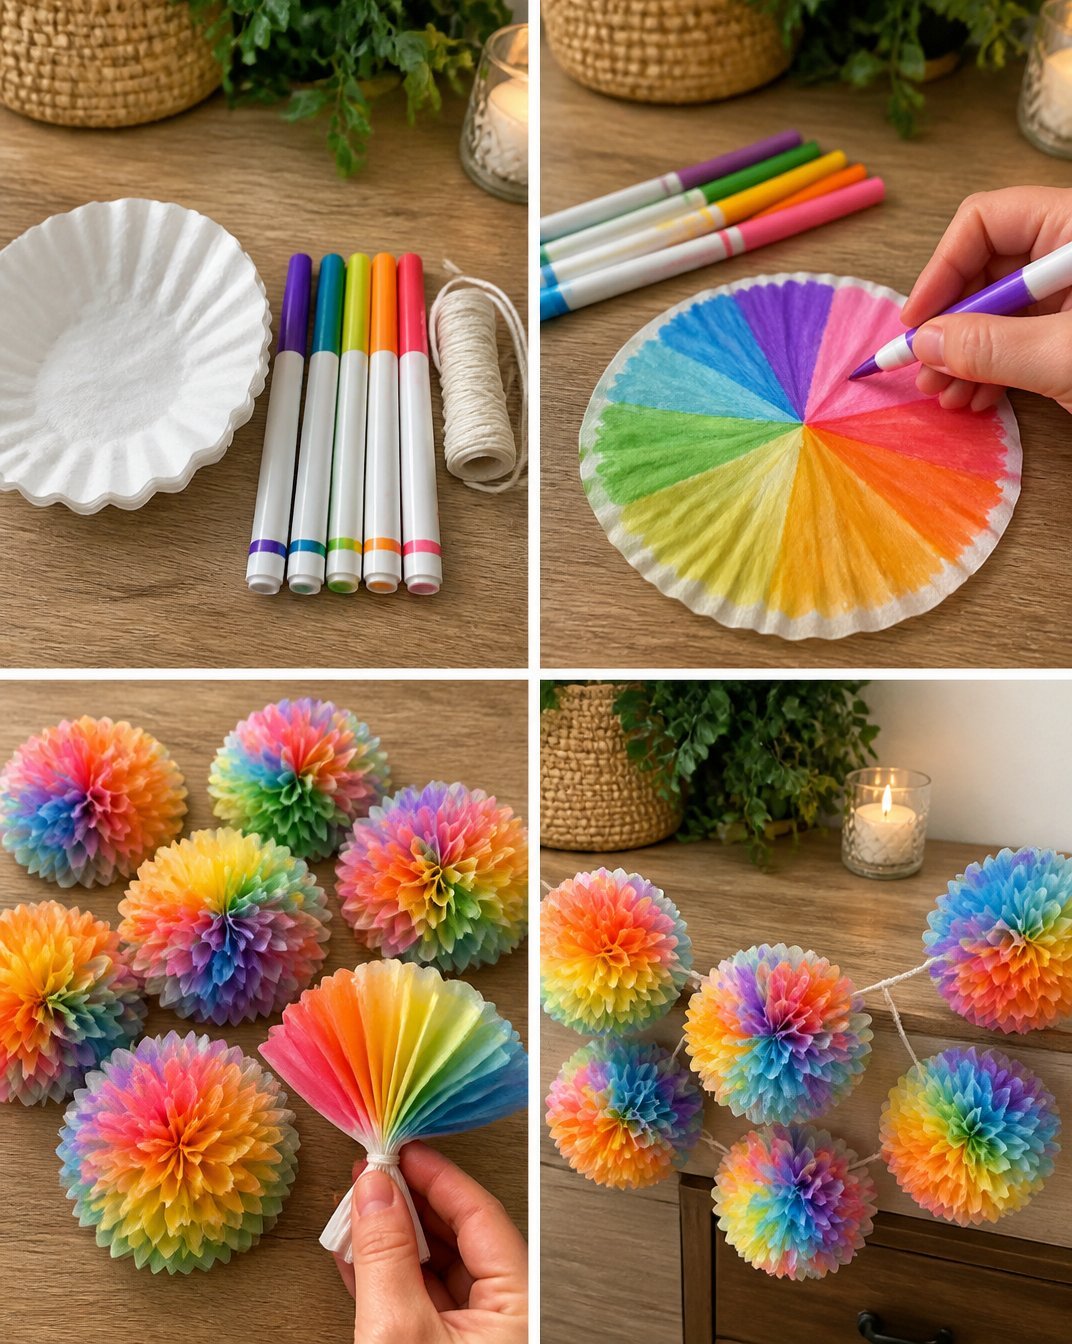
- Prepare Your Workspace: Lay down some newspaper or a plastic cloth to protect your table from any spills.
- Color the Filters: Using your markers or food coloring, decorate the coffee filters with vibrant designs. Encourage creativity; they can create patterns, swirls, or even simple stripes.
- Mist with Water: Once the filters are colored, lightly mist them with water using the spray bottle. This will help the colors blend and create beautiful effects.
- Dry the Filters: Place the colored filters on a plate or tray to dry completely. This may take about 20-30 minutes.
- Fold and Cut: When the filters are dry, fold each one in half, then in half again, making wedges. Cut the edges to create a petal shape.
- Assemble the Flowers: Open up the filter to reveal the unique flower shape you’ve created.
- String Them Together: Thread your string or twine through the center of each flower to create a garland. Spaces between the flowers add flair; adjust as needed.
The Learning Behind This DIY
Making the Rainbow Coffee Filter Dahlia Garland is not just about being creative; it also supports various skills. Children practice fine motor skills when using scissors and threading the flowers onto the string. Additionally, this activity introduces science concepts like color mixing when the colors blend upon spraying the filters. As they create, kids also learn about patience, as waiting for their filters to dry is part of the fun process.
Troubleshooting Common Issues
Occasionally, things may not go as planned. If the colors don’t blend as nicely as expected, it could be because there wasn’t enough water used in the spritzing step. Don’t fret—simply add a little more water, and the colors will start to blend together. If the filters don’t hold their shape after cutting, consider adjusting how they are folded or trimmed. Practice often leads to better results, so encourage kids to try again without being discouraged.
Easy Variations to Try
To keep things fresh, consider these fun twists on the original design:
- Seasonal Colors: For different holidays, use specific color palettes—red and green for Christmas or pastels for Easter.
- Layering Filters: Stack two or three coffee filters together before coloring for a denser flower effect.
- Themed Garlands: Create a garland that matches a particular theme, like ocean colors for a beach party or fall colors for Halloween.
- Add Sparkle: Once dry, sprinkle a little glitter on the flowers to add a touch of sparkle before stringing them together.
Storing or Reusing This Project
After enjoying your colorful garland, you may wonder about storage options. To keep your garland looking lovely, store it flat in a box if you choose to save it for future use. Alternatively, you can hang it up in your home until it’s time to take it down. If you wish to reuse materials from the project, the filters can be recycled, and any leftover string can find its way into other crafts.
FAQs About Rainbow Coffee Filter Dahlia Garland
What if I’m worried about the mess?
It’s natural to be concerned about mess when crafting with kids. Using newspaper or a plastic cloth will significantly contain any spills or drips. Most of the mess can be cleaned up quickly, ensuring that the fun stays positive.
Is this activity safe for young children?
Yes, this project is entirely suitable for children, but it’s best to supervise, especially with scissors involved. Always use safety scissors with younger kids, and you can handle any cutting tasks if necessary.
Can I substitute materials?
Absolutely! If you don’t have markers or food coloring, consider using watercolor paints or crayons. Just keep in mind that different materials may produce varied results.
A Final Helpful Note
As you engage in this creative project, remember to embrace flexibility and a sense of fun. The Rainbow Coffee Filter Dahlia Garland is all about enjoying the process, not just achieving a perfect outcome. Allow kids to express themselves and let their creativity shine; the little imperfections often make for the most memorable keepsakes.
Conclusion
Creating your own unique decorations can be rewarding, and if you’re in the market for more crafting supplies, consider checking out Mayesh for wholesale flowers and foliage. For additional kitchen accessories that may come in handy, visit Nourish Designs. Enjoy making your garland and watching your children’s enthusiasm grow!
PrintRainbow Coffee Filter Dahlia Garland
Engage kids in a creative and colorful activity by making a Rainbow Coffee Filter Dahlia Garland, perfect for brightening up any space.
- Prep Time: 15 minutes
- Cook Time: 30 minutes
- Total Time: 45 minutes
- Yield: 1 garland
- Category: Craft
- Method: Crafting
- Cuisine: N/A
- Diet: N/A
Ingredients
- Coffee filters (the larger, round type work best)
- Markers or food coloring (to add vibrant colors)
- Craft string or twine (to hang the garland)
- A spray bottle (filled with water for blending colors)
- Scissors (for trimming)
- A plate or tray (for drying the filters)
Instructions
- Prepare your workspace: Lay down some newspaper or a plastic cloth to protect your table from any spills.
- Color the filters: Using your markers or food coloring, decorate the coffee filters with vibrant designs.
- Mist with water: Lightly mist them with water using the spray bottle to help the colors blend.
- Dry the filters: Place them on a plate or tray to dry completely (this may take about 20-30 minutes).
- Fold and cut: When dry, fold each filter in half, then again, and cut edges to create petal shapes.
- Assemble the flowers: Open up the filter to reveal the flower shape.
- String them together: Thread your string or twine through the center of each flower to create the garland.
Notes
Encourage creativity and help kids learn about color mixing while making the garland.
Nutrition
- Serving Size: 1 garland
- Calories: 0
- Sugar: 0g
- Sodium: 0mg
- Fat: 0g
- Saturated Fat: 0g
- Unsaturated Fat: 0g
- Trans Fat: 0g
- Carbohydrates: 0g
- Fiber: 0g
- Protein: 0g
- Cholesterol: 0mg