

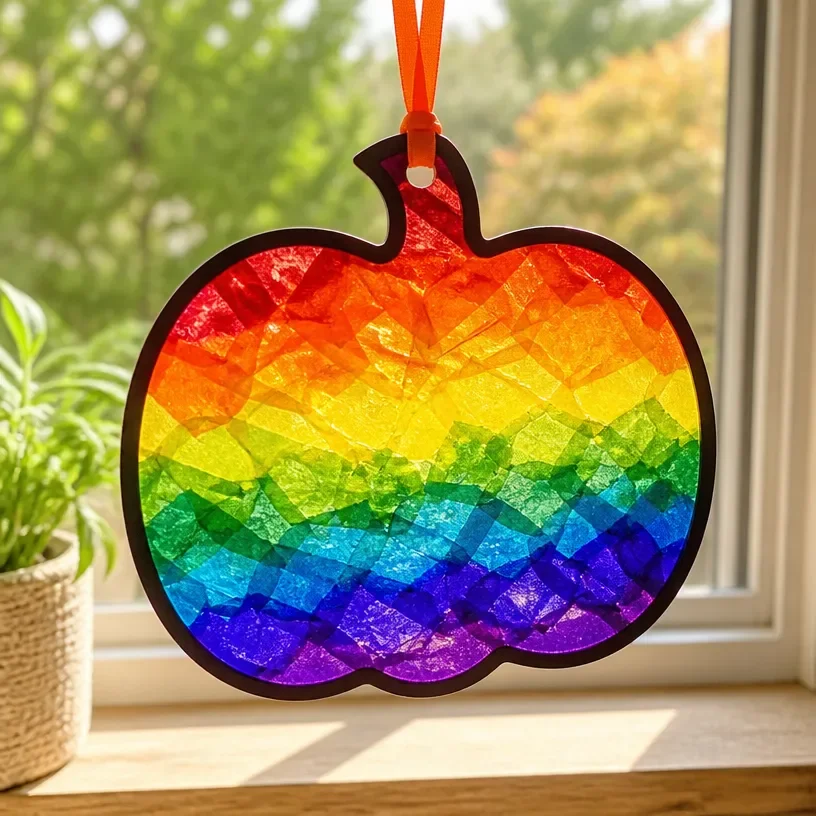
Creating a memorable activity with your kids doesn’t have to involve elaborate projects or extensive planning. Often, a simple idea can bring joy and creativity into a busy afternoon. Imagine the kids asking to do something fun right now, and you’re looking around the kitchen for ideas. This is where the DIY Melted Crayon Pumpkin Suncatcher comes in. It’s an easy, engaging project that turns ordinary crayons into vibrant autumn decorations. You may also find Diy Melted Crayon Rainbow Haunted House Suncatcher useful.
Why This DIY Melted Crayon Pumpkin Suncatcher Works So Well
You may also find Diy Melted Crayon Rainbow Heart Suncatcher Tutorial useful.
The DIY Melted Crayon Pumpkin Suncatcher stands out because it requires minimal preparation and materials, making it incredibly approachable. The method is straightforward: melt some crayons and pour them into pumpkin shapes to create a beautiful piece of art. This is perfect for last-minute plans or for an enjoyable autumn activity indoors. Additionally, the results are always rewarding, replacing the worry of complex crafts with the satisfaction of achieving a pleasing visual. Plus, it’s not just a fun project; it helps to engage kids’ creativity, making it a win-win for everyone involved. You may also find Diy Melted Crayon Rainbow Heart Suncatcher useful.
A Quick Look Before You Begin
When planning for this DIY project, take a moment to consider the timing and setup. This activity typically takes around an hour, from gathering materials to completing the suncatcher. You might want to have everything laid out before starting to keep the mess manageable. The good news is that adult supervision is minimal, allowing children to explore their creative side with confidence. Plus, the clean-up is straightforward: you just need some water and a cloth to wipe down surfaces afterward. Let’s get started! You may also find Diy Bioplastic Suncatchers Crayon Method useful.
Materials You’ll Need
- Crayons (a mix of colors works best; these are a common household item)
- Wax paper (to catch drips and make cleanup easier)
- A baking sheet (this can be an old one; it’s budget-friendly)
- A pumpkin-shaped cookie cutter (optional, but a fun shape to create)
Having these materials on hand will make the process smooth and enjoyable.
Step-by-Step Directions
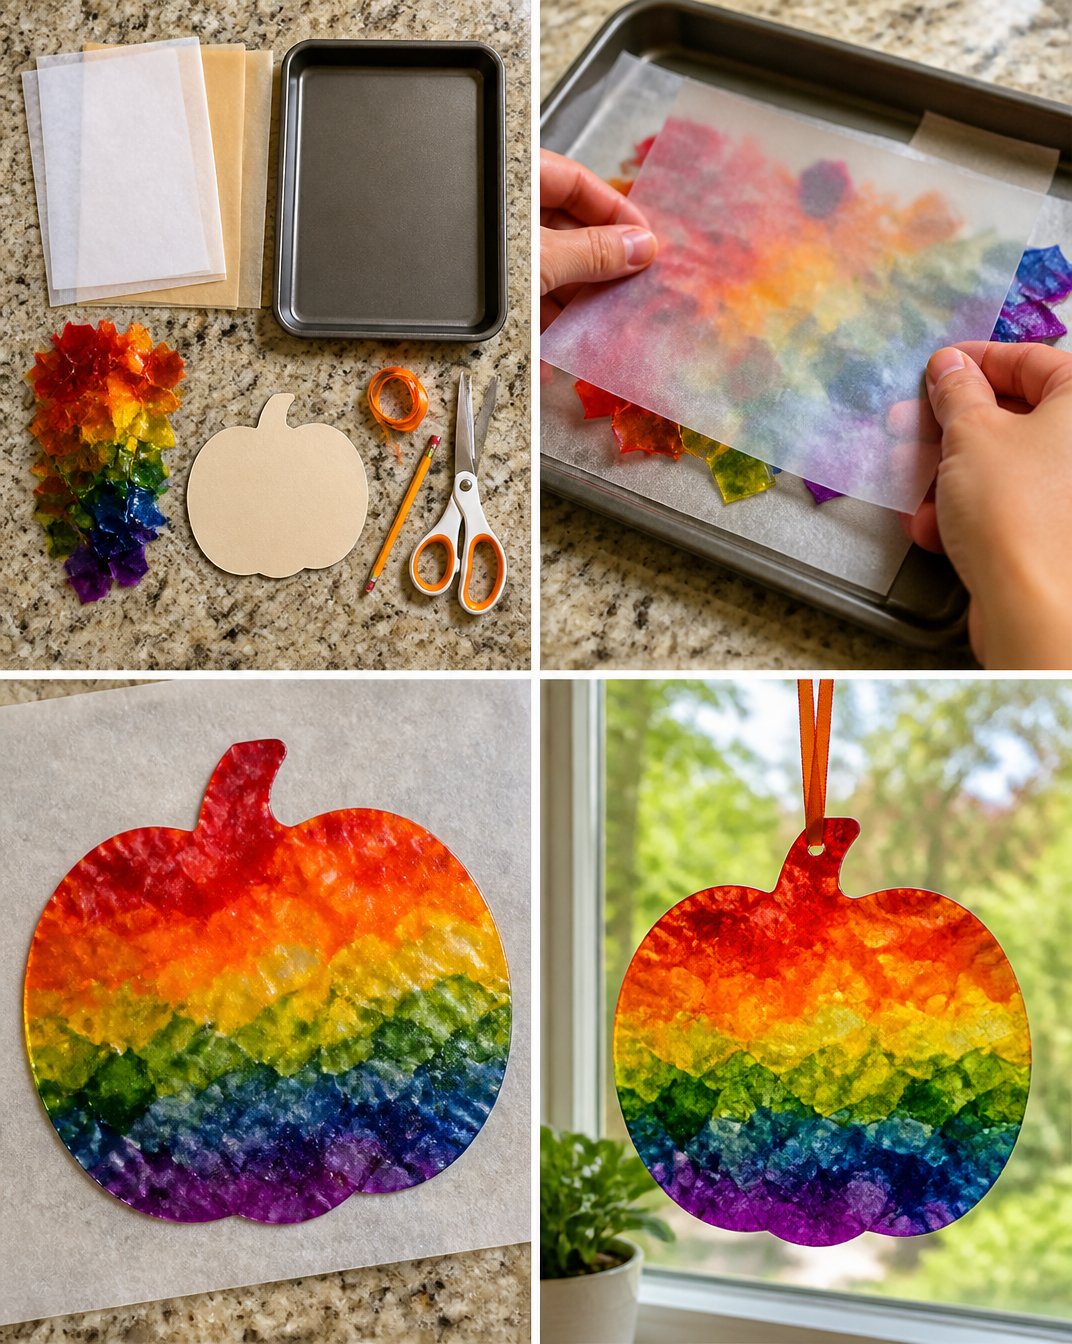
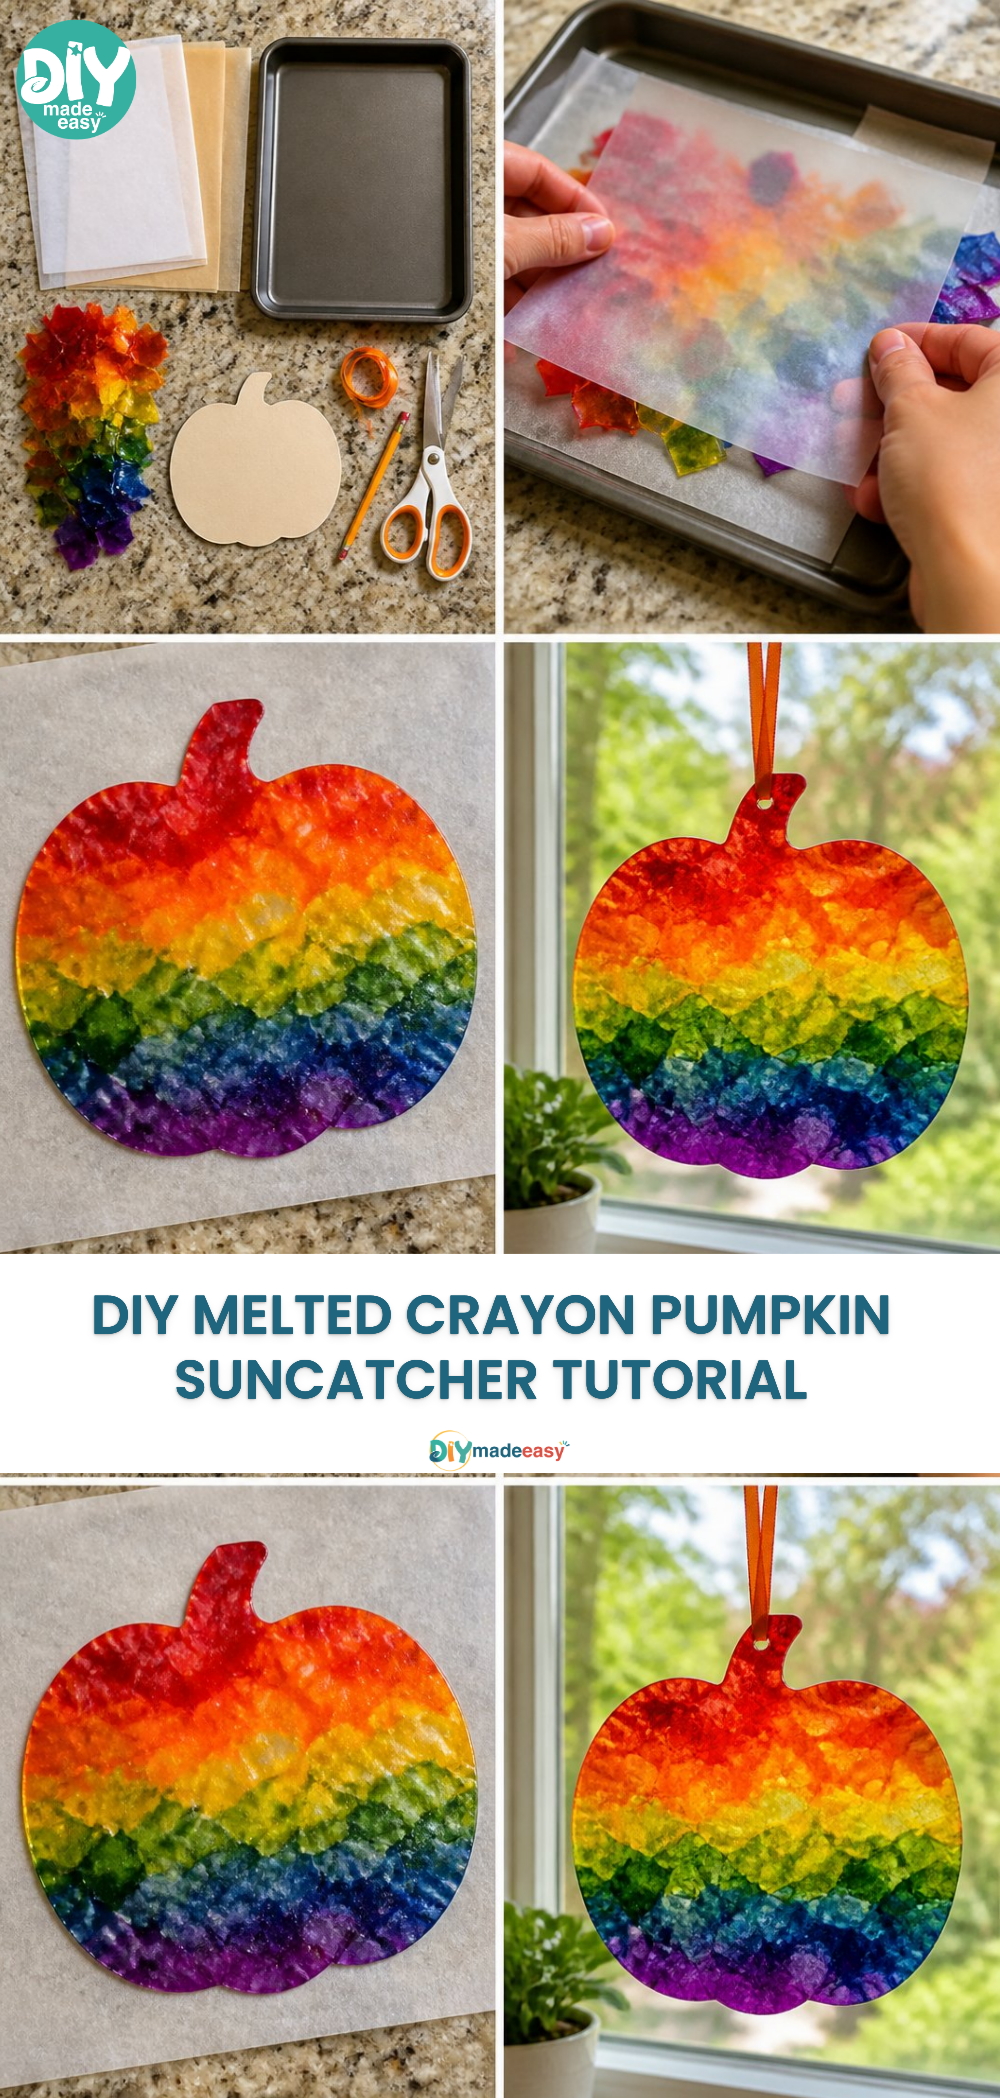
Preheat your oven to 200°F (about 93°C). This low heat will help melt the crayons without burning them.
While the oven heats, gather and peel your crayons. Kids love to help with this part! Make sure to remove all the paper wrappers.
Break the crayons into small pieces and place them on a sheet of wax paper on your baking sheet. You can create patterns or leave them random; it’s all about creativity!
Once the oven is ready, place the baking sheet inside. Keep an eye on it; it usually takes about 10-15 minutes for the crayons to melt completely.
When melted, remove the baking sheet from the oven. Use a cookie cutter to shape your melted crayon mixture into pumpkins or other designs on the wax paper.
Let the crayon shapes cool completely at room temperature. This can take a little while, but it’s worth the wait!
Once cooled, carefully peel the wax paper away from your crayon shapes. They may appear a bit fragile, so handle them gently.
Finally, display your suncatchers in a sunny window. Enjoy the beautiful colors streaming through!
What Kids Practice While Making This
The DIY Melted Crayon Pumpkin Suncatcher is more than just a fun craft; it also provides opportunities for children to develop important skills. For instance, they practice fine motor skills when peeling crayons and breaking them into pieces. The sensory experience of melting crayons helps them understand cause and effect: they see the solid state change to a liquid and then solidify again. Not to mention, engaging in a creative process like this nurtures their imaginative capabilities.
Troubleshooting Common Issues
If you find that your crayons don’t melt as expected, make sure the temperature is low enough; too high can cause burning, which can ruin the project. If your shapes break easily when cooling, check that the crayons were fully melted before removing them from the oven. You may also want to experiment with different brands of crayons, as some melt more smoothly than others. Always supervise your children while they work with hot items to ensure safety throughout the process.
Easy Variations to Try
Layering Colors: Instead of mixing crayon pieces together, try layering different colors to create a striped effect.
Different Shapes: Use other cookie cutters to make various seasonal shapes such as leaves, acorns, or even ghosts for Halloween!
Textured Add-Ins: Add some glitter to the melted crayon mixture for a sparkly twist.
Scented Suncatchers: By adding a drop or two of essential oils to the melted crayon mix, you can create scented suncatchers. Just be sure the oils don’t alter the consistency too much.
These variations allow for endless creativity and can be adjusted based on what your kids find exciting.
Storing or Reusing This Project
It’s easy to store leftover suncatchers if you want to save them for next year or for another occasion. Just keep them in a cool, dry place. If you notice any excess wax spills or marks from the melted crayon, they can simply be cleaned with warm soapy water. Given the fascinating nature of suncatchers, it’s a great idea to reuse materials to create new ones, which will encourage children to be resourceful and creative.
FAQs About DIY Melted Crayon Pumpkin Suncatcher
Q: Will this project make a mess?
A: There’s minimal mess, but having wax paper can help catch any drips and spills. Just do this project in a controlled area to make clean-up easier.
Q: What age range is this project suited for?
A: Generally, kids 4 and up can assist with this project, but adult supervision is required when it comes to the oven and melting crayons.
Q: Can we use other types of wax besides crayons?
A: While crayons are the best for this project due to their color range and melting quality, you can experiment with other wax products, but they may not yield the same vibrant results.
Q: What are realistic outcomes from this project?
A: You can expect lovely, colorful designs for your window. Keep in mind that the shapes may differ slightly depending on the melting process.
Q: How long do these suncatchers last?
A: If stored properly, these suncatchers can last a long time. However, keep them out of direct sunlight for too long to avoid fading.
Conclusion
Creating a DIY Melted Crayon Pumpkin Suncatcher is not only a fun-filled project but also a wonderful way to bond with your children. By engaging in a hands-on activity, you’re opening the door to creativity and learning. The vibrant colors and unique shapes can brighten up any window this fall. For more inspiration, you might explore creating a Melted Crayon Pumpkin Suncatcher or see how you can adapt the technique by making a flower pot sun catcher. Enjoy the colors of autumn and the satisfaction of handmade creations!
PrintDIY Melted Crayon Pumpkin Suncatcher
A fun and easy autumn activity to create vibrant pumpkin-shaped suncatchers using melted crayons.
- Prep Time: 15 minutes
- Cook Time: 15 minutes
- Total Time: 30 minutes
- Yield: 4 suncatchers
- Category: Craft
- Method: Baking
- Cuisine: N/A
- Diet: N/A
Ingredients
- Crayons (a mix of colors)
- Wax paper
- Baking sheet
- Pumpkin-shaped cookie cutter (optional)
Instructions
- Preheat your oven to 200°F (about 93°C).
- Gather and peel your crayons.
- Break the crayons into small pieces and place them on wax paper on your baking sheet.
- Place the baking sheet inside the oven for 10-15 minutes.
- Remove the baking sheet and use a cookie cutter to shape the melted crayon mixture.
- Let the shapes cool completely at room temperature.
- Peel the wax paper away from the crayon shapes.
- Display your suncatchers in a sunny window.
Notes
This project engages kids’ creativity and fine motor skills. Supervision is required when using the oven.
Nutrition
- Serving Size: 1 suncatcher
- Calories: 50
- Sugar: 0g
- Sodium: 0mg
- Fat: 0g
- Saturated Fat: 0g
- Unsaturated Fat: 0g
- Trans Fat: 0g
- Carbohydrates: 0g
- Fiber: 0g
- Protein: 0g
- Cholesterol: 0mg