

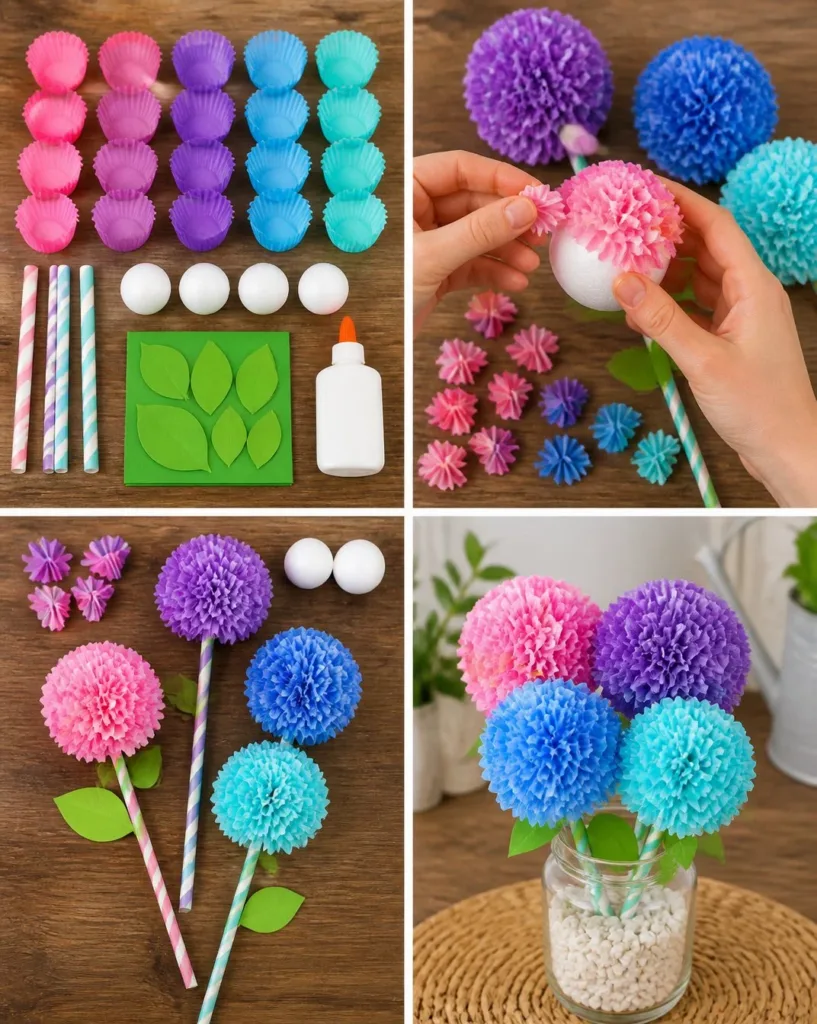
Creating fun and colorful art projects can turn a busy afternoon into a delightful experience. When kids express a desire to craft something special, a simple yet vibrant activity can be the perfect solution. This is where the idea of making Rainbow Cupcake-Liner Hydrangeas comes in. With just a few materials and some creative energy, these little flowers can be crafted and displayed in your home, brightening up any space. You may also find Big Rainbow Pinwheel Garden Stake Outdoor Yard Decor useful.
Why This Rainbow Cupcake-Liner Hydrangeas: Colorful Blooms for Your Garden Works So Well
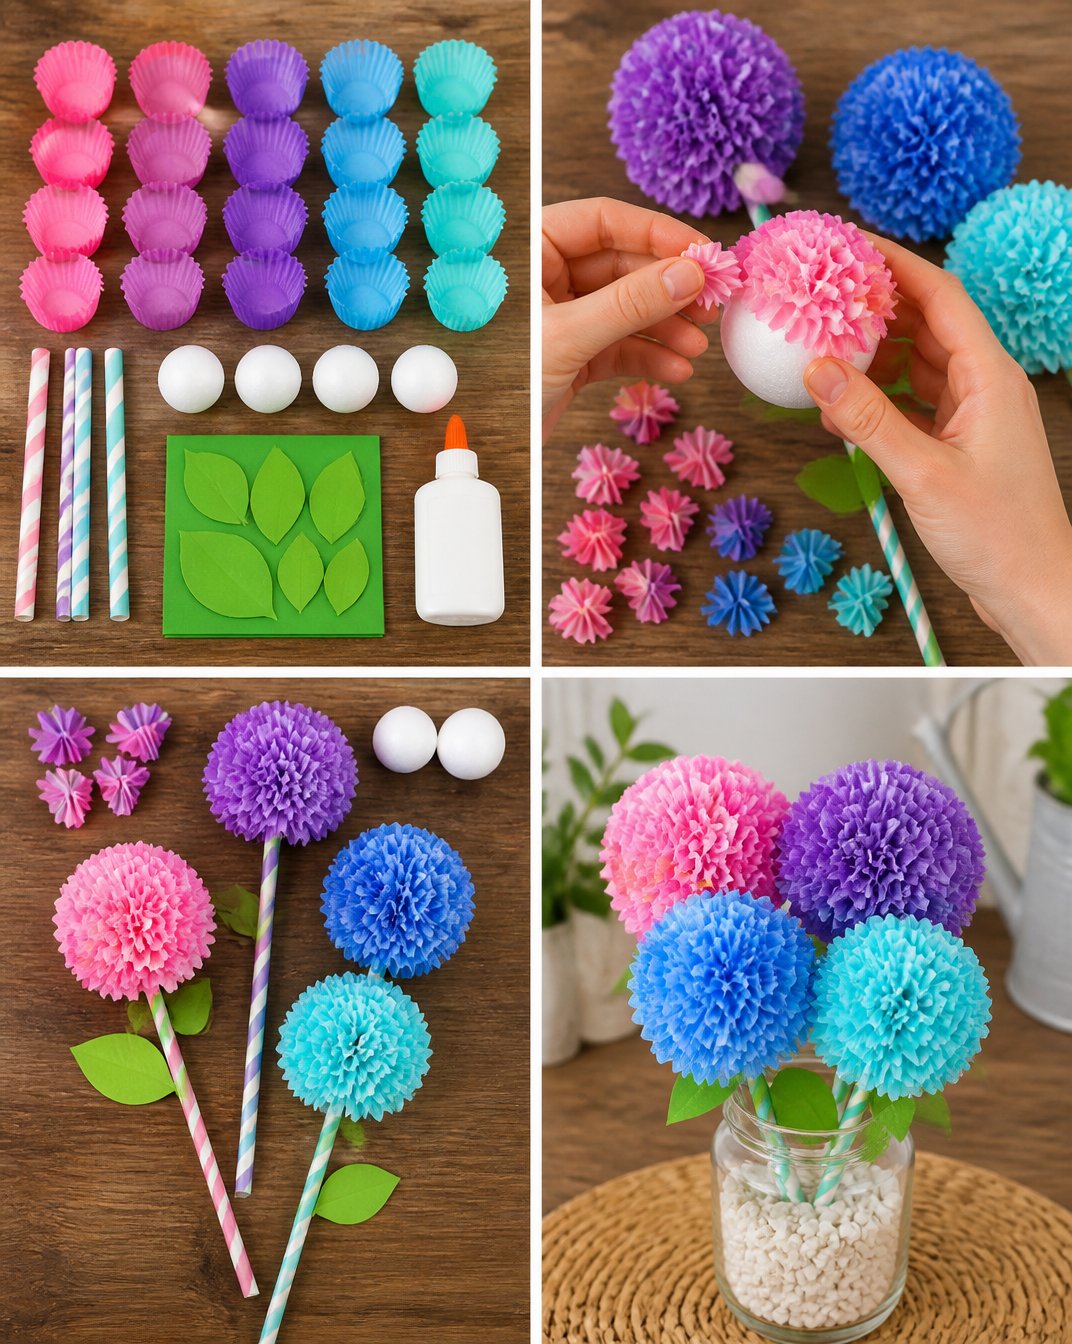
This project shines for several reasons. It’s low-prep and requires minimal materials, making it an ideal activity even for busy families. Gather your supplies, and you’ll see how accessible and enjoyable crafting can be. As you fold those cupcake liners, you’ll engage children in a hands-on activity that nurtures creativity without overwhelming them. Moreover, the bright colors attract attention and spark joy, making them great choices for decorating tables, desks, or even as gifts. You may also find Colorful Monster Pencil Organizers For Desk useful.
Additionally, making these hydrangeas is reliable and approachable. You don’t need to be an expert crafter to create something beautiful. It’s a wonderful way to bond with your kids, helping them to gain confidence in their crafting abilities. For more fun DIY ideas, you might also enjoy discovering how to create a baking soda rainbow crystal forest.
A Quick Look Before You Begin
Deciding to craft these hydrangeas should feel like an easy choice. The total time to complete the project is about 30-45 minutes, allowing room for discussion and laughter between steps. While everyone works, expect a bit of glue and scattered cupcake liners—it’s all part of the fun. Adult involvement is encouraged but not mandatory; kids can independently engage in folding and gluing. You may also find Colorful Rainbow Crystal Leaf Sun Catcher useful.
Materials You’ll Need
- 24 mini cupcake liners in pink, purple, blue, and turquoise
- 4 paper straws
- 4 foam balls
- Green cardstock
- Glue
Most of these materials can be found at home, making this a budget-friendly craft. The cupcake liners will add a vibrant touch, while foam balls offer sturdy bases for your blossoms. The green cardstock can typically be substituted with any leftover paper, adding convenience to the project.
Step-by-Step Directions
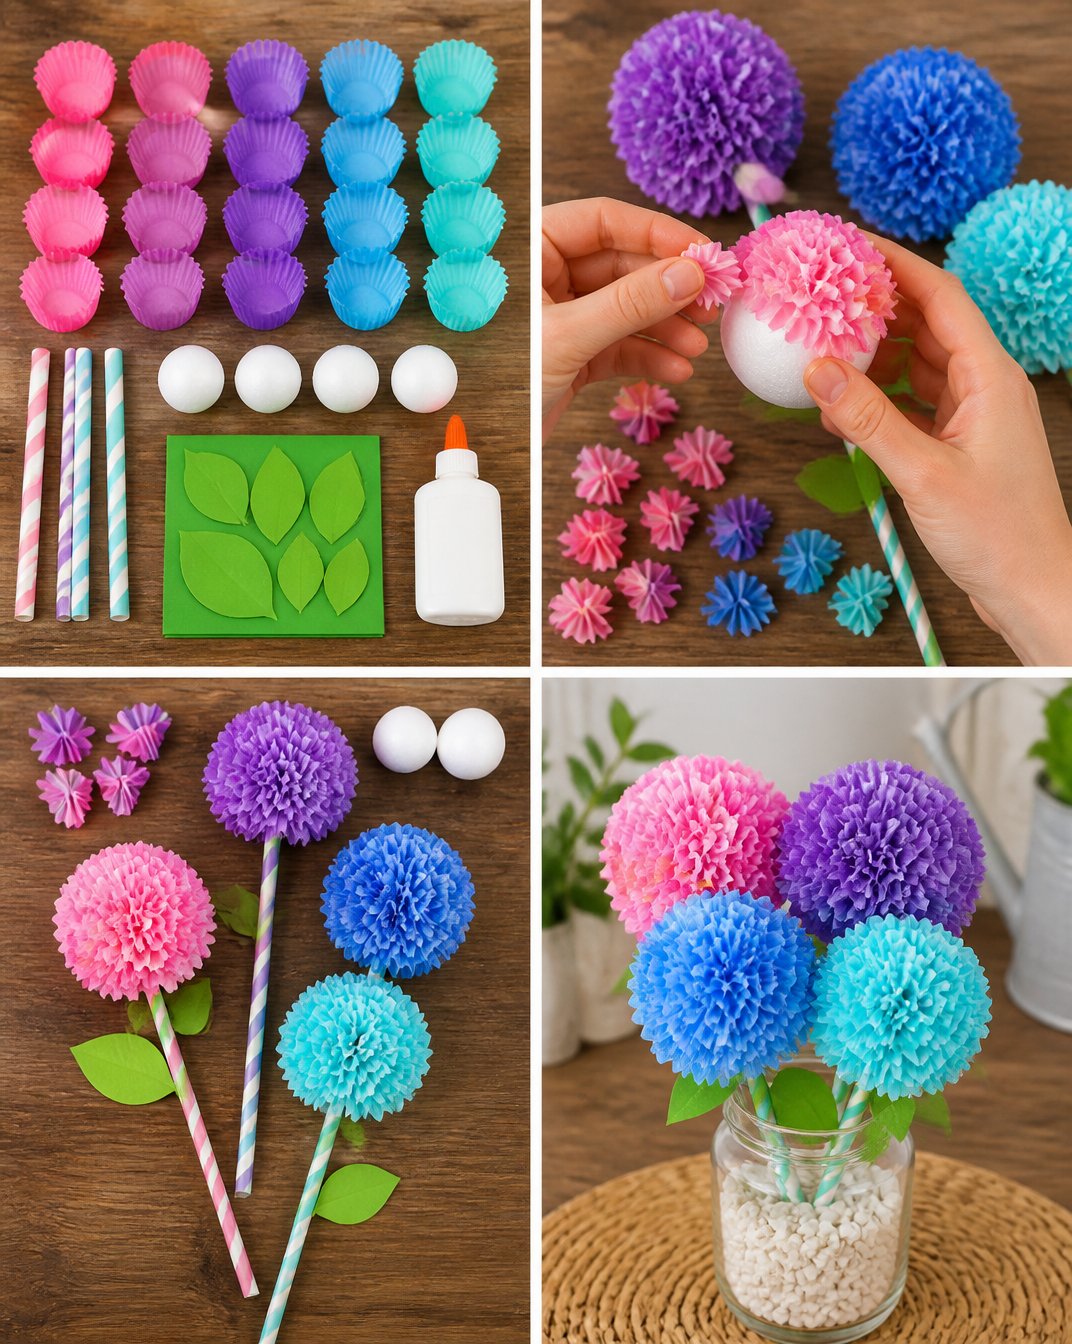
- Start by taking a mini cupcake liner and gently folding or pinching it into a small hydrangea-style blossom. Repeat this for all 24 liners.
- Once you have a good number of blossoms, begin gluing them closely together over each foam ball. Ensure you overlap them to fully cover the ball’s surface.
- Allow the glued blossoms to dry thoroughly.
- After the glue has dried, take a flower-covered foam ball and securely attach it to a paper straw stem. Hold it in place for a few moments if necessary.
- Next, cut leaf shapes from the green cardstock. These will serve as decorative leaves for your hydrangeas.
- Glue the cut-out leaves to each stem, carefully positioning them near the lower part of the foam ball.
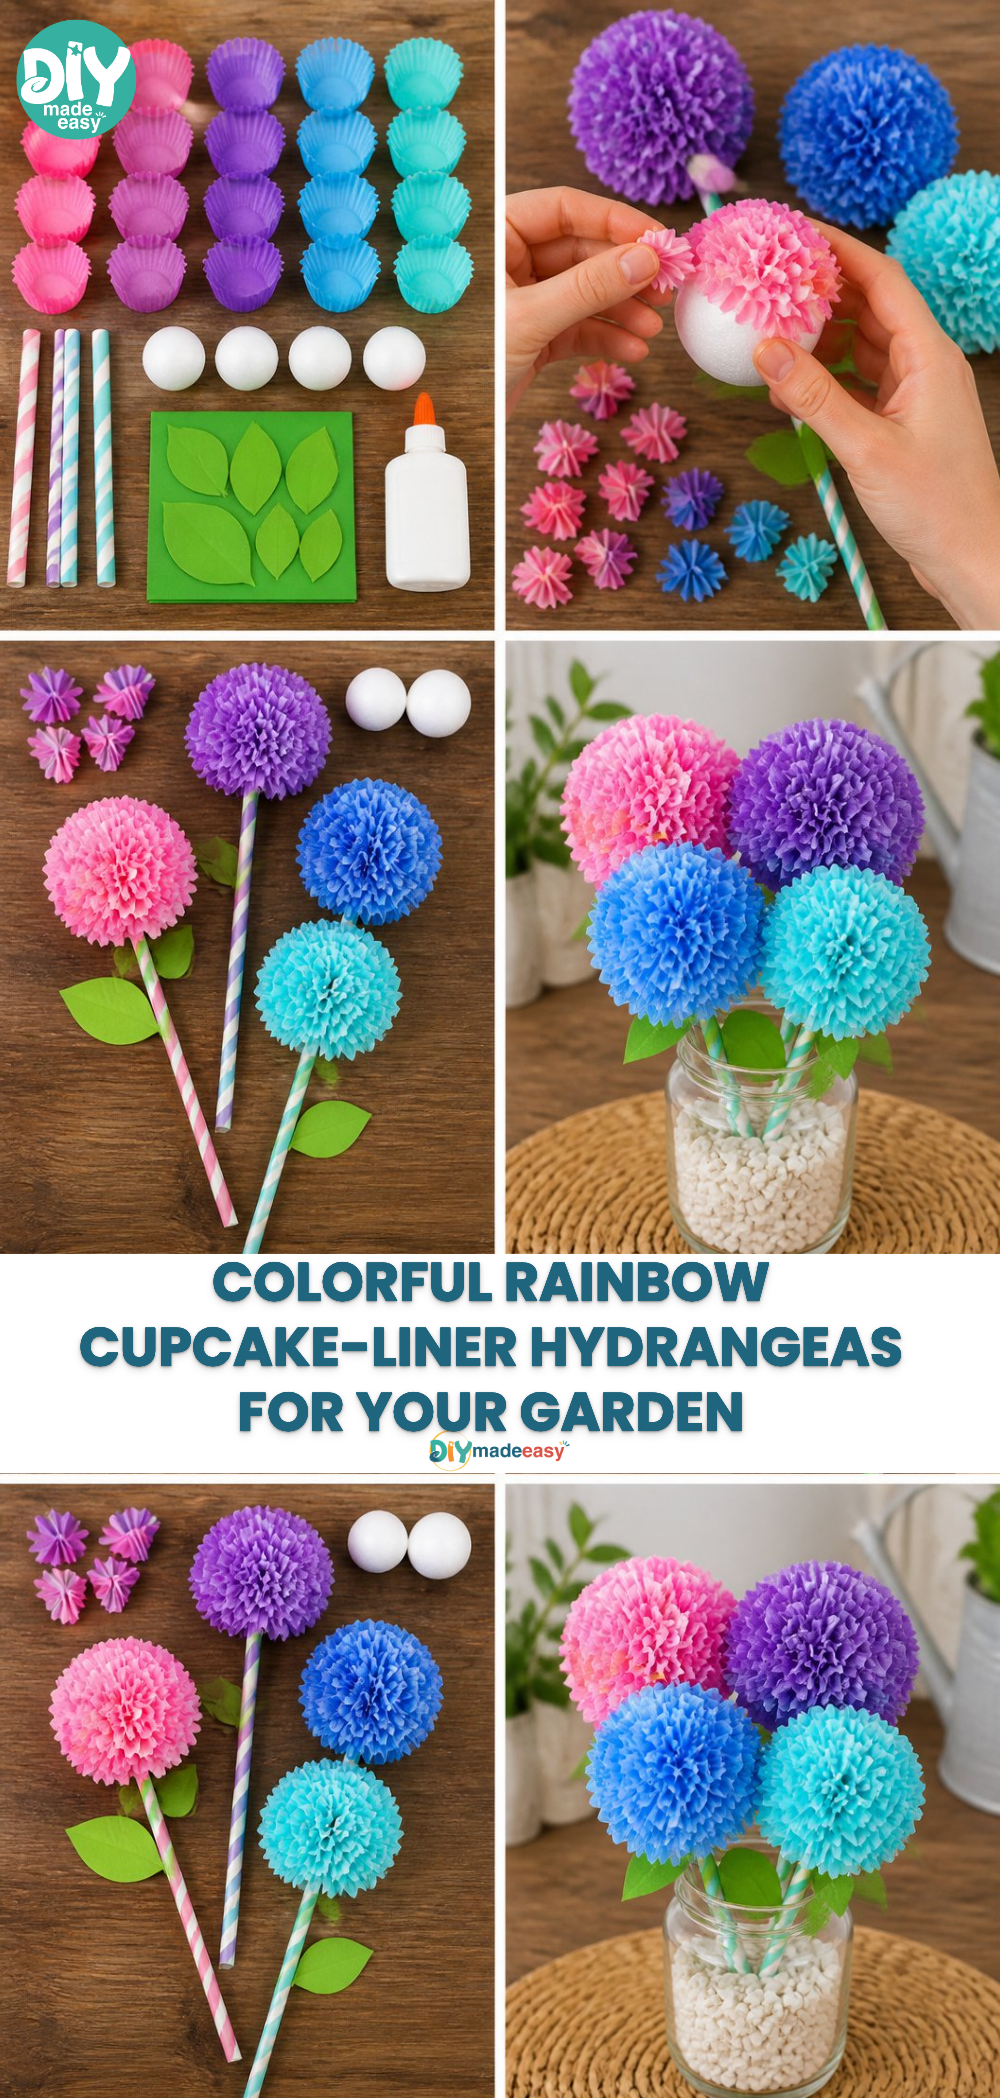
- Finally, arrange your four finished hydrangeas together in a small vase for display.
These final arrangements will provide vibrant pops of color and creativity, turning any room into a cheerful space.
The Learning Behind This DIY
Making these hydrangeas introduces children to various skills and concepts. One significant aspect is the development of fine motor skills. Folding and gluing requires careful hand movements that help improve coordination. Moreover, the project can serve as a simple introduction to gardening topics. Kids can learn about different flower shapes and colors, expanding their understanding of nature.
Additionally, this crafting experience can illustrate cause and effect, as they see how folding the liners transforms them into blossoms. The creative process, from choosing colors to arranging flowers, encourages choice-making and enhances cognitive skills.
Troubleshooting Common Issues
If something doesn’t go as planned, don’t worry—these things happen! Sometimes, glue may not hold as well as expected. In such cases, add a little more glue and hold the pieces together for a bit longer. If the cupcake liners are too crumpled, simply grab new ones and take the opportunity to redo that step. Crafting is all about experimenting and learning from mistakes.
Easy Variations to Try
For those looking to add a twist to this project, consider these variations:
- Use different colors or patterned cupcake liners based on upcoming holidays, creating themed blooms.
- Try painting the foam balls for a pop of color beneath the blossoms.
- For older kids, you could introduce more detailed techniques, such as adding glitter to the leaves or stems.
- Adapt the size of the hydrangeas by using larger foam balls to make a focal point piece for your decor.
Storing or Reusing This Project
After crafting these hydrangeas, you might wonder how to store or reuse them. If you want to keep them on display, place them in a cool, dry area away from direct sunlight to prevent colors from fading. If you plan to reuse the materials, ensure everything is cleaned properly and stored together to maintain easy access for future projects. Consider reusing the cupcake liners in similar crafts or combining materials to create new arrangements entirely.
FAQs About Rainbow Cupcake-Liner Hydrangeas: Colorful Blooms for Your Garden
Is this project messy, and how can we clean up afterwards? Yes, there may be some glue residue and scattered cupcake liners. Use a damp cloth to wipe down surfaces and allow children to help collect stray pieces for a fun cleanup session.
What age is appropriate for this activity? The project is perfect for kids aged 6 and up, though younger children can participate with adult assistance, especially during the gluing stage.
Can we use materials other than foam balls? Absolutely! If foam balls aren’t available, you can use crumpled paper or even small balls of aluminum foil as substitutes.
What if the cupcake liners don’t look like hydrangeas? That’s okay! Each person’s flowers can have their own unique look. Emphasize creativity over perfection, and enjoy the process.
Can we make this in a group setting? This project lends itself well to group crafting. Arrange all materials beforehand, and watch kids enjoy working together to create a beautiful display.
A Final Helpful Note
Taking on the Rainbow Cupcake-Liner Hydrangeas project can be an enjoyable experience that promotes creativity and togetherness. Remember, crafting is about having fun and learning as you go. Embrace flexibility and don’t worry about achieving exact results.
Whether you’re gathering supplies or folding cupcake liners, take a moment to enjoy the process. It’s not just about the end result; it’s about the stories you create along the way.
Conclusion
Creating delightful treats or themed activities can further enhance your crafting fun. If you’re interested in combining beautiful colors, you might want to explore flower garden cupcakes for an afternoon treat. Alternatively, check out this easy buttercream piping tutorial for hydrangea cupcakes to keep the floral theme going. Whatever you choose, enjoy crafting!
PrintRainbow Cupcake-Liner Hydrangeas
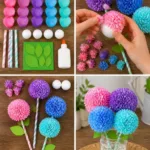
A fun and colorful DIY project for kids to make beautiful hydrangeas using cupcake liners.
- Prep Time: 15 minutes
- Cook Time: 0 minutes
- Total Time: 30 minutes
- Yield: 4 hydrangeas 1x
- Category: Craft
- Method: DIY
- Cuisine: N/A
- Diet: N/A
Ingredients
- 24 mini cupcake liners in pink, purple, blue, and turquoise
- 4 paper straws
- 4 foam balls
- Green cardstock
- Glue
Instructions
- Start by taking a mini cupcake liner and gently folding or pinching it into a small hydrangea-style blossom. Repeat this for all 24 liners.
- Once you have a good number of blossoms, begin gluing them closely together over each foam ball. Ensure you overlap them to fully cover the ball’s surface.
- Allow the glued blossoms to dry thoroughly.
- After the glue has dried, take a flower-covered foam ball and securely attach it to a paper straw stem. Hold it in place for a few moments if necessary.
- Next, cut leaf shapes from the green cardstock. These will serve as decorative leaves for your hydrangeas.
- Glue the cut-out leaves to each stem, carefully positioning them near the lower part of the foam ball.
- Finally, arrange your four finished hydrangeas together in a small vase for display.
Notes
Encourage creativity and flexibility in crafting. Each person’s flowers can have their unique look.
Nutrition
- Serving Size: 1 hydrangea
- Calories: 0
- Sugar: 0g
- Sodium: 0mg
- Fat: 0g
- Saturated Fat: 0g
- Unsaturated Fat: 0g
- Trans Fat: 0g
- Carbohydrates: 0g
- Fiber: 0g
- Protein: 0g
- Cholesterol: 0mg