

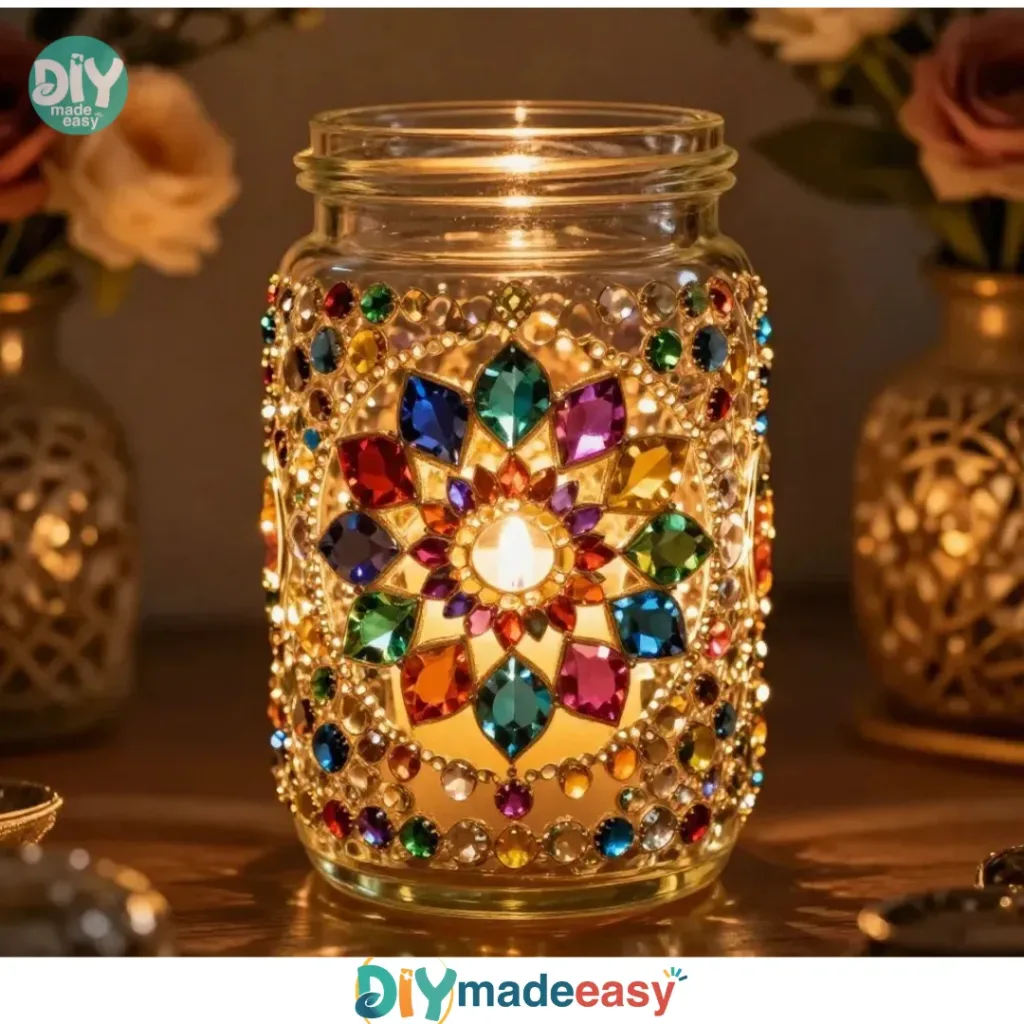
Making something special with the kids during a busy afternoon can sometimes feel overwhelming. However, grabbing a few colorful glass gems and a simple jar could spark a delightful DIY moment together—like transforming those materials into a beautiful Gem Jar Lantern. This project not only engages creativity but also brings a calming glow to any space, making it perfect for family time or a last-minute activity. You may also find Brighten Your Home Stained Glass Lantern useful.

Why This Gem Jar Lantern Works So Well

You may also find Calm Down Jar useful.
Creating a Gem Jar Lantern is a wonderful way to spend time with family without requiring extensive preparation or complicated materials. This project shines because it’s low-prep and highly approachable, making it great for school afternoons or weekend gatherings. All you need are everyday items like a glass jar and colorful gems, which you might already have at home. It’s reliable, too—once you establish the simple steps, you can repeat this project as often as you like, adding different colors or themes for each season. You may also find Diy Lightning Storm In A Jar useful.
A Quick Look Before You Begin
Before you embark on this lovely DIY, take a moment to set the stage for a smooth crafting experience. Plan for about 30 minutes of hands-on time, inclusive of setup and cleanup. Choose a calm and clutter-free area, as it will help maintain focus. Expect some mess with the sparkly gems, but it’s all part of the fun! If you’re working with younger kids, it’s helpful for an adult to be involved, guiding them through the steps while also enjoying the creative process together. You may also find Glowing Glitter Jar useful.
Materials You’ll Need
To create your Gem Jar Lantern, gather the following materials:
- Glass jar with a lid or an open top
- Colorful glass gems
- Crafting glue (optional)
- LED tealight
- Decorative elements (like jute twine or ribbon, optional)
If you find a glass jar lying around the house or can use decorative elements from previous crafts, it keeps the project budget-friendly and promotes reuse of materials.
Step-by-Step Directions
-
Prepare your workspace by setting up a calm and clutter-free area. Soft music can help enhance focus, making the crafting experience more enjoyable.
-
Select a variety of colorful glass gems that resonate with you. This is a great chance to let your personality shine through your choices.
-
Begin placing the gems inside the jar, allowing your creativity to flow as you layer them. Don’t rush this—let the kids explore different arrangements and colors.
-
If desired, apply crafting glue to hold the gems in place and let it dry completely. This step is optional but helps keep the gems from moving if you want a more permanent design.
-
Insert an LED tealight inside the jar, ensuring it fits snugly. This light will bring your lantern to life.
-
Optionally, wrap jute twine or ribbon around the neck of the jar for decoration. This add-on can make your lantern even more unique.
-
Once complete, turn on the tealight and enjoy the soothing glow that reflects off your colorful gems. Take a moment to notice how the light dances through the colors, creating a magical ambiance.
The Learning Behind This DIY

Engaging in the creation of a Gem Jar Lantern introduces kids to a variety of important concepts and skills. For one, they develop fine motor skills while carefully placing the gems and using glue. This activity also provides insight into basic science principles like light and color as they witness how the LED tealight illuminates the gems. The cause-and-effect understanding deepens as they see how their creative efforts yield a tangible, beautiful result.
Troubleshooting Common Issues
Sometimes, crafting moments don’t go as planned. If you find the gems shifting around loose in the jar, don’t worry—it happens! Simply use a bit more glue to secure them or consider letting the kids rearrange them entirely. If the LED tealight is too large for the jar you chose, opt for smaller candle options. And remember, the beauty in these projects comes from the process, not just the final product.
Easy Variations to Try
Feel free to explore different themes or seasons with your Gem Jar Lanterns. Here are a few ideas:
- Use autumn-colored gems and add leaves for a seasonal twist.
- Create a glow-in-the-dark lantern by including glow-in-the-dark paint or elements.
- Make mini lanterns as party favors by using smaller jars.
These variations can keep the project fresh and exciting every time you revisit it.
Storing or Reusing This Project
After your crafting session is complete, think about how to store or display your finished lanterns. They can be placed in cozy corners at home or used during outdoor evenings to add an ambient touch. If the gems are loose, consider storing them in a ziplock bag for the next crafting adventure. Reusing materials not only reduces waste but also fosters creativity.
FAQs About Gem Jar Lantern
What if I don’t have a glass jar at home?
You can use any container that’s clear—like a plastic jar or even a recycled food container. Just ensure it’s safe for an LED tealight.
Will the crafting glue make a mess?
Yes, crafting glue can be sticky! It’s best to cover the workspace with newspaper or an old tablecloth to manage any spills.
Are the materials safe for young kids?
Absolutely! Just be cautious of small parts and supervise younger children, especially when using decor elements like twine or ribbon.
How long does this project take?
This project can vary but typically takes about 30 minutes to set up and create the lantern, plus drying time if you use glue.
What should I do if the gems don’t stick?
If the gems seem loose, give them more time to dry or add reinforcement with more glue. You can also layer them differently to ensure a snug fit.
Conclusion
Conclusion
Creating a Gem Jar Lantern is not just a fun project, but it also adds a lovely decorative touch to your home. If you’re looking for more inspiration or different crafting ideas, consider checking out how to make a beautiful glass gem lantern or explore colorful DIY glass jar lantern craft. Enjoy your crafting time—it’s about the experience you share and the creativity you unleash!
PrintGem Jar Lantern

Engage your kids in a creative and calm DIY project by making beautiful Gem Jar Lanterns using colorful glass gems and a simple jar.
- Prep Time: 10 minutes
- Cook Time: 0 minutes
- Total Time: 30 minutes
- Yield: 1 lantern
- Category: Craft
- Method: DIY
- Cuisine: N/A
- Diet: N/A
Ingredients
- Glass jar with a lid or open top
- Colorful glass gems
- Crafting glue (optional)
- LED tealight
- Decorative elements (like jute twine or ribbon, optional)
Instructions
- Prepare your workspace by setting up a calm and clutter-free area.
- Select a variety of colorful glass gems that resonate with you.
- Begin placing the gems inside the jar, allowing your creativity to flow.
- If desired, apply crafting glue to hold the gems in place and let it dry completely.
- Insert an LED tealight inside the jar, ensuring it fits snugly.
- Optionally, wrap jute twine or ribbon around the neck of the jar for decoration.
- Once complete, turn on the tealight and enjoy the soothing glow.
Notes
This project is excellent for family time and can be revisited with different seasonal themes. Supervision is recommended for younger children.
Nutrition
- Serving Size: 1 lantern
- Calories: 0
- Sugar: 0g
- Sodium: 0mg
- Fat: 0g
- Saturated Fat: 0g
- Unsaturated Fat: 0g
- Trans Fat: 0g
- Carbohydrates: 0g
- Fiber: 0g
- Protein: 0g
- Cholesterol: 0mg