

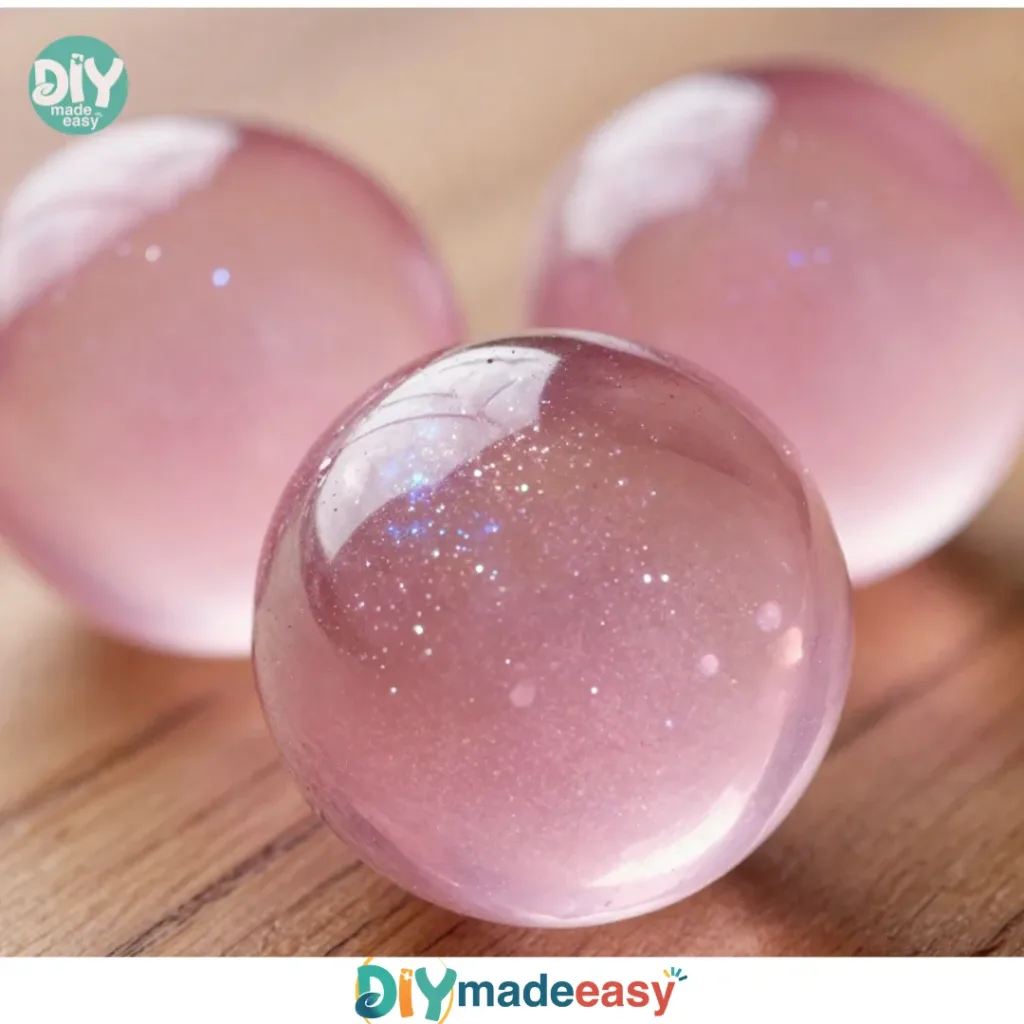
Creating DIY projects is a wonderful way to spend a busy afternoon, especially when the kids are eager to make something fun and engaging right away. If you’re looking for a quick, easy activity, try making Fairy Dust Bouncy Balls! This delightful, hands-on craft combines fun with a bit of science and creativity, turning simple ingredients into something magical. With just a few household items and a dash of imagination, you can whip up these bouncy balls to keep the kids entertained and even teach them a thing or two about textures and reactions.
Why You’ll Love Making Fairy Dust Bouncy Balls

Fairy Dust Bouncy Balls shine as a go-to activity for families. Here’s why:
- Low-prep and Quick Setup: You can gather materials in just a few minutes and dive right in without complicated preparations. This makes it perfect for spontaneous crafting sessions when your child expresses that creativity spark at home.
- Versatile and Customizable: You can easily tweak the recipe by adding different colors or glitters. This allows kids to personalize their creations and makes each ball unique.
- Reliable Results: With this straightforward process, you can expect good results on the first try. The materials are forgiving, and even if the mixture isn’t perfect, it can often be remedied along the way.
- Wonderful for Real-life Schedules: Since the steps are easy to follow and don’t take long, you can fit this project into a busy day. It’s manageable even if you have only a short amount of time.
A Quick Look Before You Begin
Making Fairy Dust Bouncy Balls is all about ease and enjoyment. The entire project only takes about 30 minutes from start to finish.
You start with a calm, organized workspace, ideal for creativity. Expect a bit of mess, but it’s all part of the fun! A splatter here or a little overflow there is perfectly normal, so don’t stress about it too much. Having a towel and a cup of warm water handy will help with any spills.
Adult involvement is light but may be necessary during the contact solution add-in phase. Younger kids may need extra supervision here because it can be a bit tricky, but that’s a part of learning navigating new textures and responses!
Discover Easy Kids Activities
Looking for simple, fun ideas for kids? Explore our Low Prep Kids Activities and find quick projects that spark creativity without long prep time.
Materials You’ll Need
For this delightful project, here are the simple materials you’ll need:
- 2 tablespoons White PVA glue
- 1/4 teaspoon Baking soda
- Contact lens saline solution
- Fine glitter or mica powder (optional)
- Food coloring or liquid watercolors (optional)
- Small mixing bowl
- Spoon or small spatula
- Measuring spoons or small scale (optional)
- A shallow tray or cloth
- Gloves (optional)
- A towel and soap for clean-up
Most of these items are common household goods, which makes this an easy project to initiate without needing a trip to the store. You may find these materials already in your kitchen or craft supplies.
Step-by-Step Directions

Now, let’s dive into the step-by-step directions for creating your Fairy Dust Bouncy Balls. Follow along, and soon enough, you’ll have bouncy balls ready to test out!
- Gather your materials and create a calm workspace. Settle in a space without too many distractions, so your little ones can focus on the task at hand.
- Lay a soft cloth or tray on the table. This will catch any spills or bits that may break free while you work.
- Keep a small cup of warm water and a towel nearby. The warm water can help clean up any sticky fingers and can also help in adjusting the texture later on.
- Pour 2 tablespoons of glue into the mixing bowl. Make sure to measure it accurately for the best results.
- Add a pinch (about 1/4 teaspoon) of baking soda. Stir slowly until the mixture feels smooth. This is where the mixture begins to take on a different texture, so be sure to mix thoroughly.
- Add color and fairy dust if desired. Sprinkle glitter or mica and fold it in. This is the magic part! You can make your bouncy balls sparkle and shine.
- Add contact solution slowly, one drop at a time. Stir after each drop and watch the glue curl away. The reaction here is fascinating to watch. It feels almost like you’re conjuring something magical!
- Test the texture with a clean finger; adjust with saline or water as needed. You’re looking for a texture that is moldable but not too sticky.
- Remove the mass and begin gentle rolling in your palms. Here’s where your bouncy ball starts to take shape!
- Continue kneading until the surface smooths. This can take a little patience, but it’s part of the process.
- Let the ball rest on the cloth for 5-15 minutes. This helps set its shape and solidify a bit more.
- Test the bounce on a soft surface. It’s exciting to see how well your creation performs.
- Store finished balls in a small jar or cloth bag. This will keep them safe until you want to play with them again.
The Simple Science or Skills at Work

Making Fairy Dust Bouncy Balls is not only about enjoying a hands-on activity; it’s also a small science experiment in disguise. As you mix different ingredients, you introduce concepts of chemical reactions. The interaction between the glue and the baking soda along with the saline solution creates a unique texture that turns into your bouncy ball.
Kids practice fine motor skills as they stir and knead, which is essential for developing hand-eye coordination. The process teaches cause and effect, showcasing how certain actions lead to specific outcomes in their creations, such as observing how the consistency changes when additional saline solution is added.
Troubleshooting Common Issues
If something doesn’t go as planned, don’t worry. Here are some common problems and quick fixes:
- Too Sticky: If the mixture remains sticky after adding saline solution, continue adding small amounts until the texture improves. A little extra kneading can also help.
- Not Bouncing: If the balls don’t bounce well, it might be due to too much baking soda or insufficient kneading. Adjust the mixture slightly or knead longer for the best results.
- Messy Cleanup: Spills can happen, but don’t fret! A damp cloth can quickly wipe up glue. Soak your mixing tools in warm, soapy water while you finish up; this will make cleaning them easier later.
Easy Variations to Try
If you’re looking to shake things up with your Fairy Dust Bouncy Balls, consider these fun variations:
- Seasonal Themes: Add colors and glitter that suit the season, like orange and black for Halloween or red and green for Christmas.
- Scented Balls: Add a drop of essential oil to the glue before mixing for a fragrant twist. Kids may love making these as gifts!
- Bigger Bouncy Balls: Increase the glue and other ingredients accordingly to create larger versions. A challenge that offers great satisfaction!
- Different Colors: Create a rainbow collection by making multiple bouncy balls, each a different color. Kids can sort them or use them in playful activities.
Storing or Reusing This Project
After you’ve had fun with your Fairy Dust Bouncy Balls, consider how to store or reuse them.
Store your bouncy balls in a small jar or cloth bag to keep them safe and clean. This also helps prevent them from sticking together.
If you notice the balls losing their bounce over time, try giving them a gentle rinse in warm water and letting them air dry. This can sometimes refresh the texture and keep the fun going!
FAQs About Fairy Dust Bouncy Balls
Will this project be a huge mess?
Not at all! While some glue may drip, placing everything on a cloth or tray keeps the mess manageable. Have a towel handy to wipe clean easily.
Are the ingredients safe for kids?
Yes! The materials used are non-toxic and safe. However, always supervise younger children, especially when using contact solution.
Can I substitute the saline solution with something else?
While saline is best for the chemical reaction needed for bouncing, you might experiment with similar solutions. Just note that results may vary.
How long do the balls last?
With proper storage, they can last for weeks! If they start to lose bounce, consider reshaping them or adding a little saline to refresh their texture.
Can we make these bigger?
Absolutely! Just scale up the ingredients proportionately for larger creations.
Conclusion
In conclusion, making Fairy Dust Bouncy Balls is a delightful project that brings creativity and learning together in a fun way. Its simple materials and straightforward methods make it an excellent choice for families looking for engaging activities. For more DIY inspiration and bouncy fun, feel free to check out this link on make your own bouncy ball and discover cute options at Cat Toy Balls to Loose Under the Couch. Embrace the magic and enjoy creating your own unique bouncy balls!
PrintFairy Dust Bouncy Balls

A fun and engaging DIY project to create bouncy balls using simple household ingredients, perfect for kids and families.
- Prep Time: 10 minutes
- Cook Time: 20 minutes
- Total Time: 30 minutes
- Yield: 4 bouncy balls 1x
- Category: Craft
- Method: DIY Crafting
- Cuisine: N/A
- Diet: N/A
Ingredients
- 2 tablespoons White PVA glue
- 1/4 teaspoon Baking soda
- Contact lens saline solution
- Fine glitter or mica powder (optional)
- Food coloring or liquid watercolors (optional)
- Small mixing bowl
- Spoon or small spatula
- Measuring spoons
- A shallow tray or cloth
- Gloves (optional)
- A towel and soap for clean-up
Instructions
- Gather your materials and create a calm workspace.
- Lay a soft cloth or tray on the table.
- Keep a small cup of warm water and a towel nearby.
- Pour 2 tablespoons of glue into the mixing bowl.
- Add a pinch of baking soda and stir until smooth.
- Add color and fairy dust if desired.
- Add contact solution slowly, one drop at a time.
- Test the texture with a clean finger; adjust as needed.
- Remove the mass and begin gentle rolling in your palms.
- Continue kneading until the surface smooths.
- Let the ball rest on the cloth for 5-15 minutes.
- Test the bounce on a soft surface.
- Store finished balls in a small jar or cloth bag.
Notes
Adult supervision is recommended during the contact solution phase. The ingredients are safe and non-toxic.
Nutrition
- Serving Size: 1 bouncy ball
- Calories: N/A
- Sugar: N/A
- Sodium: N/A
- Fat: N/A
- Saturated Fat: N/A
- Unsaturated Fat: N/A
- Trans Fat: N/A
- Carbohydrates: N/A
- Fiber: N/A
- Protein: N/A
- Cholesterol: N/A