

A busy afternoon, a sudden need for a last-minute activity, and a stack of tired kids asking to make something magical now. That is the exact moment Homemade Popping Candy comes in handy. It takes just a little focus, a short time at the stove, and a few everyday pantry ingredients to turn a regular day into a tiny celebration. I remember a rainy Saturday when my kids pressed their faces to the counter, eyes wide, as the syrup bubbled and the kitchen filled with a warm, sweet scent. We made noise, learned a little, and ended up with brittle, crackling candy they loved to crunch. If you like simple kitchen experiments, this is a great follow-up to our fun projects like homemade sugar bubble gum that keep the family smiling.
Why You’ll Love Making Homemade Popping Candy

This project works well on busy days because it uses things you probably already have on hand. You do not need hours of prep or special skills. That makes it low-prep and approachable for a weekday afternoon or a short weekend activity.
The process is reliable when you pay attention to a few simple cues. Sugar, heat, and a small chemical reaction give you a candy that crackles and pops. That reaction happens quickly and visibly, so you get clear progress and fast rewards.
The whole activity fits real life. It takes about 20 to 40 minutes from start to finish depending on cooling time. You get a neat, sharable treat and a small science moment the kids remember. It also scales easily. Make a single batch when time is tight or double it when you want more for friends.
A Quick Look Before You Begin
This DIY comes together in short parts: mixing, cooking, a quick stir, and cooling. Count on just a few messy spots and a quick wash-up. You will use a hot saucepan and a greased baking sheet, so adult supervision matters during the cooking stage.
Setup takes about five minutes. Lay out your ingredients, clear a section of counter, and have oven mitts ready. The most active time is watching the syrup. It moves fast near the end, so stay focused for those minutes.
Cleanup is straightforward. Sticky pans rinse with hot water and a little soaking. The baking sheet will need a scrape when the candy sets. That is all part of the project, and it keeps the rest of the kitchen calm and simple.
Materials You’ll Need
1 cup granulated sugar
- common household item; easy to measure
1/4 cup corn syrup
- helps prevent crystallization; easy substitute: light corn syrup only
1/4 teaspoon baking soda
- small measure for the popping texture
1/2 teaspoon flavored extract (like cherry or vanilla)
- adds a short burst of flavor
1/4 teaspoon citric acid
- gives a slight tang and boosts the popping effect
Food coloring (optional)
- optional; a few drops make the pieces look fun
Popping candy (for effect)
- optional final touch to add extra crackle
STEP-BY-STEP DIRECTIONS

- In a saucepan, combine the granulated sugar and corn syrup over medium heat.
Stir gently until the sugar dissolves.
Look for a smooth, glossy syrup with no grittiness. - Increase the heat to bring the mixture to a boil, and cook until it reaches the hard crack stage (300°F or 149°C).
Watch the bubbles grow bigger and faster as water evaporates.
You will see the syrup turn a light amber; that is the final stage. - Remove from heat and carefully stir in the baking soda, flavored extract, citric acid, and food coloring if desired.
The mixture will foam slightly when baking soda is added; that is normal.
Stir just enough to combine and keep the foam from overflowing. - Pour the mixture onto a greased baking sheet and let it cool completely.
Spread it gently if needed but do not press; let it set thin for crisp pieces.
Cooling takes a few minutes to half an hour depending on thickness. - Once cooled and set, break into pieces and enjoy the popping sensation!
Tap the candy with a spatula or break with your hands for irregular shards.
Store in an airtight container to keep the texture crisp and fun.
The Learning Behind This DIY

This project blends basic kitchen chemistry with hands-on skills. Kids see cause and effect when heat changes a syrup into hard candy. They learn that water evaporates and sugar concentrates as it cooks.
Fine motor skills come in when kids help stir the syrup and break the cooled candy. Careful stirring and pouring build control and confidence. Older kids can practice measuring with a spoon and cup to follow the recipe.
The tiny pops come from trapped gas pockets and the addition of a small amount of baking soda and citric acid. Those ingredients create fizz and a crackle when the candy cools and shatters. It teaches a simple lesson: small changes in ingredients create noticeable results.
Troubleshooting Common Issues
If the syrup stays grainy after mixing, it probably has undissolved sugar. Warm the pan gently and stir until the grains dissolve. If needed, let the mixture sit a few seconds and stir again. Avoid vigorous stirring once it boils to cut down on crystallization.
If the mixture burns or smells bitter, it cooked too long or at too high heat. Turn off the stove and move the pan to a cooler burner. Burned syrup yields a bitter taste that you cannot rescue, so start fresh if that happens. Use a lower heat next time and watch for the amber color rather than relying only on time.
If the candy becomes sticky after cooling, it likely absorbed moisture from the air. Store it in an airtight jar with a small packet of a dry kitchen desiccant or a clean folded paper towel to reduce humidity. Make the pieces thinner next time so they dry faster before storage.
If the popping seems weak, check the amounts. A small change in the baking soda or citric acid amount can change the reaction. Follow the recipe closely to keep the right balance. Adding a tiny sprinkle of popping candy on top at serving time can boost the fun without changing the batch.
Easy Variations to Try
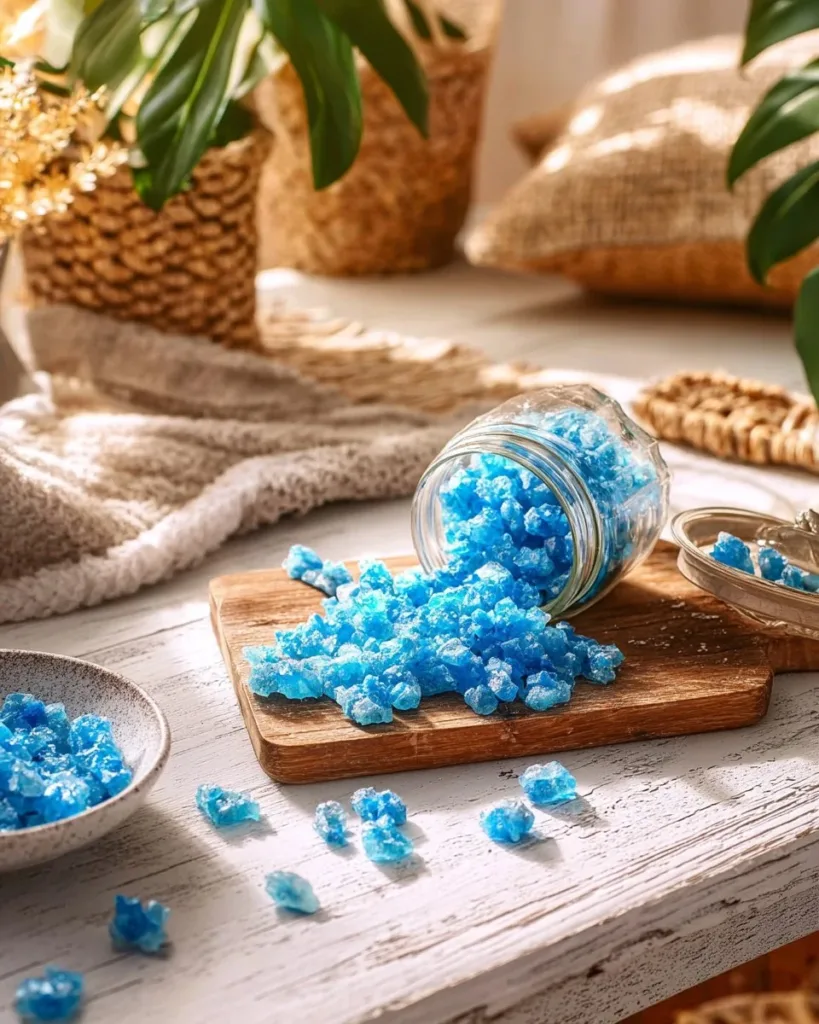
Add a few drops of food coloring to make red or blue shards for a party theme.
You do not need much; one or two drops go a long way.
Try a different extract for a surprising twist, such as vanilla instead of cherry.
Swapping extracts keeps the method the same and changes the flavor profile.
For a dramatic finish, sprinkle a small layer of regular popping candy on top once the candy is poured and still warm.
It sticks lightly and adds extra crackles when shared.
Pair a small piece with a chewable treat for texture contrast, or crush some to sprinkle on ice cream.
This keeps servings flexible for different ages and preferences.
Consider turning the set candy into gift shards wrapped in parchment for simple favors.
They look festive and feel special with little effort.
Storing or Reusing This Project
Store finished pieces in an airtight container away from heat and moisture.
Humidity softens the candy and reduces popping, so keep it dry.
If pieces absorb moisture and go chewy, try crisping them briefly in a low oven for a couple of minutes.
Let them cool completely before checking the texture.
Reuse your tools with a hot soak. Fill the saucepan with hot water and a bit of dish soap to loosen residual sugar.
A wooden spoon and a silicone spatula clean easily after soaking. Avoid scouring shiny pans aggressively to protect them.
Broken pieces make a great crunchy topping for desserts.
Keep smaller shards in a sealed bag and add them as a finishing touch for a quick, playful crunch.
FAQs About Homemade Popping Candy
Will this make a big mess in my kitchen?
I am worried about sticky counters. It does involve hot syrup, which can be sticky if spilled. I usually cover nearby surfaces with a clean towel and clear a small area for cooling. The biggest cleanup is the baking sheet and pan, and a quick soak in hot water loosens the sugar fast. If you keep a tray of damp cloths nearby, you can wipe small drips as you go. It feels more manageable than the kids expect.
Is this safe for young children to help with?
What age is okay? Young kids can join for measuring and watching from a safe spot. An adult should handle the saucepan and the hot syrup. I let kids stir at the start and break the cooled candy. For many families, ages 6 and up work well for small tasks, but adjust based on your child’s attention and the level of adult supervision you can provide.
Can I swap ingredients if I do not have citric acid or corn syrup?
You can skip food coloring if you do not have it. Corn syrup helps stop sugar crystals from forming, so leaving it out makes the process a bit trickier but not impossible if you stir carefully and keep the heat steady. Citric acid adds tang and supports the popping effect; leaving it out will change the flavor and might reduce the fizz slightly. I recommend following the recipe the first time to see how it behaves, then try small changes.
How long will the popping stay active?
When stored dry in a sealed container, the pieces keep their crackle for several weeks. The popping reacts to moisture and time, so the texture softens if it sits in a humid place. For best results, eat within a week or store in a dry place to keep that fresh spark.
What happens if the syrup goes too dark while cooking?
If the syrup turns dark amber or brown and smells caramelized, it has cooked past the right stage and tastes more bitter. It will harden, but the flavor will be off. I usually toss that batch and start again. To avoid this, watch the color closely and remove it from the heat around the light amber stage, then proceed quickly with the baking soda and flavor.
A Final Helpful Note
This is a small, bright project that delivers a lot of delight for little cost and little time. Take the pace you need. Slow down at the stove, let the syrup speak to you through its color and bubbles, and enjoy the moment where a simple recipe becomes a shared memory. If something does not go exactly as planned, that is okay. Try again, adjust one small detail next time, and celebrate the small wins with the kids. You will find it becomes easier and more predictable each time you try it.
Conclusion
If you want a slightly different take on pop-rock style candy, this A Fun Homemade Pop Rocks Recipe – Craftsy article offers a clear look at a similar homemade approach. For a step-by-step community-tested example, the Homemade Fizzy Pop Rocks Candy!!! – Instructables guide includes helpful photos and tips that pair well with the ideas here.
PrintHomemade Popping Candy

A fun and easy recipe for making crunchy homemade popping candy that crackles and pops in your mouth.
- Prep Time: 5 minutes
- Cook Time: 15 minutes
- Total Time: 20 minutes
- Yield: 4 servings 1x
- Category: Snack
- Method: Cooking
- Cuisine: American
- Diet: Vegetarian
Ingredients
- 1 cup granulated sugar
- 1/4 cup corn syrup
- 1/4 teaspoon baking soda
- 1/2 teaspoon flavored extract (like cherry or vanilla)
- 1/4 teaspoon citric acid
- Food coloring (optional)
- Popping candy (for effect, optional)
Instructions
- Combine the granulated sugar and corn syrup in a saucepan over medium heat.
- Stir gently until the sugar dissolves.
- Look for a smooth, glossy syrup with no grittiness.
- Increase the heat to bring the mixture to a boil, and cook until it reaches the hard crack stage (300°F or 149°C).
- Watch the bubbles grow bigger and faster as water evaporates.
- Remove from heat and carefully stir in the baking soda, flavored extract, citric acid, and food coloring if desired.
- Pour the mixture onto a greased baking sheet and let it cool completely.
- Break into pieces once cooled and enjoy the popping sensation!
Notes
This recipe is great for busy afternoons and can easily be doubled for more servings. Store in an airtight container to keep the texture crisp.
Nutrition
- Serving Size: 1 serving
- Calories: 150
- Sugar: 35g
- Sodium: 10mg
- Fat: 0g
- Saturated Fat: 0g
- Unsaturated Fat: 0g
- Trans Fat: 0g
- Carbohydrates: 37g
- Fiber: 0g
- Protein: 0g
- Cholesterol: 0mg