

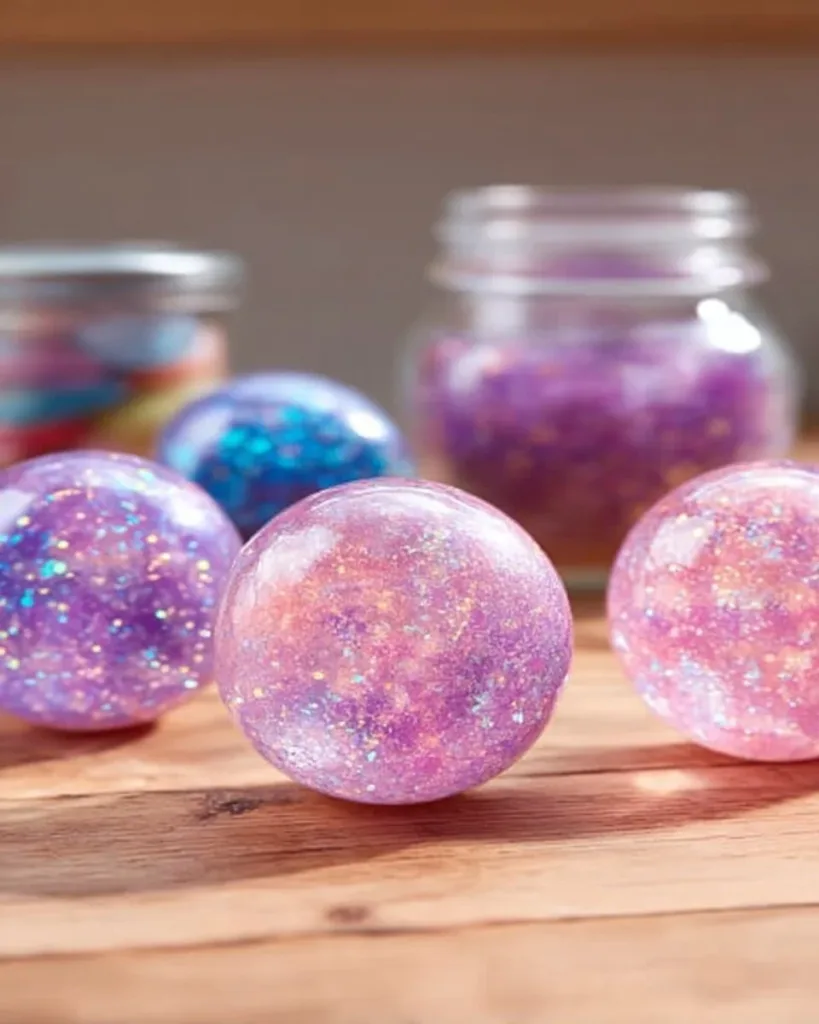
A busy afternoon, the clock sliding toward dinner, and three little voices asking, “Can we make something now?” That exact moment is where this project shines. This looks like magic… but it’s just glue and glitter 🤯 — and a few minutes, a clear surface, and everyday supplies.
It fills short gaps of time, keeps hands busy, and gives kids a real finished piece they can hold up to the light. If you have a tabletop you do not mind getting a little sparkle on, this craft fits right into a hurried day without drama. I like to keep a small kit ready so when those voices start, we can move from question to finished sparkle in an afternoon, and sometimes even use the pieces as quick gift toppers or window decorations.
Why You’ll Love Making This looks like magic… but it’s just glue and glitter 🤯

This project works because it asks for very little prep and gives clear results fast. You do not need special tools or a long list of things from the store. The main action is simple: put glue down, add glitter, let it dry. That keeps it friendly for small kids and for adults who only have a short window of time.
It stays approachable because mistakes do not ruin the end result. If glue spreads where you did not plan, you can trim edges, and glitter hides a lot. It also feels reliable. Glue dries clear, glitter adds instant wow, and the result holds together well enough to display.
This project fits real schedules. You can make a full set of shapes in under 30 minutes of active work. Drying time varies, so you can start in the afternoon and help the kids reveal their pieces the next morning. It asks for light adult help on setup and cleanup, and the making itself gives kids a good stretch of focused, tactile play.
A Quick Look Before You Begin
Expect about 10 to 30 minutes of hands-on time depending on how detailed you get. Plan for drying time of several hours or overnight. If you need a faster reveal, pick thinner shapes and a warm, dry spot for drying.
Setup is easy. Work on a washable table or cover a surface with wax paper or a disposable tablecloth. Keep paper towels and a small trash bowl nearby for quick cleanups.
Mess level is medium. Glitter is the sparkly kind of mess that likes to travel. Lay down a tray or paper to catch spills and keep a damp cloth ready for hands. I find that spilling happens most when kids reach for a heavy glitter jar with both hands. Pour small amounts into cups first and hand those over.
Adult involvement depends on the child’s age. For preschoolers, you will need to squeeze glue or guide them on how much to use. Older kids can work mostly by themselves, with an adult helping to move pieces to a drying area.
You can use this moment to teach quick cleanup habits. A little wipe while the glue is wet saves a lot of vacuuming later. And if a child is impatient to peel their piece, promise a short wait and offer a timer. Waiting becomes part of the fun when you make it clear there is a big reveal coming.
Materials You’ll Need
- clear school glue (common household item)
- fine or craft glitter (common household item)
- wax paper or a silicone mat (easy substitute: parchment paper)
- small disposable cups or bowls for glitter (budget-friendly)
- stirring stick or disposable spoon (common household item)
- paper towels (common household item)
- tray or shallow box to catch spills (optional)
- cookie cutters or small templates to trace shapes (optional)
- food coloring or washable paint for tinting (optional)
These items keep the project low-cost and simple. If you do not have a silicone mat, wax paper works well and peels off easily once the pieces dry. Cookie cutters help make consistent shapes, but freehand glue shapes look just as charming.
Step-by-Step Directions

- Cover your work surface with wax paper or a silicone mat and set out small cups of glitter.
Gently squeeze a line or puddle of glue onto the paper in the shape you want.
Work in small groups so kids do not wait too long. - Add glitter while the glue is wet so it sticks right away.
Tilt the paper slightly to catch excess glitter on the wax paper and shake it back into the cup.
For layered looks, add one color, let it set a bit, then add more. - Use a toothpick or stick to spread glue for thin, even shapes.
Thin glue dries faster and peels off more cleanly.
If you want a thicker, chunkier look, leave a little more glue in the middle. - For clean edges, use cookie cutters as a stencil and fill inside the edges.
Press lightly with the stick so glue settles to the cutter edges.
Remove the cutter carefully before the glue sets if it sticks. - If you want color, mix a tiny drop of food coloring into the glue in a cup first.
Stir until the color is even, then pour the colored glue onto the wax paper.
Keep color use small so drying stays predictable. - Let the pieces dry fully in a warm, dust-free spot.
Thin pieces often take 3 to 6 hours; thicker pieces can take overnight.
Avoid moving the wax paper too much while drying to prevent smudges. - Peel the pieces off the wax paper once they feel solid and no longer tacky.
Trim any rough edges with safety scissors if needed.
Display them on a window, stick them to cardstock, or punch a hole and add a ribbon.
These steps follow a simple pattern: make, decorate, dry, and reveal. Keep a steady pace and remind kids that the reveal is worth the wait. I learned through many afternoons that a short, enforced wait makes the final moment feel like a magic trick.
What Kids Practice While Making This

This activity supports fine motor skills through controlled squeezing, sprinkling, and spreading. Kids practice hand strength when they squeeze glue bottles and precision when they aim glitter onto glue.
They also build planning skills. Choosing shapes, layering colors, and deciding when a piece is ready to peel all involve judgment and sequencing. These are small decisions that give kids real ownership over their work.
Sensory awareness comes into play. Children feel the smooth glue, watch glitter fall like tiny stars, and learn the difference between wet and dry textures. Those cues help them estimate drying time and learn cause and effect.
Creativity and simple problem solving show up too. If a glitter layer looks sparse, they learn to press more glitter or add glue. If a piece tears, they learn to reinforce edges next time. All of this happens in a low-pressure setting where trial and error is part of the fun.
Troubleshooting Common Issues
If the glue runs out beyond the shape you planned, it probably sits on a low spot of the paper. Use a stir stick to gently nudge it back or leave it to dry and trim the edge after peeling.
When glitter falls everywhere, do not panic. Fold the wax paper and funnel loose glitter back into a cup. For carpeted rooms, use a slightly damp paper towel to pick up stray glitter before it dries into fibers.
If pieces stay tacky after the expected drying time, they likely have too much glue for their thickness. Move them to a warmer, drier spot and give them more time. A fan helps, but avoid hot direct heat that could warp the shapes.
If your piece tears when you lift it, it probably dried unevenly. Next time, aim for thinner, even layers and test a small corner before peeling fully. You can repair small tears by putting a dot of glue on the back and pressing it flat until set.
When colors look dull after drying, that can happen with heavy glitter coverage or very thin coloring. For brighter results, layer glitter to build intensity or mix a slightly stronger tint into the glue before pouring.
If kids rush and stick their hands into wet glue, have a small bowl of warm soapy water ready. Most school glues wash off skin easily when wiped or rinsed while still wet.
Easy Variations to Try
Try making mini suncatchers by adding a loop of yarn before the glue fully sets, then hang them in a sunny window.
Make a set of gift tags by peeling pieces, writing on the back with a fine-tip marker, and punching a hole for ribbon.
Create a layered effect by letting one glitter color dry, then adding another thin layer of glue and a second color on top.
Use punches to cut dried pieces into stars, hearts, or letters for easy crafts later.
Make a gallery string by clipping several pieces to a length of twine with clothespins for a quick decoration.
These variations keep the project fresh for different ages. For younger kids, use simple shapes and one glitter color. For older kids, challenge them to plan a layered design or spell a name using glued letters. If you want a more involved sun-catcher like the one in the clear glue mosaic project, try a larger shape and a careful stencil approach.
Storing or Reusing This Project
Leftover glue stores well in its original bottle; seal it tight and keep it at room temperature.
Store extra glitter in small jars or capped spice containers so it stays neat and easy to pour.
If you want to save partially used wax paper with dried glitter for later, fold it carefully and tape the edges; you can salvage small sparkly bits for collages.
When cleaning up, collect loose glitter on a tray and reuse it or pour it back into jars. Avoid rinsing lots of glitter down the sink; instead, wipe it up with paper towels and toss it in the trash.
For a low-waste option, use craft glitter alternatives like shredded metallic paper or small sequins saved from old projects. They behave similarly and reduce the tiny microplastics problem that comes with some glitter types.
If you would like to store finished pieces, lay them flat in a shallow box between sheets of wax paper. This prevents sticking and keeps edges from bending. Label the box and pull it out for quick craft displays or card-making sessions later.
FAQs About This looks like magic… but it’s just glue and glitter 🤯
Can my toddler do this safely, or should I wait until they are older?
Yes, toddlers can join with close supervision. They will need an adult to squeeze glue and manage glitter containers. I usually hand toddlers a small spoon for glitter and let them sprinkle, which keeps fingers away from the jars. Have wipes close and plan the activity on an easy-to-clean surface.
Will the glitter come off everywhere once the pieces are dry?
A little shedding can happen, especially at first touches. Most glitter that is embedded over glue stays put. To reduce shedding, press a thin layer of clear glue over the top after the piece dries and let that second coat dry fully. That seals the glitter and lowers fallout.
What if I do not have clear glue?
Clear school glue works best for the see-through, glassy look. White glue dries opaque, which changes the effect but still makes a fun craft. If you only have white glue, consider mixing in a tiny bit of food coloring to brighten it, or layer glitter more thickly to hide the opacity.
How long will these pieces last, and can we use them on cards or ornaments?
With gentle handling, pieces last for a long time. Store them flat, and avoid bending. They work well on cards, as gift tags, or as ornaments if you add a hole and a loop. Expect regular wear over time if folks handle them often, but they hold up well for seasonal decorations.
If my child wants to add stickers or paint on top, when is the right time?
Wait until the glue is completely dry and no longer tacky. Adding stickers or thin paint works best after a full day of drying. For paint, use a light touch; heavy layers can bend thin pieces. If you want to add a protective topcoat, a thin layer of clear craft glue or a clear acrylic sealer works once stickers or paint are set.
A Final Helpful Note
Keep this project easy and kind. The best results come from relaxed sessions where the goal is fun more than perfection. If a piece tears or glitter scatters, laugh, tidy, and try again. Over time you will learn small tricks like how thin to pour glue for quick drying and which glitter jars topple the most.
Trust that simple supplies can surprise you. A few minutes of prep, a short waiting period, and the reveal make this craft feel special without much fuss. Let kids make bold choices and be ready with a gentle fix if things go sideways. You will end up with sparkly moments and real pieces that show effort and play.
Conclusion
If you want another short, hands-on experiment to pair with this craft, our step-by-step guide to making fizzing bottle rockets is a favorite for quick science fun and pairs well with an afternoon of crafting. For a different kind of sparkly project that uses clear glue in larger shapes, check out the detailed clear glue mosaic suncatcher tutorial for more ideas and techniques. For inspiration beyond crafts, I sometimes look at creative makeup tutorials to study color layering and shimmer placement the same way I think about layering glitter in crafts; this Euphoria inspired eyeshadow tutorial shows how small layers of shimmer build a bigger effect. If you want a thoughtful read while your pieces dry, this short essay on identity and phases offers a different kind of reflection and may help you tune your patience during slow drying times Yes, Your Kid’s Trans Thing is a Phase – New Discourses.
PrintGlitter Craft with Kids

A fun and creative craft project using glue and glitter that kids can enjoy while building fine motor skills.
- Prep Time: 10 minutes
- Cook Time: 30 minutes
- Total Time: 40 minutes
- Yield: Varies depending on project size
- Category: Crafts
- Method: Crafting
- Cuisine: N/A
- Diet: N/A
Ingredients
- Clear school glue
- Fine or craft glitter
- Wax paper or a silicone mat
- Small disposable cups or bowls for glitter
- Stirring stick or disposable spoon
- Paper towels
- Tray or shallow box to catch spills (optional)
- Cookie cutters or small templates (optional)
- Food coloring or washable paint for tinting (optional)
Instructions
- Cover your work surface with wax paper or a silicone mat and set out small cups of glitter.
- Gently squeeze a line or puddle of glue onto the paper in the shape you want.
- Work in small groups so kids do not wait too long.
- Add glitter while the glue is wet so it sticks right away.
- Tilt the paper slightly to catch excess glitter on the wax paper and shake it back into the cup.
- For layered looks, add one color, let it set a bit, then add more.
- Use a toothpick or stick to spread glue for thin, even shapes.
- Let the pieces dry fully in a warm, dust-free spot.
- Peel the pieces off the wax paper once they feel solid and no longer tacky.
Notes
This project is great for kids and provides a low-pressure environment for creativity. Make sure to supervise younger children closely.
Nutrition
- Serving Size: N/A
- Calories: N/A
- Sugar: N/A
- Sodium: N/A
- Fat: N/A
- Saturated Fat: N/A
- Unsaturated Fat: N/A
- Trans Fat: N/A
- Carbohydrates: N/A
- Fiber: N/A
- Protein: N/A
- Cholesterol: N/A