

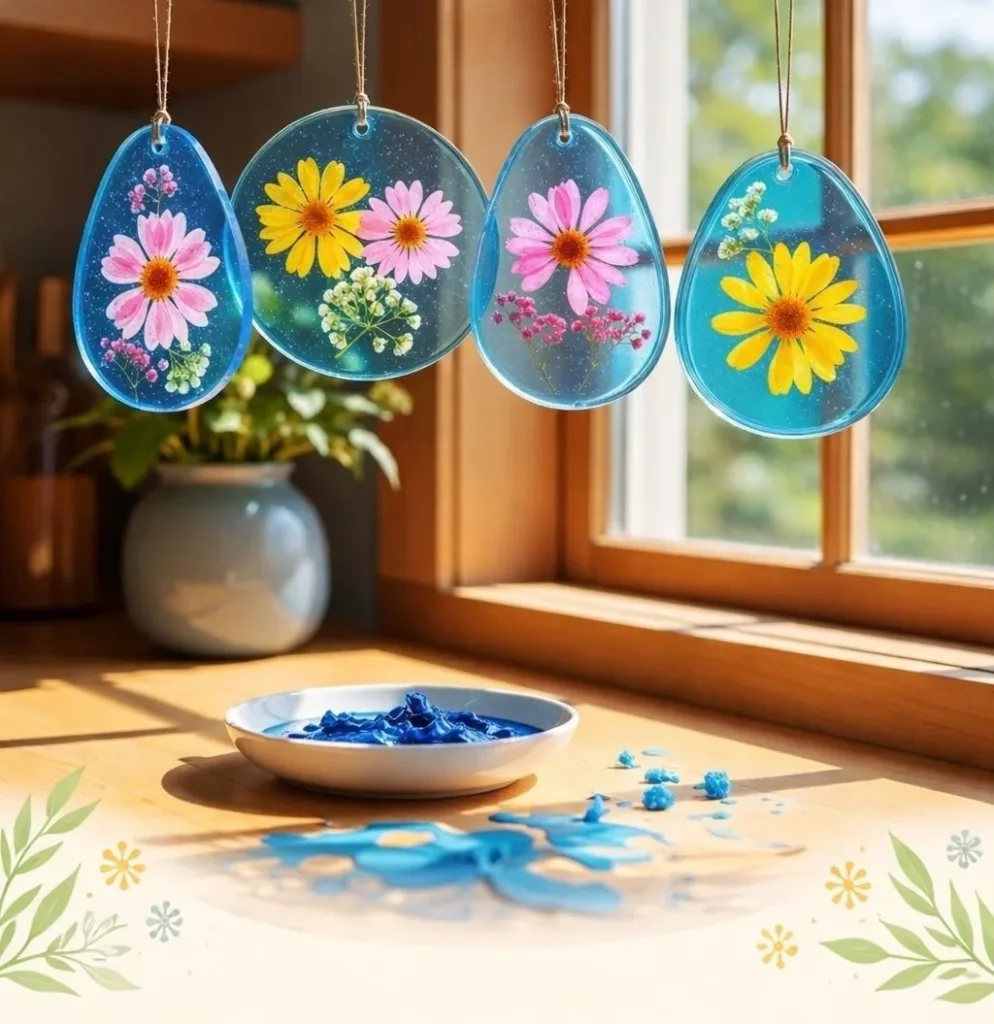
A busy afternoon, a bowl of crayons, and three impatient kids asking what to do now is a familiar scene in my kitchen. On days like that I pull out a quick, hands-on project that uses what we already have. DIY Bioplastic Suncatchers (Crayon Method) fits the bill: it takes ordinary crayons, a little bioplastic mix, and a calm ten minutes of stirring to make something bright and grown-up enough to hang on the window. If you want a simple, tidy project that teaches a bit of kitchen science and leaves everyone proud, this is a reliable choice. You can find a more detailed version of the recipe on the full recipe page if you want to compare notes with extra photos and measurements full recipe page.
What Makes DIY Bioplastic Suncatchers Easy to Start

This project feels easy because it uses familiar ingredients and takes place right on the stove you already know how to use. The materials cost little or nothing when you use old crayons and a small jar of bioplastic powder or agar-agar plus glycerin. You do a small amount at a time, so cleanup stays manageable and the mess never gets out of hand.
The method stays simple: mix, warm, melt, pour, and cool. You do not need special tools or long drying times. That short cycle suits a weekday afternoon or a rainy weekend. The low heat and gentle stirring keep the process safe with a supervising adult, and the results look polished even when kids handle the decorations.
The technique also gives consistent results. The bioplastic base forms a clear sheet that dyes well with crayon pigments. You can control thickness and color by how much mixture you pour and how many layers you add. If you worry about perfect shapes, cookie cutters and trimming make tidy pieces fast. For a beginner, this makes success very likely.
A Quick Look Before You Begin
Set aside about 30 to 45 minutes for a full round from prep to finished pieces. Most of that time is hands-off cooling. Active work stays under 15 minutes per batch, which keeps energy high and attention steady.
You will need a small counter area for tools, a hot plate or stove for gentle heating, and a tray or two for drips or cooling sheets. The project creates soft waxy drips and a faint smell of melting crayon; it is not messy like paint, but a drop can stick to fabric, so a silicone mat or parchment protects surfaces well.
Expect an adult to handle the pan and stirring. Older kids can manage crayon shaving, pouring, and decorating under supervision. The project suits ages roughly five and up with an adult nearby, and it works for a mixed-age group because kids can take on pieces that match their skill: younger kids sprinkle color, older kids create patterns and trim shapes.
Materials You’ll Need
Bioplastic powder or agar-agar and glycerin mix
Note: the core binder. Use the product the recipe calls for.
White vinegar or water
Note: small amount to mix with the bioplastic powder.
Old crayons, peeled and broken into shavings
Note: reclaim what you have. Color blends nicely.
Baking parchment or silicone mats for non-stick cooling
Note: reusable silicone mats work well.
Shallow pot and gentle heat source
Note: small saucepan and low heat are best.
Wooden stirring spoon
Note: avoids scratching and stays cool in hand.
Cookie cutters or templates for shapes (optional)
Note: handy for neat shapes, not required.
Scissors for trimming cooled sheets
Note: regular household scissors work when sheets are still slightly warm.
String or thin ribbon for hanging
Note: embroidery thread or ribbon is fine.
A small ruler and pencil for marking placement (optional)
Note: helps line up layers and holes.
A tray for catching drips
Note: protects your workspace and reduces cleanup.
STEP-BY-STEP DIRECTIONS

- Prepare your workspace and tools. Lay out parchment or a silicone mat and place cookie cutters if you plan shapes. Keep a bowl of crayon shavings within reach and a tray under your pot to catch spills.
Place everything you need nearby so you do not rush while the mix is warm. - Measure and mix the bioplastic base. Combine your chosen bioplastic powder with the liquid called for in the recipe. Stir gently, aiming for a smooth, lump-free blend that looks glossy when heated.
Aim for a consistency like heavy cream; adjust slowly if needed. - Heat slowly over low heat. Warm the mixture in a small pan, stirring with a wooden spoon. Watch the texture become clear and slightly thick, not bubbling or scorching.
If bubbles form, lower the heat. The mix should move like syrup. - Add little pieces of crayon for color. Stir one color at a time, letting the wax melt fully into the bioplastic.
Stir slowly so pigment disperses evenly without splashing. - Pour thin, even amounts onto the prepared surface. Tilt the pan and allow the mixture to flow slowly into a thin sheet.
A thin pour gives translucent suncatchers; pour less for delicate, light-catching pieces. - Build layers or add designs. Sprinkle shavings or drip colored bioplastic onto the fresh sheet to create patterns and move pigment with a spoon or toothpick.
Work quickly if you want layers to blend. For sharper lines, let the first layer firm a bit. - Let the sheet cool until it firms but stays slightly warm. If you want to cut shapes, wait until it holds together but still yields under scissors.
Cool time varies by thickness; a thin sheet takes 10 to 20 minutes on the counter. - Trim and punch holes for hanging. Cut around the edges and make a hole for hanging.
If the sheet cracks while trimming, wait a minute longer; warm material trims cleaner. - Tie a string or ribbon and hang to test light play. Choose a window that sees soft sunlight.
The colors look richest in indirect light; direct hot sun can weaken bioplastic over time. - Store spare sheets flat and away from heat, keeping them separate with wax paper.
Stack with parchment between layers to avoid sticking and keep them cool.
The Simple Science or Skills at Work

Making these suncatchers teaches simple cause and effect you can see. Heat melts wax and softens the bioplastic binder. As the mixture cools, the molecules slow and lock into a clear sheet that holds color from crayons. The way color spreads depends on temperature and how quickly you stir.
Kids practice fine motor skills every time they shave crayons, sprinkle bits, or guide a small ribbon through a hole. Measuring and mixing builds basic math and observation skills as they watch the mixture change. Layering and patterning encourage planning and patience. When a color blends unexpectedly, that moment becomes a small lesson in experimentation and flexibility.
You also practice household chemistry in a gentle way. The bioplastic binder plus glycerin gives flexibility; the crayon wax acts as a pigment that melts into the binder. That combination produces a durable, slightly flexible sheet that catches light well.
Troubleshooting Common Issues
If the mix lumps or has grainy bits, it probably needs more gentle stirring and a touch more liquid. Turn the heat down and stir until it smooths. If it scorches, the pan got too hot. Salvage small batches by moving to a cooler pan and stirring in a little extra glycerin if you have it.
If bubbles appear, the pan is too hot or you stirred too vigorously. Lower heat and let the mixture sit a moment so bubbles rise and pop before pouring. If the poured sheet is cloudy, it may be too thick; try a thinner pour next time or spread it with the spoon while warm.
When colors separate or look streaky, that usually means the pigment cooled at different rates. You can embrace the effect as a marbled look or reheat gently with the spoon and swirl to blend. If sheets crack when trimming, they either cooled too long or are too thin. Warm them slightly with your hands or let them sit near warm but not hot sunlight for a minute to relax before cutting.
If the suncatcher sticks to the parchment, the surface might not be non-stick enough. Use silicone mats or lightly rub a tiny bit of vegetable oil on parchment to help release. For stubborn spots, lift the edge and slide a thin spatula underneath to ease it free.
Easy Variations to Try
Try single-color minimalist suncatchers by melting one crayon color into the base. This makes bold, jewel-like pieces that look very polished. It works well if a child wants a clean, simple project.
Create layered ombre pieces by pouring a pale layer, letting it firm slightly, then adding progressively darker pours. The soft transitions look intentional and pleasing in a window.
Use cookie cutters to make holiday shapes and stamp small punched holes with a pencil for instant ornaments. Kids like seeing the sharp silhouettes after trimming.
Make a mixed-media version by sprinkling tiny bits of tissue paper or thin leaves on the warm sheet. Press gently so they adhere, and avoid anything thick that will trap moisture.
If you have older kids, invite them to plan a series and trim pieces of varying thickness to see how light passes differently. That small experiment helps them learn observation and decision-making.
Storing or Reusing This Project
Store finished suncatchers flat in a cool drawer or box. Lay parchment paper between pieces so they do not stick. Avoid high heat or direct midday sun for long periods; the bioplastic can soften in very warm conditions.
If you have leftover sheets, reuse them as another base for a layered piece. Place a sheet on the mat, warm it slightly, then pour a fresh thin layer on top to fuse. This approach reduces waste and lets you try new color combinations.
Clean up by wiping the pan with paper towels while it is still warm, then wash with warm soapy water. Crayon residue can be stubborn if you let it cool into the sink, so a quick wipe before it hardens makes cleanup easier. Keep a tray under your pan during work to catch drips and throw the drips away once they cool.
If a suncatcher gets dusty, wipe gently with a damp cloth. Avoid strong solvents or abrasive scrubbing which can dull the surface. For small scratches, a soft rub with a clean cloth can reduce their appearance.
FAQs About DIY Bioplastic Suncatchers (Crayon Method)
Can my preschooler join in safely?
Yes, with supervision. Let younger children do crayon shaving and sprinkling while an adult handles the saucepan and hot stirring. Keep their area clear of the hot pan and make sure scissors are used by an adult or older child. I often have preschoolers sit at the table with a bowl of shavings while one adult manages the stove and another trims or assembles.
Will the colors fade in sunlight?
They may soften or fade slowly in bright, direct sunlight over many months. I recommend hanging your suncatchers in a window with gentle light or rotating them occasionally so one spot does not get constant direct sun. The colors usually stay vivid for a long time in indirect light.
What if I do not have bioplastic powder?
Can I use plain agar-agar? Use only the binder the recipe lists, which may be a bioplastic powder or a specific agar-agar plus glycerin mix. Those ingredients create the right texture and flexibility. I keep a small jar of the listed binder for these projects because plain agar-agar without glycerin behaves differently and can make brittle sheets.
How messy will this be in the kitchen?
It stays tidier than painting but does need a protected surface. Use parchment or a silicone mat and a tray for drips. Keep a damp cloth handy for quick spots, and wipe the pan while warm. In my experience, the mess concentrates in one small area and cleanup takes 10 minutes once the pan cools.
What results should I expect the first time?
Expect clear, slightly flexible sheets with crayon color mixed through. They will look handmade and lovely, not factory perfect. Trimming takes practice; your first cuts may be uneven, but cookie cutters help. I find every batch looks different and that is part of the charm.
A Final Helpful Note
This project rewards slow and steady rather than speed. Take the time to set up clearly, warm the mix gently, and let cooling happen without rushing. Celebrate small successes like a clean pour or a nicely blended color. If something feels off, pause and adjust rather than pushing through. That keeps the mood light and the results better.
If you want ideas that build on this technique, try our other color-focused projects like the blue crayon series or shell-shaped crafts to keep the creativity flowing. For an ocean-themed twist and some playful shaping techniques, you might enjoy the crystal seashell recipe and the blue crayon suncatchers articles found on the site blue crayon suncatchers and crystal seashell recipe. If you want a quick reference about the broader context and tips for handling bioplastic projects, the general DIY Bioplastic Suncatchers page has useful notes and examples DIY Bioplastic Suncatchers.
Conclusion
If you want to see botanical variations that blend plant material into thin bioplastic sheets, this tutorial shows a nature-forward spin worth exploring; it offers inspiration and photos that pair well with the crayon method Botanical Bioplastic Sun Catchers – Wineberry Woods. For more hands-on, low-prep science activities you can use all summer, check out this round-up of easy STEM ideas to keep kids curious and busy Summer STEM Activities – 30 STEM Challenges For Summer Fun!.
PrintDIY Bioplastic Suncatchers (Crayon Method)

Create colorful bioplastic suncatchers using old crayons and a simple bioplastic mix. A fun, hands-on project for kids that involves kitchen science.
- Prep Time: 15 minutes
- Cook Time: 30 minutes
- Total Time: 45 minutes
- Yield: 4-6 suncatchers
- Category: Craft
- Method: Stirring & Molding
- Cuisine: DIY
- Diet: N/A
Ingredients
- Bioplastic powder or agar-agar
- Glycerin
- White vinegar or water
- Old crayons, peeled and broken into shavings
- Baking parchment or silicone mats
- Shallow pot
- Wooden stirring spoon
- Cookie cutters (optional)
- Scissors
- String or thin ribbon
- A small ruler and pencil (optional)
- A tray for catching drips
Instructions
- Prepare your workspace and tools.
- Measure and mix the bioplastic base.
- Heat slowly over low heat.
- Add little pieces of crayon for color.
- Pour thin, even amounts onto the prepared surface.
- Build layers or add designs.
- Let the sheet cool until it firms.
- Trim and punch holes for hanging.
- Tie a string or ribbon and hang.
- Store spare sheets flat and away from heat.
Notes
This project is safe for younger children with adult supervision. Be cautious with hot materials and sharp tools.
Nutrition
- Serving Size: 1 suncatcher
- Calories: N/A
- Sugar: N/A
- Sodium: N/A
- Fat: N/A
- Saturated Fat: N/A
- Unsaturated Fat: N/A
- Trans Fat: N/A
- Carbohydrates: N/A
- Fiber: N/A
- Protein: N/A
- Cholesterol: N/A