

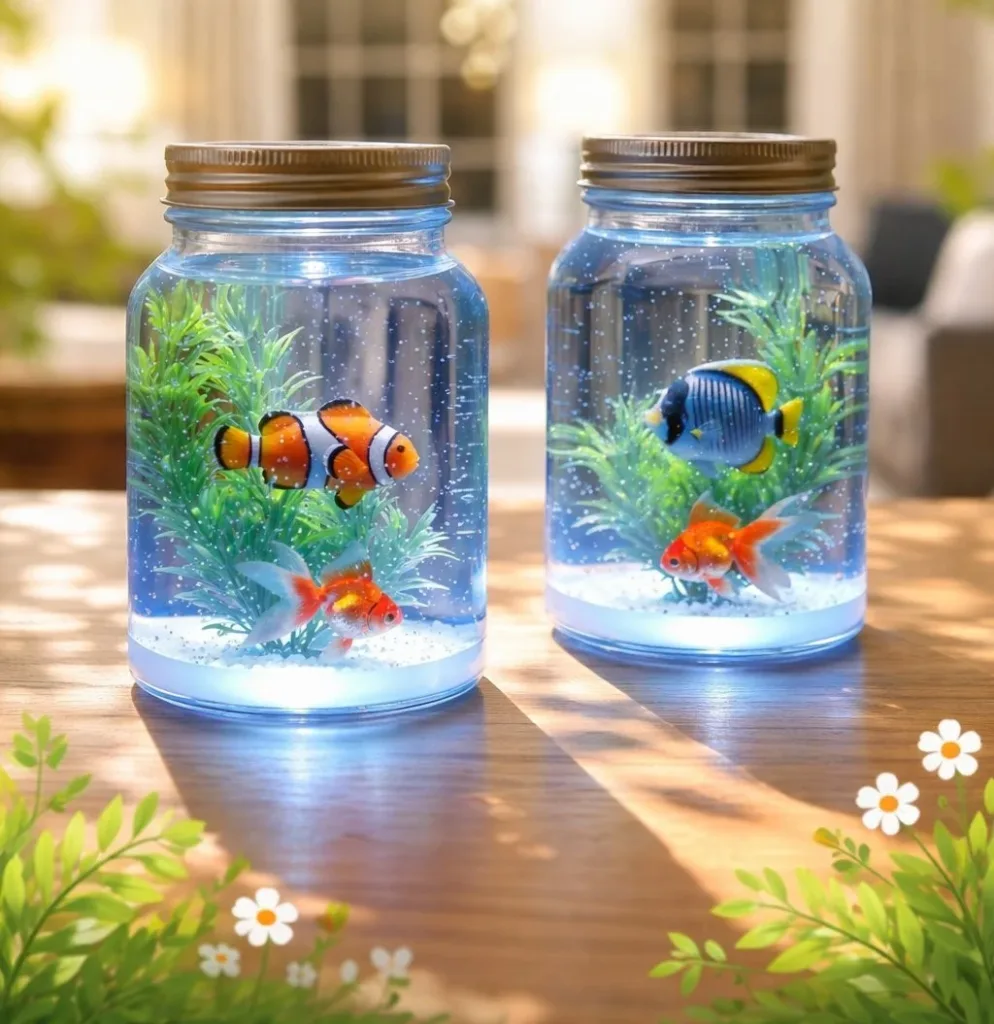
A busy afternoon, kids at the table, and a sudden wish for something calm and creative led to this idea: a Mini Aquarium in a Jar. I remember gathering a wide-mouth jar and handfuls of sand from the craft box while my youngest set out tiny shells and a plastic fish.
This project fits right into those last-minute moments when you want something hands-on, low-fuss, and satisfying. It uses things you likely already have, cleans up quickly, and gives everyone a tiny, peaceful scene to admire. If you liked the gentle science of our DIY Lightning Storm in a Jar, you will find this one just as cozy and more grounded. Mini Aquarium in a Jar makes a sweet table centerpiece, a calm-down jar, or a quick weekend craft that looks delightful on a shelf.
Why You’ll Love Making Mini Aquarium in a Jar

This project feels easy from the first scoop of sand to the final seal. It calls for minimal prep and simple materials you can gather in five minutes. You do not need special tools or messy chemicals. That makes it perfect for quick afternoons, rainy weekends, or when kids ask for something creative now.
It works well because the materials behave predictably. Sand settles, pebbles add texture without moving around, and tiny decorations sit where you place them if you take a moment to secure them. The steps follow a calm rhythm – clean, layer, place, fill, seal – so you can work in short bursts or all at once.
You will find reliable results even on a busy day. If you want a craft that finishes in under an hour and still looks charming, this is it. It also gives kids a clear role to play – rinsing sand, arranging shells, or choosing a figurine. For a focused, low-prep project that still produces a real result, Mini Aquarium in a Jar fits the bill.
A Quick Look Before You Begin
This activity fits into about 30 to 60 minutes from start to finish. Gathering and rinsing materials takes the first 10 to 15 minutes. Assembling the layers and placing decorations takes another 15 to 20 minutes. Filling, tinting, and sealing add the final 5 to 10 minutes.
Setup stays compact. Lay down a towel, work on a low table, and keep a small bowl for rinse water. Expect a little wet sand or a stray pebble now and then; that is normal and easy to sweep up.
Mess level is low to medium. Rinsing sand produces cloudy water, so do that at the sink. Pouring sand into a jar can be fussy if you skip the funnel, so use a piece of paper rolled into a funnel or a small kitchen funnel. Adult supervision helps with scooping, rinsing, and sealing, especially for younger children.
If you like jar crafts, you may also enjoy the soft, hypnotic motion of a jar lava lamp. Try this calming twist after you make your aquarium to keep the creativity going with a different effect from our Magical Snowstorm in a Jar tutorial.
Materials You’ll Need
A clear glass jar with a wide mouth
- Common household jar – mason jars work well and are easy to reach.
Fine sand or aquarium sand
- Aquarium sand looks clean and settles nicely; play sand from a craft store works too.
Small pebbles or aquarium gravel
- Adds texture; rinse well before use.
Tiny shells or sea glass
- Small, smooth pieces make the scene feel coastal and finished.
Small waterproof figurines like miniature fish
- Plastic or resin minis that will not dissolve in water.
Distilled water or filtered water
- Distilled water reduces cloudiness and keeps the jar clearer longer.
Clear glue or aquarium-safe glue
- Use clear-drying glue for small bits that need sticking in place.
Tweezers or a chopstick
- For precise placement of tiny items.
A small funnel or a strip of paper
- Makes pouring sand easy and tidy.
A lid with a tight seal or silicone
- A tight lid prevents spills; silicone adds a stronger seal if you expect movement.
Optional: mineral oil or blue food coloring
- Mineral oil creates layered liquid effects; blue food coloring tints water for a deeper ocean look.
Include a small scoop, a towel, and a sink nearby. If you want to try a different jar look later, check how we use color in the Rainbow Lava Lamp in a Jar for ideas.
STEP-BY-STEP DIRECTIONS

- Clean the jar with warm water and soap, and lay down a towel.
Pour warm soapy water into the jar and rinse well.
Set the jar upside down on a towel to dry while you prep. - Rinse sand and gravel in a sieve.
Put sand and pebbles in a fine sieve and rinse under running water.
Stop when the water runs mostly clear, then let them drain briefly. - Create a base layer by pouring sand using a funnel.
Roll a strip of paper or use a funnel to guide the sand into the jar.
Fill to the depth you like – start with a thin layer for tiny scenes. - Add a layer of pebbles for texture.
Scatter small pebbles over the sand so they sit naturally.
Tap the jar gently to settle the pebbles into place. - Position small decorations with tweezers.
Pick up shells, sea glass, or minis with tweezers or a chopstick.
Place them where the scene looks balanced and pleasing. - Secure pieces with glue if needed.
Add a tiny dab of clear glue to items that shift or lean.
Let the glue dry completely before moving on – it only takes a few minutes. - Slowly fill with distilled water, tilting the jar.
Tilt the jar slightly and pour water slowly down the side to reduce bubbles.
Stop when the water reaches just under the mouth of the jar. - Add tint or oil if desired.
If you want a blue tint, add one drop of food coloring and watch it blend.
To create a layered oil effect, slowly add mineral oil on top – it will float and separate. - Seal the jar with a lid or silicone.
Screw on the lid tightly and wipe any drips from the outside.
For extra security, run a bead of silicone around the rim before sealing. - Place the jar in a quiet area to enjoy.
Set your mini aquarium somewhere steady and out of direct sun.
Enjoy the gentle look and let kids check it now and then for leaks.
What Kids Practice While Making This

This activity helps kids build fine motor skills in a gentle way. Picking up tiny shells with tweezers improves hand-eye coordination and finger control. Rolling a paper funnel and pouring sand encourages careful movements and planning.
They also practice cause and effect. Rinsing sand shows how dirty water becomes clear. Adding blue coloring demonstrates how a little color spreads in water. Gluing a shell in place teaches patience – wait for the glue to dry and the piece will stay put.
There is soft science here too. Children see how different materials behave in water – sand sinks, oil floats, and pebbles rest on top of sand. Those small discoveries encourage curiosity without pressure.
If you want to expand into other jar experiments later, the same careful hands-on skills translate to projects like a Salt Volcano where layering and small tool work make a big visual impact.
Troubleshooting Common Issues
If the water looks cloudy after filling, do not worry.
Cloudiness usually means some dust or tiny sand particles washed in.
Open the jar, tilt it, and add a little more distilled water, pouring slowly down the side to rinse and reduce bubbles.
If decorations float or shift, check how you placed them.
Small air pockets under shells or light plastic can make items bob.
Gently release the item with tweezers, tap it down into the sand, or add a small dab of clear glue to anchor it.
If bubbles collect along the glass or items, try this simple fix.
Let the jar sit still for a day; tiny bubbles often migrate to the surface.
If they persist, open the jar and tilt to let trapped air escape while adding water slowly.
If the seal leaks a little, act quickly and calmly.
Dry the rim, add a fresh bead of silicone, and reseal. Place the jar on the towel until the silicone cures.
Avoid placing it where it can tip while the seal sets.
If colors look dull, remember that lighting matters.
A jar looks brighter in natural, indirect light. Direct sun can cause glare or heat.
Move it to a bright shelf or a table near a window without direct afternoon sun.
Easy Variations to Try
Make it a night sky jar – use dark sand, tiny star beads, and a small glow-in-the-dark fish.
This adds a playful twist and a soft glow when the lights go out.
Create a layered ocean by alternating sand colors.
Use white sand and a thin darker layer for depth. Add shells and a single figurine for a minimalist look.
Try a calm oil top layer for slow motion.
Add mineral oil slowly on top of the water to make a soft, slow-moving surface effect.
This works well for sensory jars and gives a different texture to watch.
Seasonal touches change the mood quickly.
Add tiny starfish for summer, a mini crab for a beach theme, or a small evergreen twig for a winter scene.
Keep elements small and waterproof so they last.
Turn it into a classroom center – make multiple jars and compare.
Let each child choose a theme and place their creation on a shelf for a week-long display.
Storing or Reusing This Project
Keep your jar in a cool, stable spot away from direct sunlight.
Sun can heat the jar and increase condensation, which may obscure the scene.
If you want to change the display, empty the jar carefully.
Unscrew the lid, pour out the water over a sink, and remove decorations with tweezers.
Rinse the jar and reuse the sand and pebbles after letting them dry.
Store spare materials in labeled containers.
Tiny shells, beads, and minis last a long time when kept dry and together in a small box.
This lets you swap themes quickly without new shopping.
To reduce waste, repurpose leftover sand and pebbles in other crafts.
They make great filler for planters, vase displays, or other jar projects.
If glue or silicone gets messy, use a razor blade to scrape cured bits carefully, then wash.
FAQs About Mini Aquarium in a Jar
Will this project make a big mess?
It can be a little messy when you rinse sand and pour it into the jar, but the mess is easy to manage. Lay a towel down and rinse sand at the sink. Use a funnel or paper funnel to keep sand inside the jar. Most of the cleanup is quick – a sweep and a damp cloth.
Is this safe for young kids?
Yes, with supervision. Small pieces are choking hazards for toddlers, so keep tiny items out of reach for children under three. An adult should handle rinsing, gluing, and sealing. Older preschoolers and school-age kids can place items with tweezers and pour water slowly.
Can I substitute materials if I do not have aquarium sand?
You can use fine craft sand from a hobby store or washed play sand. Rinse any sand you use until the water runs clear to reduce cloudiness in the jar. Avoid using beach sand that may include shells that break down or salt that could leave a residue.
What if my jar looks dull after a week?
A small amount of condensation or tiny bubbles can make the scene look muted. Move the jar out of direct sun and let it settle for a day. If murkiness persists, open it, pour out the water, rinse the contents gently, and refill with distilled water. You will often get a clearer look the second time.
How long will it last?
If sealed well and kept out of hot sunlight, a Mini Aquarium in a Jar can stay attractive for months. The scene will not be perfect forever – tiny shifts or a little cloudiness can appear – but those small changes add character and make the jar feel lived-in rather than fragile.
A Final Helpful Note
This project is forgiving. Small scuffs, a tilted shell, or a tiny bubble do not ruin the result. Focus on the process – the rinsing, the layering, the placement – and you will enjoy the calm rhythm of making. If something goes off course, pause, fix the single issue, and move on. You do not need perfect symmetry or professional supplies to make a jar that brings quiet joy to a shelf or a desk. Trust your eye, take your time with small pieces, and celebrate the little scene you create.
Conclusion
If you want another mason jar aquarium idea with a slightly different assembly or visual, check the clear, step-by-step example at Design Dazzle mason jar aquarium idea for creative inspiration. For another family-friendly tutorial with bright photos and tips, see the practical walk-through at hello, Wonderful mason jar aquarium guide.
PrintMini Aquarium in a Jar

Create a calming Mini Aquarium in a Jar that’s perfect for kids and a delightful centerpiece.
- Prep Time: 15 minutes
- Cook Time: 0 minutes
- Total Time: 30 minutes
- Yield: 1 jar 1x
- Category: Craft
- Method: Crafting
- Cuisine: N/A
- Diet: N/A
Ingredients
- 1 clear glass jar with a wide mouth
- 1 cup fine sand or aquarium sand
- 1 cup small pebbles or aquarium gravel
- Small shells or sea glass
- 1 small waterproof figurine (miniature fish)
- 1 cup distilled water or filtered water
- Clear glue or aquarium-safe glue
- 1 pair of tweezers or a chopstick
- 1 small funnel or a strip of paper
- 1 lid with a tight seal or silicone
- Optional: Mineral oil or blue food coloring
Instructions
- Clean the jar with warm water and soap, and lay down a towel.
- Pour warm soapy water into the jar and rinse well.
- Set the jar upside down on a towel to dry while you prep.
- Rinse sand and gravel in a sieve.
- Create a base layer by pouring sand using a funnel.
- Add a layer of pebbles for texture.
- Position small decorations with tweezers.
- Secure pieces with glue if needed.
- Slowly fill with distilled water, tilting the jar.
- Add tint or oil if desired.
- Seal the jar with a lid or silicone.
- Place the jar in a quiet area to enjoy.
Notes
Use a towel and keep rinse water handy to manage mess. Supervision is required for young kids.
Nutrition
- Serving Size: 1 jar
- Calories: 0
- Sugar: 0g
- Sodium: 0mg
- Fat: 0g
- Saturated Fat: 0g
- Unsaturated Fat: 0g
- Trans Fat: 0g
- Carbohydrates: 0g
- Fiber: 0g
- Protein: 0g
- Cholesterol: 0mg