

A busy afternoon, a request for something hands-on, and a quick kitchen setup are all it takes to turn small shells into a bright, sparkly keepsake. The Bright Green Crystal Seashell Experiment fits that moment perfectly. I remember opening the cupboard, finding alum in the spice drawer, and watching my kids’ faces light up when the first green crystals began to form. If you want a low-fuss project that feels a bit like kitchen science and a bit like craft time, this one delivers. If you have done a crystal growing experiment before, this will feel familiar and even easier to manage with shells.
Why This Bright Green Crystal Seashell Experiment Works So Well

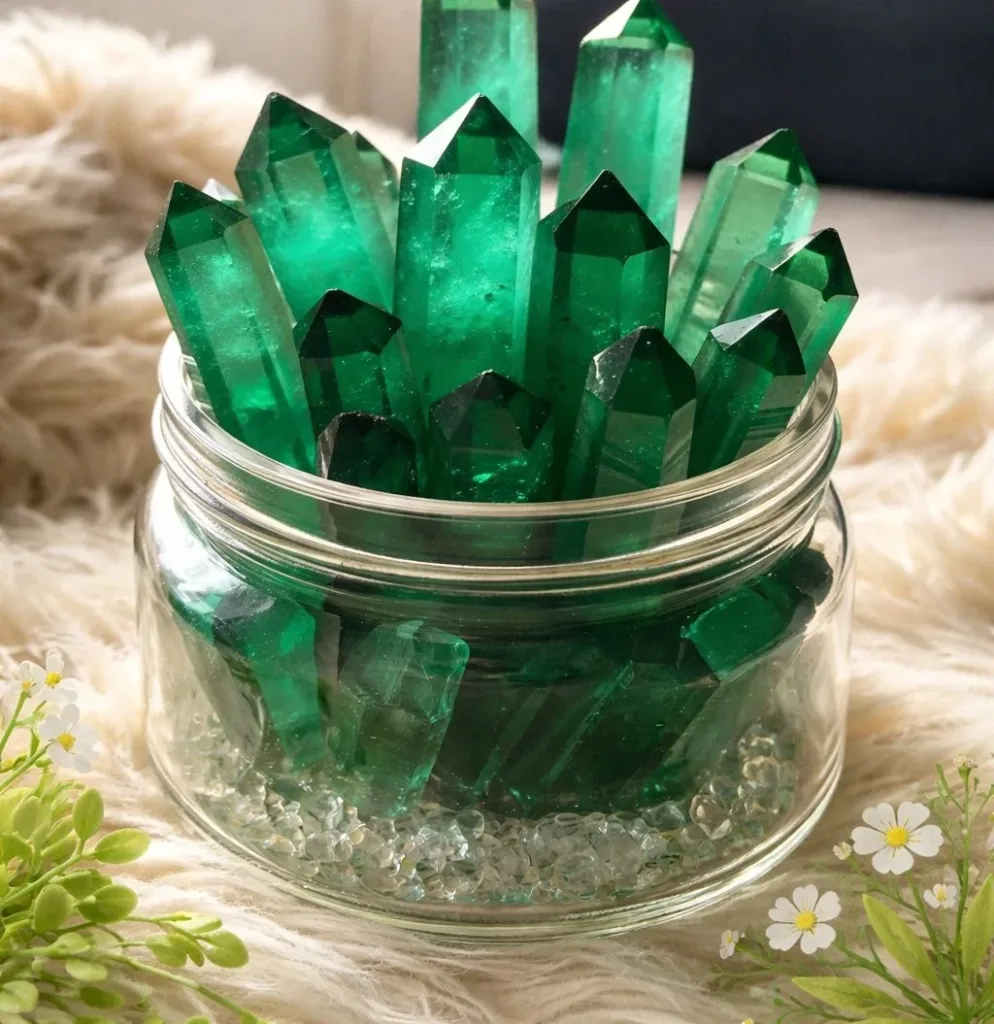
This project uses simple chemistry you can see and feel. Dissolving alum or Epsom salt in very warm water creates a solution that wants to leave behind solid crystals as it cools and evaporates. The open shells act like tiny bowls that collect the solution and guide crystal growth into pretty, shell-shaped patterns.
It is low-prep because most homes already have the materials or close substitutes. It is approachable because the steps stay the same each time: mix, fill, wait, and dry. You do not need fancy tools or exact lab conditions to get a good result.
It is reliable for busy schedules. You can set the tray out in the morning and come back in a few days. A sunny windowsill or a small fan nudges evaporation but does not demand constant babysitting. The experiment also scales easily for a small solo craft or a group of kids.
This activity keeps mess and stress small. You work mostly with a cup of warm water and small amounts of powder. A tray and a few paper towels contain spills. That makes it a good choice when time is short but curiosity is high.
A Quick Look Before You Begin
How This DIY Comes Together
Plan for a short setup time and a wait of a few days for crystal growth. Setup takes about 10 to 20 minutes: clean shells, heat water, mix, color, and pour. After that you check in once a day and add solution when needed.
The mess level stays low. You might see small spills or a little colored residue in the tray, but paper towels catch most of it. Gloves and safety glasses are optional and handy with curious kids. Use a small brush for final cleanup of dried crystals.
Adult help matters mostly for heating water and supervising younger children while pouring hot liquid. Older kids can do much of the stirring and pouring on their own under a watchful adult.
You will feel rewarded when tiny crystals appear on the shell edges and then fan out. The slow change is part of the charm. Expect bright green flecks at first, then clearer, glassy crystals toward the end of the process.
Materials You’ll Need
What You’ll Use for This DIY
Clean seashells (small to medium size)
common household treasure from beach trips; check for loose bits
Alum powder or Epsom salt
easy to find at grocery or pharmacy; both work as crystal formers
Hot water (near boiling)
heat in a kettle or microwave; adult handle only
Bright green food coloring or liquid dye
adds dramatic color; a few drops go a long way
Small tray or shallow container
contains spills and holds shells steady
Stirring spoon or wooden craft stick
for mixing; wooden sticks are cheap and disposable
Measuring spoons
for consistent salt or alum amounts
Clear glue or nail polish (optional)
seals crystals for display and protects them
Paper towels
cleanup and drying surface
Small brush
gentle cleaning of shells and crystals
Gloves and safety glasses (optional)
good for extra caution with hot water and curious hands
A small fan or a sunny windowsill for evaporation
speeds drying but is optional and gentle
If you like following recipes, this list matches the simple set of things I keep on hand for quick science-craft afternoons. For a recipe-style reference, check the diy crystal seashells recipe for more context on quantities and variations.
STEP-BY-STEP DIRECTIONS

- Prepare your workspace and shells by rinsing and drying them.
Rinse shells in warm water to remove sand and debris.
Pat dry on paper towels and let air-dry until no dampness remains. - Heat a cup of water until very warm or near boiling.
An adult should heat the water and handle the kettle.
Pour the hot water slowly into a heat-safe cup. - Stir in alum or Epsom salt until dissolved.
Measure roughly 2 to 3 tablespoons and add a bit at a time.
Stir until the water looks clear and mostly free of grains. - Add a few drops of bright green food color and stir.
Start with 2 to 4 drops and increase if you want stronger color.
Stir gently until the color spreads evenly in the solution. - Place shells open-side up in the tray.
Arrange them so they do not touch each other, allowing airflow.
Use paper towels under the tray to catch drips if needed. - Fill each shell with the solution carefully.
Pour slowly to avoid splashing and overfilling the tray.
Fill each shell just to the rim so crystals can form along the edge. - Put the tray in a warm, draft-free environment.
Choose a sunny windowsill or a warm corner away from heavy drafts.
A small fan nearby speeds evaporation, but avoid direct wind. - Check daily and add more solution if needed.
Look for small crystals forming along the edges and bottom.
Top up gently when you see the level drop to keep contact with the shell. - After 3-7 days, remove and dry the shells.
Lift shells and set them on paper towels to air-dry fully.
If you want faster drying, use a gentle fan for an hour. - Optionally seal with clear glue or nail polish.
Brush a thin coat over crystals to protect them from flaking.
Let the sealant dry completely before displaying.
The Simple Science or Skills at Work

This activity teaches cause and effect in a very hands-on way. When the warm, saturated solution cools or evaporates, it cannot hold as much dissolved material. The dissolved alum or Epsom salt then builds solid crystals along the shell surfaces.
Kids practice measuring and following steps. Stirring helps develop hand control and coordination. Pouring small amounts into shells improves fine motor skills and concentration.
Watching changes over several days builds patience and observation skills. You will notice crystals begin as tiny specks and then grow into larger, sharper forms. That slow change rewards daily check-ins and gentle adjustments.
Parents also get a chance to explain simple terms like solution, saturation, and evaporation without heavy science talk. You can point out texture differences when crystals first form, how some look powdery and then become clear, and how color dye sometimes concentrates in certain areas.
Troubleshooting Common Issues
If Something Doesn’t Go as Planned
Problem: No crystals after a few days.
Why it happens: Solution may be too weak or the shells did not stay in contact with enough liquid.
Fix: Remake a stronger solution with a little more alum or Epsom salt and refill the shells. Move the tray to a warmer spot.
Problem: Crystals look cloudy or powdery.
Why it happens: Rapid evaporation or too much dye can cloud the structure.
Fix: Move to a spot with milder warmth and avoid direct, strong sunlight. Use slightly less dye next time.
Problem: Crystal growth only on the tray, not in shells.
Why it happens: Shells may be tilted or touching each other, directing flow away from them.
Fix: Reposition shells so each sits level open-side up. Clean any salt buildup and refill shells.
Problem: Bright color fades or streaks.
Why it happens: Dye can concentrate and leave streaks rather than uniform color.
Fix: Stir the solution well before pouring, and use fewer drops of dye. If streaks form, add a light seal coat to even the finish.
Problem: Crystals flake or break off.
Why it happens: The crystals can be fragile when large or when moved too soon.
Fix: Let shells dry fully for at least 24 hours, then apply a thin coat of clear glue or nail polish to hold them together.
If you try these fixes and still feel stuck, small changes usually help. I find slightly more salt and a calmer spot make the biggest difference. That added patience often turns a so-so result into a display piece.
Easy Variations to Try
Simple Ways to Change It Up
Use different green tones by mixing a drop of blue with yellow dye to create a softer green. This keeps the idea familiar but fresh for repeat sessions. Try this with older kids who like color mixing and watching subtle differences form.
Make a mixed batch where some shells use alum and others use Epsom salt. You can compare textures and crystal clarity in a little side-by-side study. It becomes a small experiment about which material makes more glassy crystals.
Try a “half-fill” look by pouring less solution so crystals grow more along one side of the shell. This produces a natural, gradient effect that looks like mineral veins in real stones.
If you want a seasonal twist, set shells on a tray with small pine cones or dried leaves for display. The crystals add a jewel-like pop to a holiday bowl or nature table without extra work.
For a focused color swap, see tips for a different palette in our pink seashell crystals guide to get ideas on saturation and dye amounts.
Offer these as suggestions rather than rules. Each variation gives you a reason to try the activity again, with small adjustments that keep it doable for a quick afternoon.
Storing or Reusing This Project
What to Do With It After
Store finished shells in a box lined with tissue paper to protect crystals from bumps.
Keep the box in a cool, dry place away from humidity that can dull crystals.
If you seal the crystals, you can use shells as ornaments, little jewelry dishes, or simple shelf accents.
A light dusting with a soft brush keeps them looking fresh without disturbing the crystals.
For leftovers, save any unused salt or alum in a labeled jar and reuse it for another batch.
You can also reuse the tray and stirring stick after a quick rinse and dry.
If you want to give shells as gifts, wrap each in tissue and use a clean, sturdy box.
Include a short note about the process so recipients know to handle them gently.
If some crystals break, scoop them into a jar as a textured filler for a small craft jar or sensory bottle. That keeps the material useful instead of tossing it.
FAQs About Bright Green Crystal Seashell Experiment
How messy will this be?
I worry about colored water and little hands. Expect low to moderate mess. You use a small cup of colored solution and a tray to catch spills. If a drop lands on the table, a damp paper towel cleans up quickly. I always keep a towel nearby and set up the tray on a washable surface. Kids can help with cleanup as a final step, which keeps the activity tidy and teaches responsibility.
Is this safe for young kids to try?
The materials are common household items, but hot water needs an adult. For preschoolers, manage the hot-water steps and let them do the pouring with supervision. Gloves and safety glasses are optional but can be fun for role-playing as lab helpers. If you use nail polish later, do that away from children and in a well-ventilated area.
Can I substitute something if I do not have alum or Epsom salt?
Alum and Epsom salt both form crystals and give similar results. If you have one on hand, it will work fine. I do not recommend inventing other chemicals; keep to these two for predictable results. If you are unsure, check the labels and choose the product that resembles what I describe in the materials list.
What if my shells do not come out perfectly covered in crystals?
That is normal and okay. Sometimes crystals form mainly along edges or in small patches. That still looks pretty. Small flaws make each shell unique, and often the most interesting pieces have uneven growth. You can always remake a stronger solution and try again with different shells.
How long will these last on display?
With light handling and if you seal them, these shells can last a long time. Keep them out of heavy humidity and avoid dropping them. If you see dulling over time, a fresh light coat of clear glue can bring back the shine. I have shells on a shelf for months with just an occasional dusting.
A Final Helpful Note
One Last Tip Before You Go
Take your time and treat this as a small ritual more than a race. The mixing takes minutes, but the watching and adjusting over several days make the project feel like a living craft. If something goes sideways, try a single, small change next time rather than redoing the whole process.
If you enjoy a hands-on kit vibe, collect a few shells and run two batches side by side with tiny tweaks. You learn more from small comparisons than from large, dramatic changes. And most of all, celebrate the quirks. Those imperfect crystals tell a good story.
Conclusion
If you want a compact headset for listening while crafting outdoors, check the comfort and features in the Lightspeed Delta Zulu® ANR Headset to decide if it fits your needs. For deeper reading on dye adsorption and how dyes interact with materials, this study on efficient adsorption of crystal violet dye using functionalized Argan gives useful background that connects to the science behind colored solutions.
PrintBright Green Crystal Seashell Experiment

A fun and hands-on DIY project that teaches kids about crystal growth using simple materials and techniques.
- Prep Time: 20 minutes
- Cook Time: 0 minutes
- Total Time: 3-7 days
- Yield: Varies based on the number of shells used
- Category: Crafts
- Method: Crafting
- Cuisine: N/A
- Diet: N/A
Ingredients
- Clean seashells (small to medium size)
- Alum powder or Epsom salt (2-3 tablespoons)
- Hot water (1 cup, near boiling)
- Bright green food coloring or liquid dye (a few drops)
- Small tray or shallow container
- Stirring spoon or wooden craft stick
- Measuring spoons
- Clear glue or nail polish (optional)
- Paper towels
- Small brush
- Gloves and safety glasses (optional)
- A small fan or a sunny windowsill for evaporation
Instructions
- Prepare your workspace and shells by rinsing and drying them.
- Heat a cup of water until very warm or near boiling.
- Stir in alum or Epsom salt until dissolved.
- Add a few drops of bright green food color and stir.
- Place shells open-side up in the tray.
- Fill each shell with the solution carefully.
- Put the tray in a warm, draft-free environment.
- Check daily and add more solution if needed.
- After 3-7 days, remove and dry the shells.
- Optionally seal with clear glue or nail polish.
Notes
This project is low-prep, reliable for busy schedules, and teaches kids about science in a fun way.
Nutrition
- Serving Size: N/A
- Calories: N/A
- Sugar: N/A
- Sodium: N/A
- Fat: N/A
- Saturated Fat: N/A
- Unsaturated Fat: N/A
- Trans Fat: N/A
- Carbohydrates: N/A
- Fiber: N/A
- Protein: N/A
- Cholesterol: N/A