

A busy afternoon, a cupboard of pantry staples, and a child asking to make something colorful right now. That is where Colorful Eco-Friendly Bioplastic Suncatchers fit perfectly. I have stood at my kitchen counter with a hot cup of water nearby, a silicone mat on the table, and a small saucepan warming on low while a kiddo pressed cookie cutters into soft puddles of bioplastic.
It feels like a quick kitchen science moment that turns into sunlit art. If you want a simple activity that mixes a little making, a little science, and a beautiful result, this project lands in the sweet spot. For a quick reference page and a similar recipe, check our full project guide at the DIYMadeEasy suncatcher page.
Why You’ll Love Making Colorful Eco-Friendly Bioplastic Suncatchers

This project works well because it asks for almost nothing ahead of time. You use pantry cornstarch and water, a touch of vinegar and optional glycerin, and household art supplies. That makes it low-prep and easy to start on a weekday afternoon when plans change.
It fits into real-life schedules. The active cooking time on the stove is just a few minutes and most of the wait is hands-off as pieces cool. You can set it up while dinner simmers or while helping with homework, and kids can jump in for the hands-on bits.
The method gives predictable results when you follow a few quick cues. You will notice the mixture go from milky to thick and glossy. That change tells you it is ready to form into shapes. The pieces dry to a flexible, slightly firm film that catches light well.
It also feels satisfying. You make something that looks like stained glass without a kiln or toxic plastics. That makes it approachable for families who want a craft that doubles as a simple science experiment.
A Quick Look Before You Begin
Start to finish, plan for about 20 to 40 minutes. The stove time is short, but the pieces need a calm cooling period at room temperature to set. If you want several colors, factor in a few extra minutes for stirring in dyes.
Set up on a table you can wipe easily. Use a silicone mat or parchment to keep pieces from sticking and to make cleanup faster. Keep clothespins or clips nearby to hold shapes while you work on the next color.
Mess level stays low if you control a couple of things. Use warm water that is not boiling so you do not scald little hands. Stir on low heat to avoid splatters. Keep a damp cloth within reach for quick wipeups. You will probably get a small amount of residue in the saucepan; it washes out with hot soapy water and a gentle scrape.
You will want an adult for the stovetop steps. Kids do best with the pouring, embellishing, and trimming steps. If you like similar quick science crafts that combine curiosity with art, try the colorful baking soda and vinegar reaction for another hands-on afternoon activity.
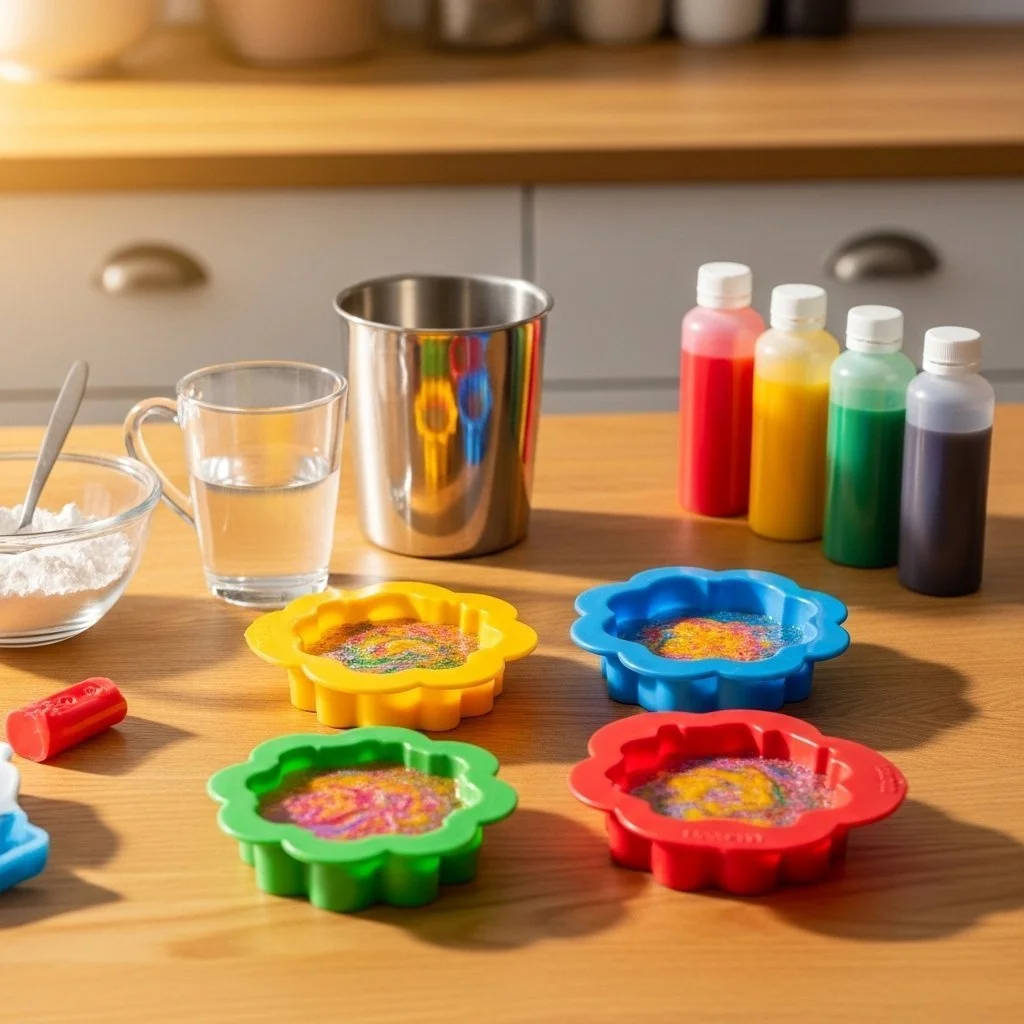
Materials You’ll Need
1 tablespoon cornstarch
4 tablespoons warm water (not boiling)
1 teaspoon white vinegar
1/4 teaspoon glycerin (optional) – makes pieces a little more flexible
Natural food coloring or diluted watercolors – gentle, easy colors
Silicone baking mat or parchment paper – prevents sticking
Small saucepan – for warming the mixture
Wooden spoon – gentle stirring tool
Cookie cutters or stencil shapes (optional) – for crisp shapes
Scissors – to trim edges
Clothespins or clips – hold shapes while they set
Tweezers or a toothpick – place tiny embellishments
Dried flowers, gold leaf bits, or textured paper scraps (optional) – small decorations
Measuring spoons and cup – accurate small amounts
These items keep things simple and budget-friendly. If you want a full printable recipe and a slightly expanded version, see our recipe page at the dedicated bioplastic suncatchers recipe.
Step-by-Step Directions

- Gather and set up a calm workspace; use a silicone mat or parchment on your table. Warm a cup of water nearby.
Lay out your measuring tools, tweezers, and small decorations so you do not rush. The warm cup of water can be used to thin brushes or wipe a hands-on spoon. - In the saucepan, combine cornstarch, water, vinegar, and glycerin, stirring until the cornstarch dissolves.
Stir slowly until the mixture looks smooth and milky. No lumps should remain. This feels like stirring pancake batter but much thinner. - Warm the mixture over low heat, stirring continuously until it thickens.
Keep the heat low and stir without stopping. The mixture will go from cloudy to translucent and glossy. You will feel it pull away from the sides a little and thicken to coat your spoon. - Add drops of natural food coloring or diluted watercolor and stir until the color is uniform.
A few drops go a long way. Stir until the color looks even and no streaks remain. If it gets too dark, add a little warm water from your cup to soften it. - Pour or spoon the bioplastic onto the mat in puddles about as thick as a thin coin.
Work quickly but gently. Spoon small puddles roughly a quarter inch thick for nice light-catching pieces. Use cookie cutters pressed on the mat as a guide if you want definite shapes. - While the mixture is still tacky, add tiny embellishments using tweezers.
Place dried flower pieces, gold leaf bits, or small paper scraps while the surface is slightly sticky. Tweezers or a toothpick help with delicate placement. Press gently so items sit flush. - Allow the pieces to cool and set at room temperature.
Move the mat to a quiet spot where the pieces can sit undisturbed. They firm up as they cool. Expect about 10 to 30 minutes depending on size and room temperature. - Carefully peel the suncatchers from the mat and trim edges with scissors.
Peel slowly from one edge. If a corner resists, ease it up with a toothpick. Trim any rough edges for a clean look. The material should feel slightly flexible but not sticky. - Create holes for hanging and use thread or twine to display them near a sunny window.
Make small holes with scissors or poke with a toothpick while the pieces are still slightly pliable, or carefully punch a hole afterward. Tie a length of thread and hang where sunlight will shine through.
The Simple Science or Skills at Work

This activity mixes craft with clear science and fine motor practice. The cornstarch and vinegar react with heat to form a thin bioplastic film that dries into a translucent sheet. That simple chemistry explains why the mixture thickens and then firms as it cools.
Kids practice measuring and timing when they help with the recipe. Those small tasks build confidence. Stirring gently and watching the texture change teaches cause and effect. They learn that heat changes ingredients and that stirring matters.
Placing tiny embellishments with tweezers builds hand-eye coordination and fine motor control. Trimming edges with scissors also sharpens scissor skills in a purposeful way. Hanging the finished piece completes a project cycle that feels rewarding.
Above all, the process teaches patience. You do a short, active step and then wait calmly for a result. That rhythm suits short attention spans and busy schedules.
Troubleshooting Common Issues
If your mixture stays lumpy, it likely needs more stirring before you heat it. Take it off the heat, stir until smooth, then warm again. Small lumps usually smooth out with gentle whisking.
If the mixture scorches or smells burnt, the heat was too high. Toss that batch, wash the pan, and start over at a lower temperature. Use low heat and steady stirring next time.
If the finished pieces are brittle and crack easily, the glycerin was probably missing or the mixture cooked too long. Try the optional 1/4 teaspoon glycerin or remove the pan a touch earlier when the mix is glossy but still spreadable.
If the pieces stick badly to the mat, check that you used parchment or a clean silicone mat. Parchment paper works well if the silicone mat has tiny tears or older residues. Press gently when peeling to avoid tearing.
If a color looks dull after drying, you used too little pigment or the dye was too diluted. Add a drop or two more next time. Natural food coloring gives subtle shades, which is part of the charm, but vivid color needs a few drops.
If small decorations sink in or float off-center, they were added too early or too late. Place items when the surface is slightly tacky. If you wait until it is dry, decorations will not adhere. If you add them when the mix is too runny, they may sink.
Easy Variations to Try
Make tiny sun catchers on a keyring scale and combine them for colorful zipper pulls. Use small cookie cutter shapes and string a row for a mobile.
Layer two colors by pouring a thin first layer, letting it set a bit, and then adding a second color on top. This creates a subtle stained-glass look.
Use textured paper scraps or leaf veins under the bioplastic puddle to add patterns. Press them gently so the texture shows through when dry.
Try seasonal themes. Make leaf-shaped pieces in autumn colors or small snowflake-like shapes in cool blues. These are suggestions, not rules, so match ideas to what your kids enjoy.
Combine with other quick activities from the kitchen table. If you like the mixing and color play here, you might enjoy the chromatography coffee butterflies for another colorful exploration.
Storing or Reusing This Project
Store finished suncatchers flat in a drawer or box where they will not bend sharply. They remain flexible but can crease if folded tightly.
If you have leftover bioplastic mixture that is still hot and runny, pour one or two extra puddles on the mat to make test shapes rather than toss it. If it cools in the pan, it often cleans off easily with warm soapy water.
Keep small jars or zip bags for tiny decorations so you can reuse items like dried flower bits or gold leaf. That reduces waste and makes the next session faster.
Clean the saucepan right after use. Soak it briefly in warm soapy water and wipe with a non-abrasive sponge to remove any film. The silicone mat or parchment wipes clean or peels away without fuss.
If you plan to do many batches, measure and label your dyes so you repeat color mixes that worked well.
FAQs About Colorful Eco-Friendly Bioplastic Suncatchers
Can little kids safely help?
Yes. An adult should do the stovetop steps. Kids can measure under supervision and handle pouring and decorating. I let my seven-year-old spoon puddles and use tweezers for flowers while I stir the pan. Expect small spills and have a wet cloth ready. It feels hands-on and safe when an adult handles the heat.
What about mess and cleanup?
Cleanup stays simple if you use a mat or parchment and wipe sooner rather than later. The saucepan might have a thin film that soaks away with hot soapy water. If a child drops a puddle on the table, it peels off once dry. I usually keep a damp sponge and a bowl of warm water nearby to clean spoons and tools between colors.
Can I swap ingredients if I do not have glycerin?
Glycerin is optional. It adds flexibility but is not essential. If you skip it, your pieces might be a little firmer. I often leave it out and still get lovely translucent results. Be honest with expectations: they may be slightly more brittle.
Will these last in a sunny window?
They hold up well for months in gentle sun. Direct, very strong sunlight for long months may fade colors slowly, especially natural dyes. If a piece starts to curl or fade, take it down and store it flat. The material is biodegradable, so it will not be permanent like acrylic, but it gives a beautiful season of color.
What if my pieces crack when I trim them?
Cracking usually happens if they become too brittle or you trim with dull scissors. Use sharp scissors and trim gently. If a piece feels brittle, let it sit a little longer at room temperature to gain slight flexibility before trimming.
A Final Helpful Note
You do not need perfect shapes or flawless color gradients to make great suncatchers. The joy comes from watching simple kitchen ingredients turn into sunlit art. Take small moments to celebrate curious reactions and tiny triumphs, like a child placing a petal exactly where they want it. Be flexible, breathe through little spills, and enjoy that your family made something together.
Conclusion
If you want another clear set of steps and photos to compare techniques, the Chemistry for Kids guide on how to make a bioplastic suncatcher gives a helpful visual walk-through: How To Make A Bioplastic Suncatcher – Chemistry for Kids. For more inspiration and one more recipe take on DIY bioplastic suncatchers, see this friendly project write-up that highlights color and embellishment ideas: DIY Bioplastic Suncatchers: Eco-Friendly Art That Shines Bright!.
PrintColorful Eco-Friendly Bioplastic Suncatchers

A fun, hands-on project to create colorful bioplastic suncatchers using pantry staples, suitable for kids and adults alike.
- Prep Time: 10 minutes
- Cook Time: 5 minutes
- Total Time: 30 minutes
- Yield: 4 suncatchers 1x
- Category: Arts & Crafts
- Method: Crafting
- Cuisine: N/A
- Diet: N/A
Ingredients
- 1 tablespoon cornstarch
- 4 tablespoons warm water (not boiling)
- 1 teaspoon white vinegar
- 1/4 teaspoon glycerin (optional)
- Natural food coloring or diluted watercolors
- Silicone baking mat or parchment paper
- Small saucepan
- Wooden spoon
- Cookie cutters or stencil shapes (optional)
- Scissors
- Clothespins or clips
- Tweezers or toothpick
- Dried flowers, gold leaf bits, or textured paper scraps (optional)
- Measuring spoons and cup
Instructions
- Gather and set up a calm workspace; use a silicone mat or parchment on your table. Warm a cup of water nearby.
- Lay out your measuring tools, tweezers, and small decorations so you do not rush.
- Combine cornstarch, water, vinegar, and glycerin in the saucepan, stirring until the cornstarch dissolves.
- Warm the mixture over low heat, stirring continuously until it thickens.
- Add drops of natural food coloring or diluted watercolor and stir until the color is uniform.
- Pour or spoon the bioplastic onto the mat in puddles about as thick as a thin coin.
- While the mixture is still tacky, add tiny embellishments using tweezers.
- Allow the pieces to cool and set at room temperature.
- Carefully peel the suncatchers from the mat and trim edges with scissors.
- Create holes for hanging and use thread or twine to display them near a sunny window.
Notes
For best results, control temperature and timing to avoid scorching. Use gentle colors and standard household art supplies for a rewarding crafting experience.
Nutrition
- Serving Size: 1 suncatcher
- Calories: 50
- Sugar: 0g
- Sodium: 5mg
- Fat: 0g
- Saturated Fat: 0g
- Unsaturated Fat: 0g
- Trans Fat: 0g
- Carbohydrates: 12g
- Fiber: 0g
- Protein: 0g
- Cholesterol: 0mg