

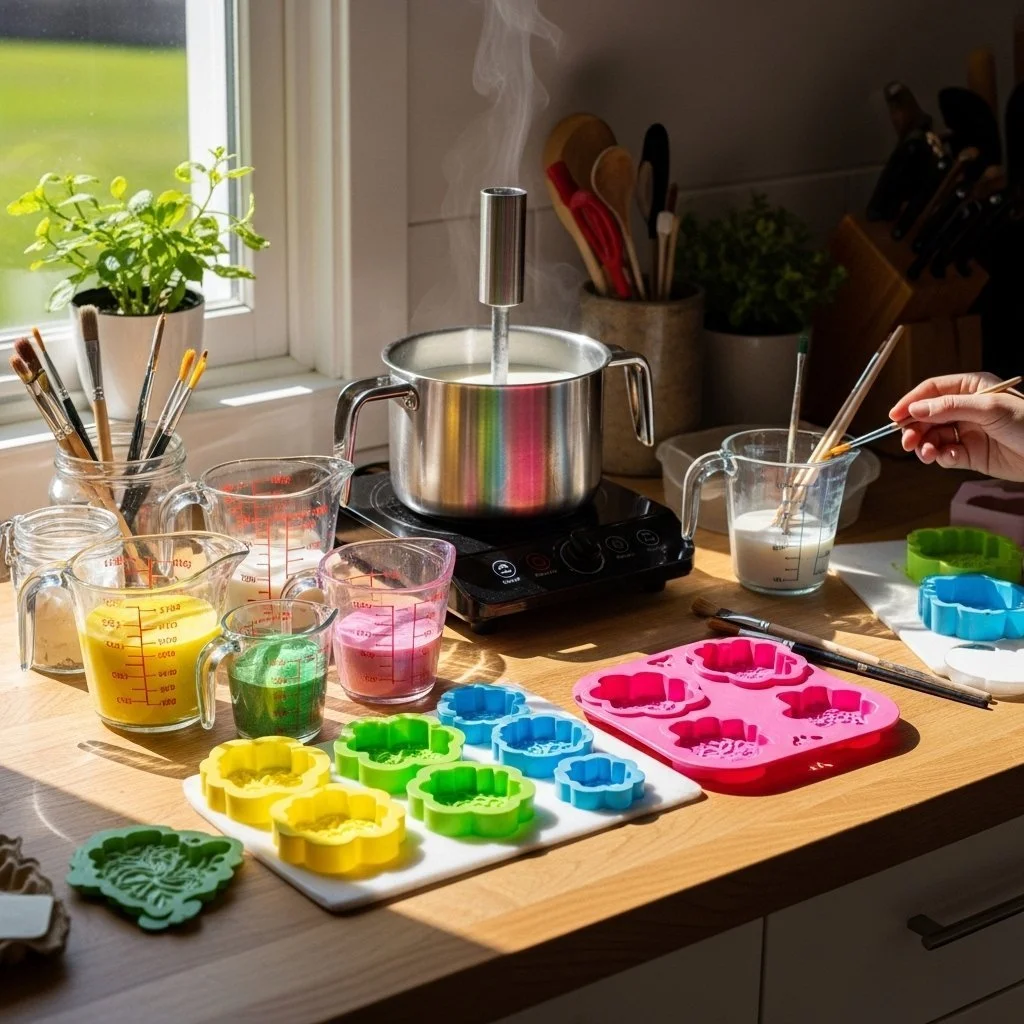
A busy afternoon. The kids ask for something crafty right now. You pull out a small saucepan and a tray, and in twenty minutes the kitchen smells faintly like toast while you make Vibrant Eco-Friendly Bioplastic Suncatchers with things from the pantry. This project fits those moments when you want a quick setup, a calm activity, and a bright result everyone can hang in a window. If you want the exact recipe or a printable guide later, I have a clear pantry-friendly version you can check: bioplastic suncatchers recipe.
Why This Vibrant Eco-Friendly Bioplastic Suncatchers Works So Well

This project feels low-prep because the ingredients live in many kitchens already. You do not need fancy tools or long cooking times. Two tablespoons of starch, a splash of vinegar, and a little heat make a glossy, flexible sheet that dries clear enough to catch light.
It works well with kids because you see progress fast. The mix thickens and goes glossy on the stove, and the thin sheets dry within a day. That steady change keeps attention without long waits.
It is reliable for busy schedules. You can mix, pour, and walk away to tidy up. The drying step happens at room temperature, so you do not babysit an oven. The result looks like glass but feels lightweight and safe to handle.
A Quick Look Before You Begin
Gathering and setting up takes about 5 to 10 minutes. Expect the active cooking step to take 3 to 7 minutes. Drying time varies from a few hours to a full day depending on humidity and thickness.
Setup stays tidy if you line a tray with baking paper and set decorations nearby. Plan for a small mess: a few drips or sticky fingers happen, and that is okay. You will want an adult for the stovetop step, but kids can do most of the stirring, coloring, and decorating.
This project has low heat risk if you keep the pan on low to medium-low and stir. The cleanup uses warm soapy water and a soft cloth. If you keep work in a single area, cleanup finishes fast.
Materials You’ll Need
2 tablespoons tapioca starch or cornstarch
common household item, pantry staple
3 tablespoons water
common household item, easy to measure
1 teaspoon white vinegar
common household item, helps the mix set
1 teaspoon glycerin (optional)
optional, adds flexibility and shine
Natural food coloring or diluted acrylic ink (optional)
optional, for bright or subtle color
Dried flowers, glitter, or small pressed leaves (optional)
optional, for decoration and texture
Step-by-Step Directions

- Gather your tools and line a tray with nonstick baking paper. Arrange your molds and tiny decorations.
Set a pan, spoon, heatproof cup, and sandpaper nearby so you do not hunt for tools while the mix is hot. - In a saucepan, measure 2 tablespoons of tapioca starch and add 3 tablespoons of water. Stir gently until smooth.
Mix until no dry streaks remain. The paste should look milky and pourable. - Add 1 teaspoon of white vinegar and 1 teaspoon of glycerin if using. Stir to combine.
The vinegar helps the bioplastic set; glycerin keeps it from getting too brittle. - Heat the mixture on low to medium-low, stirring continuously until it thickens and becomes glossy. Remove from heat.
Watch for a slow change from cloudy to clear and glossy. You will see it pull away from the pan a little when it is ready. - Transfer to a heatproof measuring cup, let cool slightly, then add color if desired.
Add a drop or two of coloring and stir. Warm liquid takes color well, so you get an even shade quickly. - Pour or spoon the mixture into molds or spread on baking paper, keeping the layer thin.
Thin layers dry faster and look more glass like. Aim for about 1/8 inch or less when possible. - Add any decorations, pressing them gently into the mixture.
Place dried flowers, leaves, or a pinch of glitter while the sheet is still soft. Press shallowly so items sit flush. - Let cool and dry at room temperature for several hours to a day.
Avoid moving the tray while it dries. Thicker spots need more time; check edges gently after a few hours. - Once dry, peel from paper and smooth any sharp edges with sandpaper.
Use fine sandpaper and light strokes. Sanding softens points and gives a neat finish. - Make hanging holes and thread with twine or fishing line.
Use a small hole punch or a heated metal skewer handled by an adult. Keep holes near the top and away from fragile decorations. - Hang in light to enjoy the colors.
Choose a window with good light. The suncatchers look best where they get steady, indirect sun.
The Simple Science or Skills at Work

This project teaches simple cause and effect. Heat and mixing change starch and water into a clear, flexible sheet. The vinegar helps break bonds so the starch sets smoothly. Glycerin acts like a tiny flexible bridge in the mix, so the dried pieces bend instead of snapping.
Kids practice fine motor skills when they stir, pour, and place tiny decorations. They also learn timing and observation by watching the mix go glossy and then set. Handling thin sheets builds care and hand-eye coordination when they sand edges and add hanging holes.
You can use trial and gentle changes to learn. Thicker layers take longer to dry and can wrinkle. Thin layers dry fast and stay flat. Watching those differences helps children connect action with result.
Troubleshooting Common Issues
If the mix stays cloudy or grainy, it needs more heat and gentle stirring. Small lumps melt with steady low heat until the mixture goes glossy.
If your suncatcher cracks when dry, it likely dried too fast or had too little glycerin. Try a slightly thinner layer next time or add the optional glycerin for extra flexibility.
If decorations float or sink unevenly, press them gently after pouring. If an item shifts while the sheet is still hot, lift and reposition quickly with a clean tool.
If edges feel sticky after drying, the layer was probably too thick or the environment was humid. Let it dry longer in a warm, dry spot. You can also pat edges with fine sandpaper to remove tackiness.
Easy Variations to Try
Make a mosaic look by pouring small blobs of different colored mix next to each other. They join lightly as they dry and create soft borders.
Create seasonal shapes by using simple cookie cutters as molds. Cutouts let you make themes without complicated tools.
Try very small pressed leaves and paper confetti for texture. Keep items thin so drying stays even and the suncatcher remains flexible.
If you want a more opaque look, add tiny specks of acrylic ink rather than full color. It gives a frosted effect and hides small imperfections.
For a kid-led session, let older children mix colors into separate cups and layer them on the tray. This boosts creativity and keeps one adult free for stove safety.
Storing or Reusing This Project
Keep finished suncatchers flat when storing. Lay them between sheets of baking paper and place them in a shallow box or between book pages to keep them from bending.
Save leftover mix in a sealed jar for a day if you think you will use it again. Warm it gently and stir before reusing. Do not keep it for long; fresh mix gives the best clarity.
Clean tools with warm soapy water right after use. The mixture scrubs off easier when you do not let it dry in the pan or on spoons.
If a piece chips or you do not like the edge, cut it down and add a new hole to make a smaller ornament. This reduces waste and makes a second chance.
FAQs About Vibrant Eco-Friendly Bioplastic Suncatchers
Will this make a big mess in the kitchen?
I worry about sticky counters and drips. I have done this many times and it usually stays tidy if you keep a tray and paper under your workspace. Wipe spills quickly with a damp cloth. The wet mix rinses off countertops with warm soapy water. Have children work on the tray and keep a bowl of soapy water for quick hand washes. A few sticky spots are normal, but they clean up fast.
Is this safe for young children and what age is best?
This process has a short stove step, so an adult must handle that part. Kids as young as three can help with mixing in a bowl, placing decorations, and sanding edges under supervision. Older kids can pour and place details with a steady hand. Keep hot tools and the pan handled by an adult. Use poking tools only with supervision to avoid burns.
What if I do not have glycerin or want to swap an ingredient?
Glycerin is optional. The mix will still set without it but may feel a touch stiffer. If you skip glycerin, make slightly thinner pieces so they bend less. Do not replace vinegar; it helps the sheet set. The core recipe works with tapioca starch or cornstarch as listed.
My suncatcher looks cloudy or cracked. Did I do something wrong?
Cloudiness often means the mix did not cook enough or had small lumps. Warm it gently and stir until glossy next time. Cracking usually comes from thick pieces or fast drying. Try thinner layers or add the optional glycerin to improve flexibility. Small flaws are normal and you can sand or trim them away.
How long do these last and where do I keep them?
They last quite a while hanging in a window away from direct, strong heat. Store flat between sheets of paper if you take them down. They can yellow a little over months if exposed to harsh sun, so rotate or move them indoors for longer life.
Conclusion
If you want a deeper dive or a different set of step photos, this tutorial gives a clear breakdown and extra tips for making bioplastic suncatchers: DIY Bioplastic Suncatchers: Eco-Friendly Art That Shines Bright!. For a printable pattern and step-by-step PDF you can use on craft days, this listing offers a simple, easy-to-follow file: DIY Bioplastic Suncatchers PDF Tutorial | Fun Science Craft for Kids.
A Final Helpful Note
Take a breath and keep this project flexible. Small missteps do not ruin the fun. The shine and color show up even when edges need sanding or a shape needs trimming. This craft gives you visible progress, quick wins, and room to teach simple science and careful hands. If you keep the stove step to an adult and plan decorations in advance, you will get calm, bright suncatchers that feel special but cost very little. For more creative ideas and related projects, try a few simple variations and let the kids pick colors. You will end up with a string of bright windows and a happy, calm afternoon craft.
PrintVibrant Eco-Friendly Bioplastic Suncatchers

Create beautiful, eco-friendly bioplastic suncatchers using pantry staples. A fun and simple craft project perfect for kids!
- Prep Time: 10 minutes
- Cook Time: 5 minutes
- Total Time: 30 minutes to 1 day (drying time varies)
- Yield: Varies based on mold size
- Category: Craft
- Method: Stovetop
- Cuisine: N/A
- Diet: N/A
Ingredients
- 2 tablespoons tapioca starch or cornstarch
- 3 tablespoons water
- 1 teaspoon white vinegar
- 1 teaspoon glycerin (optional)
- Natural food coloring or diluted acrylic ink (optional)
- Dried flowers, glitter, or small pressed leaves (optional)
Instructions
- Gather your tools and line a tray with nonstick baking paper.
- Measure 2 tablespoons of tapioca starch and add 3 tablespoons of water to a saucepan. Stir gently until smooth.
- Add 1 teaspoon of white vinegar and 1 teaspoon of glycerin if using. Stir to combine.
- Heat the mixture on low to medium-low, stirring continuously until it thickens and becomes glossy. Remove from heat.
- Transfer to a heatproof measuring cup, let cool slightly, then add color if desired.
- Pour or spoon the mixture into molds or spread on baking paper, keeping the layer thin.
- Add any decorations, pressing them gently into the mixture.
- Let cool and dry at room temperature for several hours to a day.
- Once dry, peel from paper and smooth edges with sandpaper.
- Make hanging holes and thread with twine or fishing line.
- Hang in light to enjoy the colors.
Notes
This project is simple and adaptable, perfect for kids with adult supervision for the stovetop step.
Nutrition
- Serving Size: 1 suncatcher
- Calories: 0
- Sugar: 0g
- Sodium: 0mg
- Fat: 0g
- Saturated Fat: 0g
- Unsaturated Fat: 0g
- Trans Fat: 0g
- Carbohydrates: 0g
- Fiber: 0g
- Protein: 0g
- Cholesterol: 0mg