

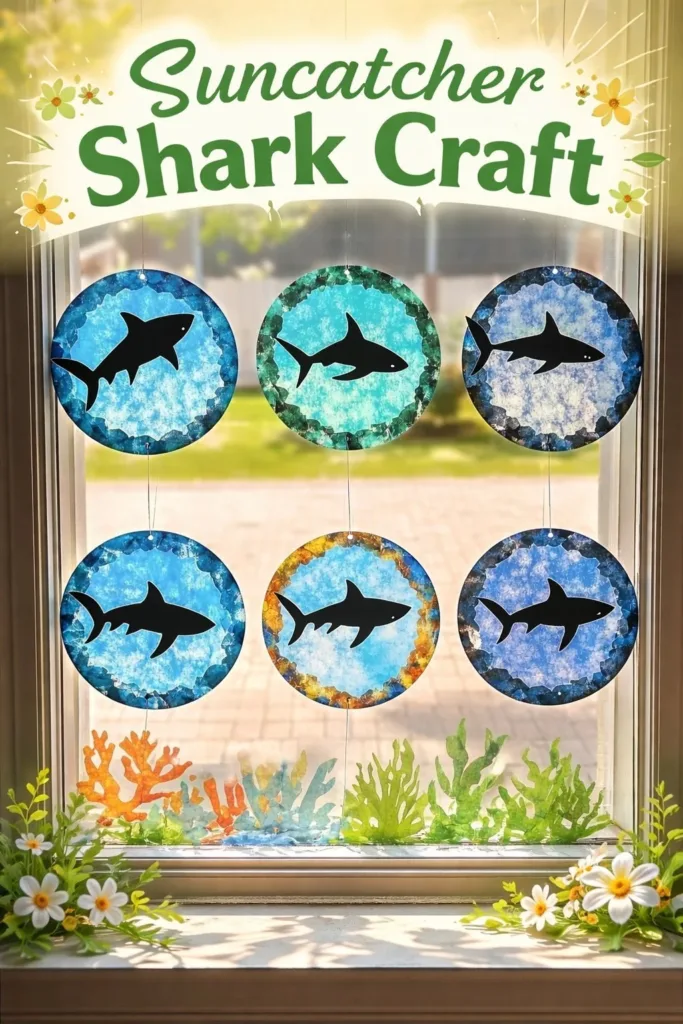
A busy afternoon, a bowl of snacks on the table, and a chorus of “Can we make something now?” usually starts my best simple projects. Today that moment turned into a Suncatcher Shark Craft that kept a small crew happily busy for nearly an hour. We cleared a little counter space, laid down parchment, and turned everyday clear plastic into a bright, sea-ready shark that catches sun and curiosity. If you want more easy ideas to keep that creative buzz going after this one, check out our selection of fun kids craft projects for quick hits and kid-friendly steps.
Why You’ll Love Making Suncatcher Shark Craft

This craft works because it gives quick visible results with very little fuss. You start with a simple shape and end with a playful piece that changes with the light. The materials sit on the shelf until you need them. You do not need a big prep time or fancy tools.
It fits a busy household. Kids can help with tracing and coloring while an adult handles hot steps. The cleanup stays small. The biggest mess is a few marker smudges and a scrap of plastic to toss.
It also behaves. The design hides small mistakes. A bumpy edge or a stray marker line turns into character instead of a failure. That makes the project forgiving and confident-making for kids and grownups alike.
A Quick Look Before You Begin
How This DIY Comes Together
This craft takes about 30 to 60 minutes depending on ages and how many details you add. Setup takes five minutes: parchment, a template, and markers within reach. The workspace stays low-mess if you put down parchment and a towel.
Adult help matters mostly during heating or laminating steps. Kids can do tracing, cutting with supervision, and the coloring. Expect a little waiting time as colors dry or the piece cools. That waiting gives kids a chance to plan patterns or pick beads.
If you want another project that uses light and clear layers in a playful way after this, try the rainbow light idea in our rainbow light show writeup. It pairs well with suncatchers and shows the same gentle science of light and color.
Materials You’ll Need
What You’ll Use for This DIY
Clear or translucent plastic sheets suitable for crafting
common household item or cheap craft supply
Scissors or craft blade
use what you have; scissors work for kids, craft blade for detail
Pencil or water-soluble marker for tracing
easy to erase or wipe away if needed
Shark template or freehand drawing on paper
print a simple template or draw a quick shark shape
Small round hole punch or awl for hanging hole
punch that fits ribbon or string; an awl works with adult help
Permanent markers or translucent paint pens in blues, greys, and white
choose translucent pens so light still passes through
Oven or laminator
either technique seals and flattens the plastic; follow safety notes
Baking tray and parchment paper
use parchment for oven method; it keeps the plastic from sticking
Thin string, fishing line, or ribbon for hanging
choose clear line for floating look, ribbon for a playful finish
Small glass beads or sequins for sparkles (optional)
add tiny highlights for shimmer; optional and fun
A well-ventilated workspace
important for any heat step and marker fumes
Sandpaper or nail file for smoothing edges
lightly file rough bits so the suncatcher hangs safely
Step-by-Step Directions

- Prepare your workspace by laying out parchment paper and gathering your tools.
Spread a sheet of parchment on the counter for a clean, heat-safe surface.
Set scissors, markers, beads, and your shark template within reach. - Trace or draw the shark shape on paper.
Place the template on the paper and trace the outline with a pencil or marker.
Let kids try freehand if they want a goofy or chubby shark shape. - Cut the plastic to match the traced shape.
Place the paper pattern under the plastic and trace lightly if needed.
Cut slowly with scissors or a craft blade; feel for smooth, controlled cuts. - Add color with translucent markers and let dry.
Layer blues, greys, and small white highlights for that ocean look.
Pause to let ink sit; a tacky feel usually means they need a few minutes. - Place small beads or sequins for shimmer if desired.
Set a few beads on the plastic surface where you want tiny sparkles.
Keep them shallow so heat or laminating keeps them in place. - If using an oven method, preheat to low heat and place the suncatcher on parchment, watching it closely.
Put the suncatcher on a baking tray with parchment and into the cool oven, then set to a low temperature.
Watch from the window and be ready to take it out when it softens but before it curls. - For laminator or iron methods, sandwich the plastic between parchment and apply gentle pressure.
Run the sandwich through a laminator on a low setting or press with an iron set low.
Use steady, even passes; avoid heavy pressure that could warp the piece. - Let the suncatcher cool completely before handling.
A warm suncatcher looks glossy and soft; when it cools it firms up and becomes clear.
Cool time gives the plastic a sturdier feel and keeps colors from smudging. - Punch a small hole for hanging and thread string.
Use a small hole punch or an awl to make a neat hole near the top.
Thread thin string, fishing line, or ribbon and tie a secure knot. - Hang the suncatcher in a sunny spot.
Place it near a window where direct light hits for at least part of the day.
Watch the colors glow and adjust the height to catch the eye.
The Learning Behind This DIY
Skills This Activity Supports

This craft teaches simple cause and effect. When kids add translucent color to clear plastic, they see how light changes the look. That moment of discovery sticks. It makes them curious about how materials behave.
Children practice fine motor skills while tracing and cutting. Holding a small marker and coloring with care builds hand strength and control. Punching a hole and threading string improves coordination with a bit of patience.
You show simple science without jargon. Heat fuses or presses the plastic into shape. Light passes through the translucent colors and beads and creates brighter, deeper hues. Those tiny truths invite questions and playful exploration.
Troubleshooting Common Issues
If Something Doesn’t Go as Planned
If colors look patchy, wait longer for ink to dry before heating or laminating.
Patience with drying time prevents smudges and muddy color mixing.
If the plastic curls in the oven, it likely got too hot or moved too fast.
Reduce the heat slightly, take the tray out sooner, and flatten under parchment while cooling.
If beads shift during heating, secure them with a tiny drop of hot glue on the back before the heat step.
You can also use the laminator method to lock them in place more gently.
If edges feel sharp after cutting, file them lightly with sandpaper or a nail file.
A few minutes of sanding smooths the edge and makes the piece safe to handle.
If the punched hole cracks, move the hole a little closer to the center and reinforce with a small dot of clear glue around the hole.
Let the glue dry fully before adding the hanging string.
Easy Variations to Try
Simple Ways to Change It Up
Turn the shark into a school of smaller fish by tracing tiny fish shapes on one sheet.
Kids love creating a mobile of different shapes and sizes to hang at varying lengths.
Make a glow-in-the-dark version by using a few glow pens or paint for eyes and highlights.
The daytime sun show still works and the pieces take on a soft glow at night.
Add a playful scene by layering two plastic shapes, one with the shark and one with seaweed.
Sandwiching them can give depth and a basic 3D effect without complicated steps.
Try seasonal trims like ribbon tails for a birthday theme or hang several suncatchers as a window garland.
Small changes like ribbon color create a new look for parties or holidays.
Storing or Reusing This Project
What to Do With It After
Store finished suncatchers flat to avoid bending or cracking.
A shallow box or drawer with a piece of parchment between items keeps them safe.
Save scraps of clear plastic for small practice shapes or future projects.
Trim off used edges and keep a labeled envelope for “practice pieces” or tiny ornaments.
If a suncatcher loses a bead or the string wears, repair it simply.
Swap the string, re-punch a hole slightly inward, or add a small drop of glue to reattach details.
Recycle larger scrap pieces if your local program accepts plastic craft sheets.
If not, reuse them as templates or protective surfaces for messy projects.
FAQs About Suncatcher Shark Craft
Will this make a big mess? I have little kids.
You should expect minimal mess. Most of the work uses markers and a bit of plastic shredding. Lay down parchment and a towel and you will contain most ink marks and scraps. Children usually leave tiny bits of plastic; a quick sweep or a wipe with a damp cloth cleans it up. If you worry about marker stains on hands, keep wet wipes nearby and remind kids to color on the plastic, not their clothes.
Is this safe for younger children with the oven or laminator step?
Heated steps require an adult. Let kids do everything up to the heat step and hand the piece to an adult for the oven or laminator. Work in a well-ventilated space and use low heat. If you want an entirely heat-free route, the laminator method uses little heat and often feels safer under adult supervision. I have done the laminator method many times with a teen helper handling the run-through while younger kids watched.
Can I swap markers or paints if I do not have translucent markers?
You can use any translucent paint pens or markers designed for plastics. Regular opaque markers may hide light and change the suncatcher’s look. If you only have opaque markers, test on a scrap piece to see the effect. It rarely fails, but the result looks denser and less glowing than the translucent variety. Be honest about the change and enjoy the different look rather than expecting the same glow.
How long will these last in a window?
With normal indoor conditions they last months or longer. Sun will slowly fade some colors over a long time. If you hang them where they get very strong midday sun for years, expect gradual fade. You can refresh a faded area with another thin layer of translucent marker and a quick reseal if needed.
Can I make more than one at a time? How many can I do in one session?
Yes, you can make multiples. Space on a baking tray, parchment sheet, or laminator pouch limits you. We usually make three to six at a time with one adult handling oven or lamination. The kids color multiple pieces and wait while the adult runs the heat step. The rhythm keeps everyone busy without chaos.
A Final Helpful Note
One Last Tip Before You Go
Take your time with the coloring. The best glow comes from deliberate layers, light taps of white for shine, and a few small sparkles placed with care. Enjoy the in-between moments when the piece cools or dries. Those pauses let kids observe and chat about color and light. Remember that imperfect edges and a bead that slid a little off make the suncatcher personal.
Trust the process. This project rewards patience and small attention to detail. If something slips, treat it as a design choice. You will get more comfortable with the heat or laminator step the second time you make a set.
Conclusion
If you want a different shark shape or a step-by-step photo guide, take a look at the playful example from Shark Suncatcher Craft – One Simple Party for inspiration. For a larger, bolder version and another method, the tutorial at Giant Shark Suncatcher Craft | And Next Comes L shows a successful variation that might spark new ideas.
PrintSuncatcher Shark Craft

Create a playful suncatcher shark using simple materials that catch sunlight and imagination.
- Prep Time: 5 minutes
- Cook Time: 30 minutes
- Total Time: 60 minutes
- Yield: 1 suncatcher
- Category: Craft
- Method: Crafting
- Cuisine: N/A
- Diet: N/A
Ingredients
- Clear or translucent plastic sheets suitable for crafting
- Common household scissors or craft blade
- Pencil or water-soluble marker for tracing
- Shark template or freehand drawing on paper
- Small round hole punch or awl for hanging hole
- Permanent markers or translucent paint pens in blues, greys, and white
- Oven or laminator
- Baking tray and parchment paper
- Thin string, fishing line, or ribbon for hanging
- Small glass beads or sequins for sparkles (optional)
- Sandpaper or nail file for smoothing edges
Instructions
- Prepare your workspace by laying out parchment paper and gathering your tools.
- Trace or draw the shark shape on paper.
- Cut the plastic to match the traced shape.
- Add color with translucent markers and let dry.
- Place small beads or sequins for shimmer if desired.
- If using an oven method, preheat to low heat and place the suncatcher on parchment, watching it closely.
- For laminator or iron methods, sandwich the plastic between parchment and apply gentle pressure.
- Let the suncatcher cool completely before handling.
- Punch a small hole for hanging and thread string.
- Hang the suncatcher in a sunny spot.
Notes
This craft teaches simple science, creativity, and fine motor skills without significant mess.
Nutrition
- Serving Size: 1 suncatcher
- Calories: N/A
- Sugar: N/A
- Sodium: N/A
- Fat: N/A
- Saturated Fat: N/A
- Unsaturated Fat: N/A
- Trans Fat: N/A
- Carbohydrates: N/A
- Fiber: N/A
- Protein: N/A
- Cholesterol: N/A