

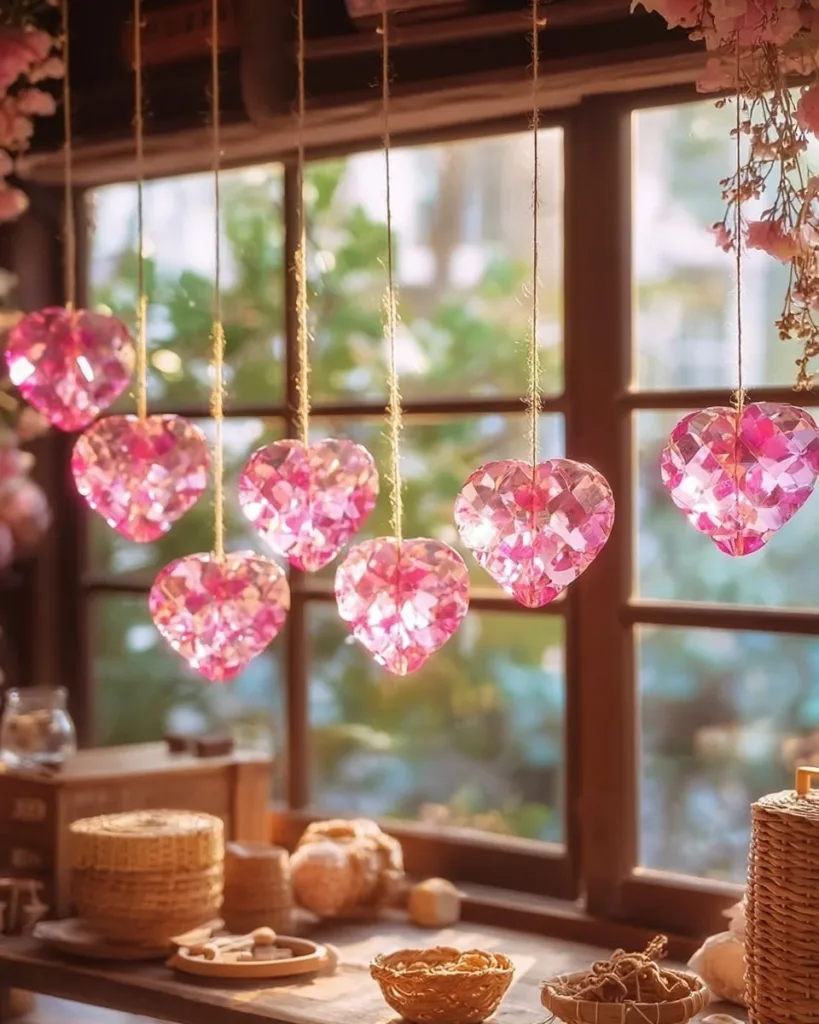
A busy afternoon, a child at the kitchen table asking for something fun, and you with a kettle and a jar on the counter those are the exact moments when Pink Crystal Heart Ornaments feel like the best idea. This project fits into quick pauses between homework and dinner, and it turns everyday pantry items into a little bit of magic.
If you have a clear jar, some alum or Epsom salt, and a small wooden heart or mold, you can make ornaments that dry into pretty pink crystals and hang on a ribbon. It helps to know this is gentle, hands-on, and forgiving; if you have questions while you work, the process is easy to pause and return to. For another kid-friendly crystal idea that uses simple kitchen supplies, you can compare techniques with our pink eggshell crystal geodes project for inspiration.
Why You’ll Love Making Pink Crystal Heart Ornaments

This project feels low-prep because most items come from the kitchen or a craft bin. You do not need specialized tools, and you can set up in under ten minutes.
It stays approachable. The steps are clear and repeatable, so results usually show within days not weeks.
It fits real life. You can start it in the afternoon, check it in the morning, and let it grow while you handle other tasks.
The Simple Appeal of Pink Crystal Heart Ornaments
A small setup gives a visible payoff. Kids see crystals start to cling to a heart within the first day or two, and that makes cleanup feel worth it.
You get reliable outcomes when you follow simple cues like water temperature and saturation. Even when crystals form slowly, they still look lovely and unexpected.
This project works well for a range of ages. With a bit of adult help for the hot water, older kids can manage most of the steps alone.
A Quick Look Before You Begin
Plan for about 15 minutes of active setup and then several days of hands-off crystal growth.
Set the jar on a towel or tray to catch spills. Expect a little white residue on the jar rim as crystals form.
You will need an adult for the hot water step. After that, the activity becomes gentle: stirring, tying a string, and watching.
Mess is modest. Crystals leave a powdery dust when dry, and the jar may get cloudy. A damp cloth cleans most of it easily.
Materials You’ll Need
Clear glass or heatproof jar
Small heart-shaped molds or flat wooden/foam hearts
Food coloring or mica powder (optional)
Alum, borax, Epsom salt, or baking soda
Hot water
String or thin ribbon
Small weight or paperclip
Measuring spoons
Heatproof spoon
Tweezers or chopsticks
Protective gloves and eye protection (recommended)
Small tray or towel
Each item is a simple household supply. If you do not have a small wooden heart, a flat foam shape works fine. Food coloring adds color, mica gives a soft shimmer, and the listed salts change crystal texture a little but all work.
Step-by-Step Directions

- Prepare your workspace and materials. Lay a towel or tray under your jar and set all items nearby.
Place the jar on the towel, keep the measuring spoons and spoon at hand, and move curious pets away.
Clear counter space so the jar sits undisturbed while crystals grow. - Create or prepare heart shapes using molds or wooden hearts.
If you use molds, press in a flat heart and let it dry if needed before use.
For wooden or foam hearts, sand a rough edge or paint first; allow any paint to dry fully. - Heat water in a kettle until nearly simmering.
You want water that is hot to the touch but not violently boiling.
Handle the kettle carefully and keep children at a safe distance for this step. - Dissolve the crystal-forming substance in the warm water until saturated.
Measure a spoonful at a time and stir; you will see the powder disappear as it dissolves.
When no more will dissolve and some powder settles, you have reached saturation. - Add food coloring gently if desired and stir until evenly mixed.
A drop or two goes a long way for a soft pink tone; stir slowly to avoid bubbles.
If you prefer mica, stir just enough to lift a shimmer into the solution without clumping. - Tie a string to the heart shape and suspend it in the jar using a chopstick.
Tie a small knot or loop so the string sits securely on the heart and hangs straight.
Rest the chopstick across the jar mouth to hold the heart in the center and off the jar sides. - Add a small weight if necessary to keep the heart suspended.
Use a paperclip or tiny washer tied at the string’s end to balance the heart orientation.
Make sure the heart does not touch the jar bottom or sides; that keeps crystals even. - Cover the jar lightly and place it in a calm spot.
A loose paper towel or lid that allows some air movement works well.
Leave the jar where pets and drafts will not bother it. - Check once or twice a day as crystals form over time.
Look for tiny sparkles along edges and soft clusters forming on surfaces.
If the solution looks cloudy or crystals form too fast, note it and adjust the next time. - When satisfied with the growth, remove the heart and let it dry.
Use tweezers or a chopstick to lift the heart carefully and set it on a tray or towel.
Let it air dry until fully hardened; this usually takes a day or two depending on humidity. - Seal if desired for longer life and store in a cool, dry place.
A spray sealant or clear craft varnish will help prevent flaking and dust.
Store ornaments away from direct sunlight to preserve the pink tone.
What Kids Practice While Making This
This activity helps kids notice cause and effect. They see how warm water dissolves salt and how cooling or evaporation brings crystals back out of the solution.
Fine motor skills improve as children tie strings, pour carefully, and place hearts into jars without touching the liquid.
Observation and patience come naturally because the project rewards daily looking and comparing progress photos or notes.
Simple chemistry shows up in a friendly way. Kids learn that many solids dissolve in water and later come back as solid crystals when conditions change.
The Learning Behind This DIY

You see a few basic science ideas here. Dissolving happens when warm water gives particles energy and spreads them apart. As the solution cools and water evaporates, particles find each other again and lock into repeating crystal patterns. The exact pattern depends on the salt type. Alum tends to produce clear, sparkly crystals. Epsom salt often gives needle-like crystals. Baking soda and borax create different textures, so you get variety by trying one at a time.
Watching crystals grow also teaches measurement and control. If you add too much powder too fast, you get undissolved grit instead of smooth saturation. If a heart touches the jar, crystals form unevenly on that side. These are small problems you can learn from and fix next time.
Troubleshooting Common Issues
If crystals do not form, check your solution. The most common cause is under-saturation. Warm more water and add more salt a spoonful at a time until you see small particles remain and do not dissolve.
If crystals look foggy or the jar clouds up, tiny air bubbles or small undissolved bits likely formed. Pour the solution through a coffee filter into a clean jar next time to remove the grit.
If crystals form on the string instead of the heart, the string might touch the jar side or the heart sits at an angle. Re-tie the string so the heart centers and add a small weight to keep it steady.
If crystals form too quickly into dull clumps, your solution may have cooled suddenly or had impurities. Try heating gently and stirring thoroughly to reach a smooth saturation, then let it sit undisturbed.
If the heart falls into the jar, lift it gently with tweezers, let crystals settle, and try again with a stronger knot and a small weight. A slipped knot is a common, fixable slip-up.
Easy Variations to Try
Try a layered color approach by letting a thin crystal crust form, then carefully adding a second, lightly colored solution. The result has streaks and depth.
Use mica powder instead of liquid food dye for a pearly finish. Stir sparingly so mica disperses and does not clump on the heart.
Try different salts one at a time to compare textures. Make small test jars with alum, Epsom salt, and baking soda to see which look you prefer.
Make a set: create several hearts at once with slightly different hues and hang them as a garland once dry.
Seasonal twist: use the same process but shape stars or leaves for other holidays and decorations.
Storing or Reusing This Project
Once sealed, crystal hearts store nicely in a cool, dry box or hung gently in a closet. Avoid humidity because it softens crystals and can make them flake.
If you want to reuse materials, dissolve the old crystals in warm water and strain the cloth and tools. Wooden hearts get one good run; foam shapes can warp with repeated wetting, so budget replacements.
Clean the jar with hot water and a gentle scrub. A vinegar soak helps remove stubborn white residue. Let the jar air dry fully before another project.
Save excess solution in a labeled jar for a day or two if you want to restart a failed attempt quickly. Do not keep it for long because evaporation and contamination change its behavior.
FAQs About Pink Crystal Heart Ornaments
Will this make a big mess?
I worry about cleanup. You will see some white powder and occasional drips, but the towel under the jar catches most of it. I always plan a 10-minute cleanup after removing hearts. Warm water and a sponge handle the jar and tools easily. If crystals flake later, wipe with a damp cloth rather than scrubbing hard.
How old should my child be to do this?
Kids about six and up can do most of the gentle parts like tying string and watching growth. An adult should handle the hot water and initial dissolving step. Older kids can work more independently once the solution cools. I have done this with preschoolers while I did the hot steps and they loved watching the crystals appear.
Can I swap the crystal ingredient if I only have baking soda?
Yes. Baking soda will form softer crystals and a different look. It often grows slower and gives a frosty coating rather than large clear crystals. Be honest about texture differences; expect variation but still pretty results.
What if my crystals look different than the pictures?
Crystals vary with humidity, room temperature, and how saturated the solution was. That variety is normal. Focus on whether the heart has a noticeable crust of crystals and feels more textured when dry. Those are real, successful outcomes even if not perfectly clear.
How long will the ornaments last?
With a light sealant they last months or years if stored away from humidity. Untreated crystals can flake and dull sooner. I keep a small box of finished hearts and occasionally touch up the seal if I see wear.
A Final Helpful Note
Trust small mistakes; they teach what to change next time. You will likely get at least one heart that surprises you with perfect sparkle and another that simply becomes a pretty, textured keepsake. Enjoy the watching part as much as the finished ornament.
Conclusion
If you want a ready-made inspiration or a decorative option to pair with your own handmade hearts, see these pink crystal heart listings on Amazon for ideas on shapes and finishes. For a decorative hanging charm idea that pairs well with a crystal ornament, consider the YIDEXIN Bling Car Mirror Charm as a style reference.
PrintPink Crystal Heart Ornaments

Create beautiful pink crystal heart ornaments using simple kitchen supplies. Perfect for kids and a fun science project.
- Prep Time: 15 minutes
- Cook Time: 4320 minutes
- Total Time: 4335 minutes
- Yield: Varies
- Category: Crafts
- Method: DIY
- Cuisine: N/A
- Diet: N/A
Ingredients
- Clear glass or heatproof jar
- Small heart-shaped molds or flat wooden/foam hearts
- Food coloring or mica powder (optional)
- Alum, borax, Epsom salt, or baking soda
- Hot water
- String or thin ribbon
- Small weight or paperclip
- Measuring spoons
- Heatproof spoon
- Tweezers or chopsticks
- Protective gloves and eye protection (recommended)
- Small tray or towel
Instructions
- Prepare your workspace and materials.
- Create or prepare heart shapes using molds or wooden hearts.
- Heat water in a kettle until nearly simmering.
- Dissolve the crystal-forming substance in the warm water until saturated.
- Add food coloring gently if desired and stir until evenly mixed.
- Tie a string to the heart shape and suspend it in the jar using a chopstick.
- Add a small weight if necessary to keep the heart suspended.
- Cover the jar lightly and place it in a calm spot.
- Check once or twice a day as crystals form over time.
- When satisfied with the growth, remove the heart and let it dry.
- Seal if desired for longer life and store in a cool, dry place.
Notes
This project is ideal for kids aged six and up with adult supervision for the hot water step. It’s a great way to practice observation, patience, and basic science concepts.
Nutrition
- Serving Size: 1 ornament
- Calories: 0
- Sugar: 0g
- Sodium: 0mg
- Fat: 0g
- Saturated Fat: 0g
- Unsaturated Fat: 0g
- Trans Fat: 0g
- Carbohydrates: 0g
- Fiber: 0g
- Protein: 0g
- Cholesterol: 0mg