

A rainy afternoon turned busy playtime into a gentle science lesson when two tired kids asked for something to do right now. I cleared a small corner of the kitchen, set out jars and a spool of wire, and we dove into making Crystal Hearts.
The project fits a last-minute request perfectly: it uses things you probably already have, it takes little hands and a calm adult, and it rewards you with sparkly, gift-ready hearts that dry into light-catching keepsakes. If you like projects that sit quietly while the magic happens, this one works. For another slow, satisfying crystal activity that uses simple parts and tasty colors, try our pink eggshell crystal geodes to compare how different frames and textures change the result.
Why You’ll Love Making Crystal Hearts

This project asks for a few clear things and gives you a real, hands-on result without drama. You shape a heart frame, mix a warm solution, and let crystals grow while you do other small tasks. It fits into a busy day because most of the time is waiting, not active work. You prepare in minutes and enjoy the reveal later.
Families like it because it combines making and quiet science. Kids see crystals form and learn a simple cause and effect. The clean-up stays manageable if you set a towel or tray under your jar. The materials are affordable, and you can repeat the activity without much fuss.
This activity also works for short attention spans. Children do a fun part at the start and then return later to watch the crystal texture change. The reward at the end feels earned, and the finished heart looks like you spent more time than you did.
A Quick Look Before You Begin
Plan for about 10 to 20 minutes of active prep and then a few hours of waiting. The first steps happen by the sink or stove with an adult nearby. After that you move the jar to a safe spot and check in for short moments as crystals appear.
Set up on a towel or tray to protect counters from spills. Expect small drips when you lift the heart out of the jar. The mess level stays low if you pour carefully and keep the jar on a stable surface.
Adult help matters for the warm water step. You do not need boiling water. Warm, comfortably hot water works best because it dissolves borax or baking soda quickly and creates the glossy solution that crystals like. A thermometer helps if you have one, but you do not need one.
Materials You’ll Need
Clear glass jars or heatproof containers
common household item; choose straight-sided jars for easy viewing
Borax powder or baking soda
easy substitute; borax makes bigger crystals, baking soda works if you prefer a gentler option
Clean water
tap water is fine; warm it for better results
Wire, pipe cleaners, or cookie cutter shapes for heart frame
wire gives sturdy frames; pipe cleaners are kid-friendly and bend easily
String or thread
thin and not stretched; long enough to suspend the heart without touching the bottom
Small spoon
for stirring and measuring dissolved powder
Tray or towel (optional)
helps catch drips and keeps the counter dry
Thermometer (optional)
useful but not required; warm, not boiling, is the cue
Food coloring or liquid watercolors (optional)
add sparing drops for subtle color; a little goes a long way
Tweezers or chopstick
handy to steady the heart when you lift it from the jar
STEP-BY-STEP DIRECTIONS

- Make your heart frame by bending wire or shaping a pipe cleaner into a heart with a small loop at the top.
Create a smooth heart shape, keeping the loop tight for hanging. If kids help, use pipe cleaners so fingers do the shaping easily. - Warm enough water in a jar until it’s comfortably hot but not boiling.
Test by touching the outside of the jar; it should feel warm to the wrist. Too hot risks burns and too cool slows crystal growth. - Slowly stir in borax powder or baking soda until fully dissolved, creating a glossy surface.
Add powder a spoonful at a time and stir until the water looks glassy and clear. If tiny grains remain, keep stirring gently. - Tie the string to the heart frame ensuring it hangs freely in the jar without touching the bottom.
Measure so the heart sits a bit above the jar base when suspended. Trim any excess string to avoid tangles. - Suspend the heart frame in the jar so it sits just above the jar base.
Rest the string over the jar rim or use a pencil across the top to hold the loop in place. Make sure the heart does not touch the jar sides. - Cover and place in a safe spot to allow crystals to form, usually within a few hours.
A covered jar keeps dust out and slows evaporation for more even crystals. Put it where curious hands cannot bump it. - Gently check the crystals and remove the heart when ready, letting excess solution drip back.
Lift the heart carefully with tweezers or by the string. Hold it over the jar so drips return and you avoid a sticky counter. - Rinse the crystal heart in clean water to remove loose crystals and allow it to dry.
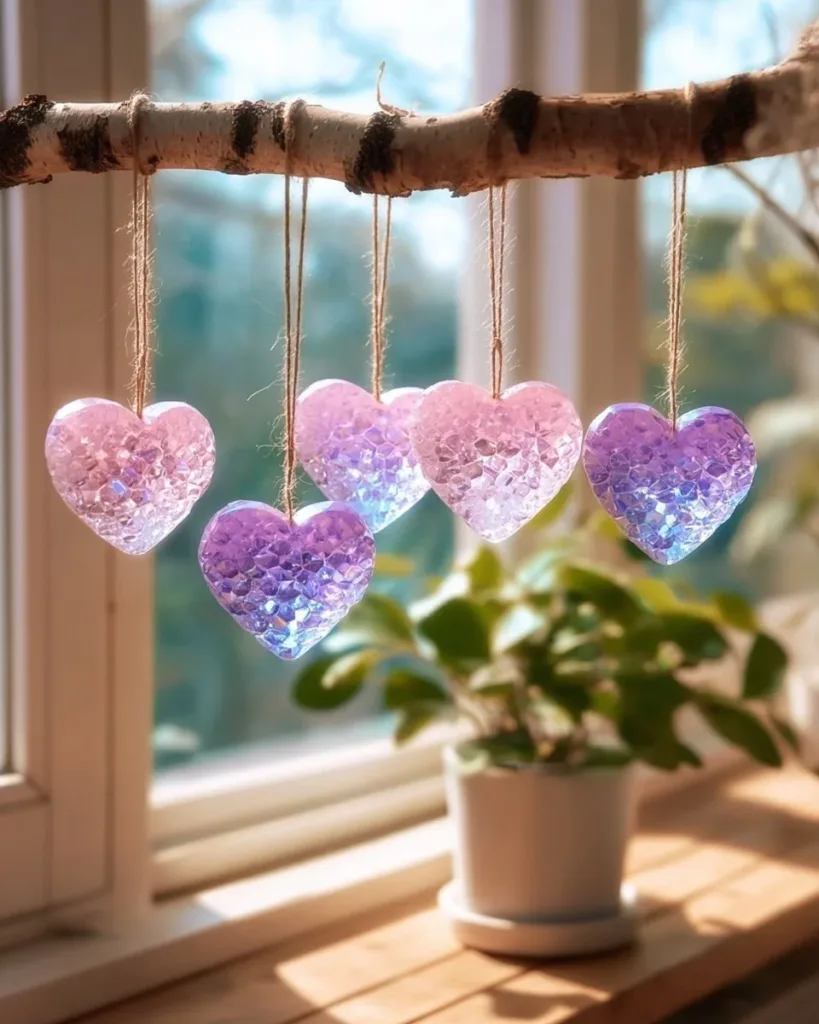
A quick, gentle rinse removes surface grains. Lay the heart on a towel to dry for several hours or overnight. - Display the finished hearts in soft light or as gifts, enjoying the slow crafting process.
Place them near a window or hang them as little ornaments. They catch light nicely and make thoughtful presents.
The Simple Science or Skills at Work

This activity teaches a few quiet, useful things. The main idea involves dissolving more solute into warm water than it can hold when cooled. As the solution cools, the extra material comes out of solution and joins existing bits, forming crystals. You see those crystals grow on the frame because the frame gives the molecules a surface to assemble on.
Hands get practice with fine motor skills as kids bend wire, tie string, and use tweezers. Measuring spoons and gentle stirring build coordination and patience. Kids notice timing and texture: the glossy surface while stirring feels different than the matte crystals that form later.
You can explain the process simply. The warm water hides the powder. When it cools, the powder needs somewhere to go and it builds tiny repeating shapes. That repeating shape becomes the sparkly surface you love.
Troubleshooting Common Issues
If crystals never appear, the solution may not have been concentrated enough. Warm the water again and stir in another small spoonful until the surface looks glossy. Sometimes a jar that cools too quickly also slows growth; cover the jar to help.
If the heart drops to the bottom, the string was too short or the knot slipped. Remove it and reshape the string, or use a pencil across the top of the jar to hold the string steady. If the heart floats instead, the frame may trap air; gently shake or press it down so it sits in the solution.
If you get powdery flakes that fall off, the crystal layer may not have bonded strongly. Let the heart sit longer in the solution before lifting next time, and rinse gently after removal. If you used food coloring and the color looks uneven, stir less vigorously during the cooling stage or add color in smaller drops.
If the solution becomes cloudy or has a film, you likely added too much dirt or dust. Use a fresh jar and clean tools next time and cover the jar while it grows. If you smell anything odd, discard the mixture and start fresh; the safe route beats holding onto something questionable.
Easy Variations to Try
Add a drop or two of food coloring before you suspend the heart for subtle pastel tones. Use only a little so crystals remain visible and delicate.
Make smaller frames from the leftover wire and grow mini hearts in espresso cups. They take the same time but feel perfect for tiny hands.
Try a cookie cutter heart pressed flat on the jar bottom as a frame. This can create a broader, flatter crystal shape that looks like a gem. Use a pencil or chopstick across the jar mouth to suspend it if needed.
Mix borax for big, sparkly crystals or baking soda for a gentler, more granular surface. Testing both on the same day helps kids see how ingredients change the result and teaches cause and effect.
If you want to avoid borax for younger kids, try the no-borax approach in our related idea for rainbow crystal rocks without borax and compare textures.
Storing or Reusing This Project
Store finished hearts where they will not get knocked around. A shallow box with tissue works well for small ornaments. Keep them out of humid spaces to avoid slow degradation.
You can reuse clear jars after rinsing them thoroughly. Let them air dry on a towel and then store them for the next batch. If any residual crystals remain in the jar, soak in warm water and wipe away before the next use.
Leftover solution loses strength as it cools and as crystals form. It rarely produces strong crystals twice, so use fresh solution when you try again. Save small leftover frames and string for future projects to reduce waste.
If a heart breaks, you can repurpose the pieces as sparkly accents in a shadow box or glue onto a simple card for a homemade decoration.
FAQs About Crystal Hearts
Will this make a big mess on my counter?
I worry about drips and crystals everywhere.
This only makes a little mess if you plan for it. Put the setup on a towel or tray and place the jar on a steady surface. When you lift the heart, hold it over the jar so drips fall back. If a few drops land on the towel, that towel catches them. A quick wipe with a damp cloth cleans the counter. I speak from experience: the worst part is a tiny sticky ring around the jar base, and it cleans easily.
Is borax safe for kids to use?
Borax works well for larger crystals, but you must supervise. Treat borax like any household chemical: avoid touching the face or mouth, wash hands after handling, and do not let kids handle it alone. If you prefer a gentler option, baking soda also works and reduces the need for strict adult handling. I always keep borax out of reach between steps, and we wash hands right after we touch frames or jars.
How long until I can remove the heart?
You start to see crystals in a few hours, but the strongest, fuller layer develops after several hours or overnight. If the crystals look lacy and light after two hours, let the heart sit longer. If you like the look early, go ahead and remove it gently. I often check after three hours and make the call based on how dense the crystals seem.
What if my crystals look dusty or fall off when I rinse them?
Dusty, flaky results usually mean the crystals did not bond to the frame strongly. Let the heart sit in the solution longer next time and avoid lifting it during growth. Rinse gently, not under a hard stream. I learned to tilt the jar and lift slowly; sudden moves dislodge loose crystals.
Can I make these as gifts and will they last?
Yes, they make sweet, handmade gifts if they get gentle care. Store them away from humidity and direct handling. If humidity softens the edges, place a small silica packet nearby in storage or keep them in a closed box. They do not last forever but keep well for months with careful handling.
A Final Helpful Note
Take your time and enjoy the waiting. The project rewards patience, and the best results come when you resist checking too often. Trust the simple steps and tidy setup. If a step feels off, you can usually fix it with small adjustments rather than starting over. You do not need perfect crystals to enjoy this; imperfect sparkles tell the story of hands and moments spent together. Keep a spare jar and a few extra pipe cleaners nearby so you can try again easily.
Conclusion
For a detailed, kid-friendly walkthrough that complements this guide, see the project on Borax Crystal Hearts (Easy Crystal Growing Experiment for Kids) which shows pictures and timing notes. If you want ready-made heart frames or decorative hearts to compare, check out the selection listed at Crystal Hearts – Amazon.com for inspiration.
PrintCrystal Hearts

A fun and educational activity for children to create beautiful crystal heart keepsakes using common household materials.
- Prep Time: 20 minutes
- Cook Time: 120 minutes
- Total Time: 140 minutes
- Yield: 2-4 crystal hearts
- Category: Craft
- Method: Crafting
- Cuisine: N/A
- Diet: N/A
Ingredients
- Clear glass jars or heatproof containers
- Borax powder or baking soda
- Clean water
- Wire, pipe cleaners, or cookie cutter shapes for heart frame
- String or thread
- Small spoon
- Tray or towel (optional)
- Thermometer (optional)
- Food coloring or liquid watercolors (optional)
- Tweezers or chopstick
Instructions
- Make your heart frame by bending wire or shaping a pipe cleaner into a heart with a small loop at the top.
- Warm enough water in a jar until it’s comfortably hot but not boiling.
- Slowly stir in borax powder or baking soda until fully dissolved, creating a glossy surface.
- Tie the string to the heart frame ensuring it hangs freely in the jar without touching the bottom.
- Suspend the heart frame in the jar so it sits just above the jar base.
- Cover and place in a safe spot to allow crystals to form, usually within a few hours.
- Gently check the crystals and remove the heart when ready, letting excess solution drip back.
- Rinse the crystal heart in clean water to remove loose crystals and allow it to dry.
- Display the finished hearts in soft light or as gifts, enjoying the slow crafting process.
Notes
Use a towel or tray to catch drips. Adult supervision is required for the warm water step.
Nutrition
- Serving Size: 1 crystal heart
- Calories: N/A
- Sugar: 0g
- Sodium: 0mg
- Fat: 0g
- Saturated Fat: 0g
- Unsaturated Fat: 0g
- Trans Fat: 0g
- Carbohydrates: 0g
- Fiber: 0g
- Protein: 0g
- Cholesterol: 0mg