

A busy afternoon, a kitchen counter with a kettle on, and three kids asking for something to do right now is a familiar start to many of our projects. I pulled out a bowl of clean seashells and a jar, and that simple moment turned into DIY Crystal Seashells an easy, low-prep activity that fills an hour with quiet wonder and gives you a keepsake at the end. If you want a calmer craft than a glue-and-glitter marathon, or a quick science moment between errands, this one fits right in. For a color-focused variation later, I like to pair it with our turquoise version for a coordinated display, which you can read about at turquoise crystal seashells tutorial.
Why You’ll Love Making DIY Crystal Seashells

This project works because it uses things many people already have or can pick up easily. The main material, borax, dissolves in hot water to make a clear solution that crystals out as it cools. The shells act like tiny cliffs for those crystals to grow on, and you end up with a sparkly shell that looks special without a lot of effort.
It feels low-prep because you do most of the work at the start washing shells, boiling water, and tying string. After that, the jars sit quietly. That makes this activity great for busy days. While the jars rest you can tidy up the kitchen or read a book nearby. The project fits short attention spans and real family schedules.
This craft is approachable. You do not need fancy tools. Kids can help wash shells, stir the solution, and choose colors. Adults handle the hot water and the boiling part. That balance keeps it safe and fun.
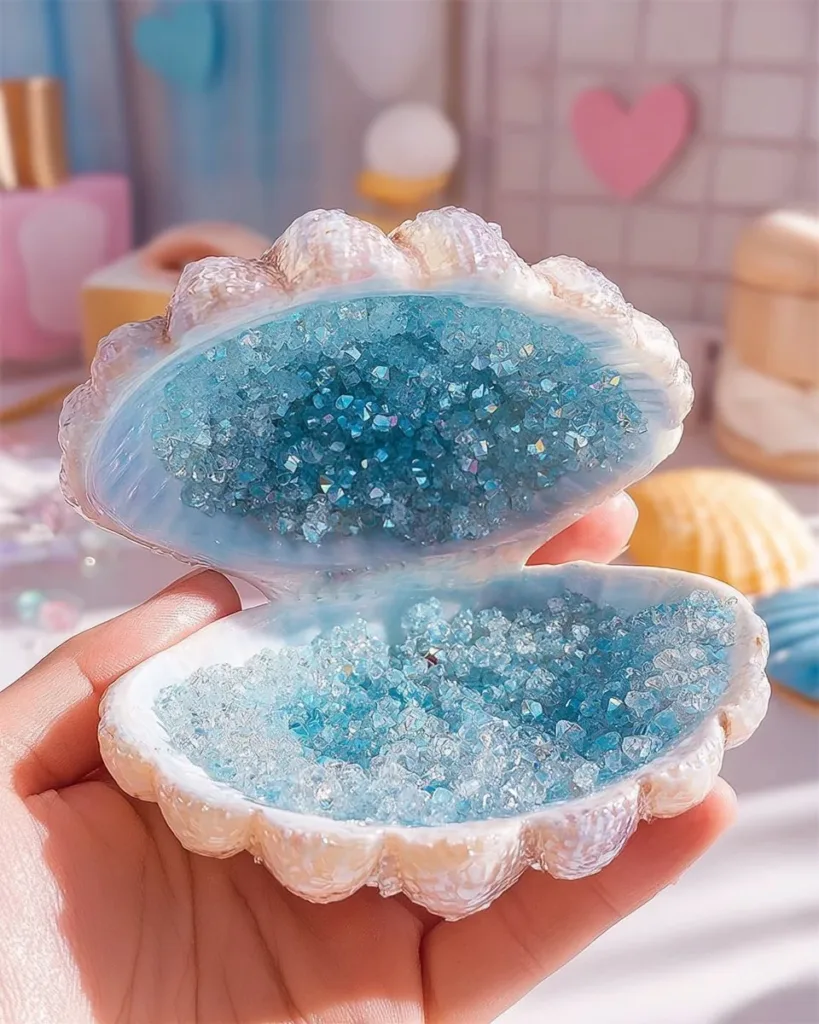
Finally, it gives real results. You will see crystals form, and the finished shells make nice keepsakes or simple decor. The results look satisfying even when they are not perfect, and small imperfections often make each shell feel unique.
A Quick Look Before You Begin
Plan for about 10 to 20 minutes of hands-on time and then several hours to let the crystals form. Most of the time you spend is waiting, which is part of the calm of this activity.
Set your workspace with a towel or tray. You will want a level, still place where jars can sit undisturbed for several hours or overnight. Expect a low to moderate mess risk; spills of the borax solution should be wiped up right away, and a towel under each jar helps catch drips.
Adults will handle boiling water and pouring. Children can do safe jobs like rinsing shells, tying string, picking colors, and watching growth. If you need a shorter day project, plan to check results after a few hours, but overnight usually gives the best crystal coverage.
Materials You’ll Need
Clean seashells (medium to large)
Note: common household finds or shells bought at craft stores. Make sure they are dry before starting.
Borax powder (or alum as a substitute)
Note: borax is common in the laundry aisle. Alum works if that is what you have.
Hot water
Note: boiling water from the kettle or stovetop. Adult-handled only.
Clear glass jars or heatproof cups
Note: see-through containers show the crystals best. Mason jars work well.
String or thin wire
Note: strong enough to hold a shell. Thin wire gives more control but string works fine.
Pencils or chopsticks
Note: for suspending the shells across the jar mouth. Easy and budget-friendly.
Food coloring (optional)
Note: a drop or two adds gentle color. Totally optional.
Tweezers and gloves (optional)
Note: useful for lifting shells safely and keeping hands clean.
Spoon
Note: for stirring the solution and scooping borax.
Tray or towel
Note: protects your table and catches drips. Essential for easy cleanup.
Glitter or mica powder (optional)
Note: adds shimmer inside the jar or on the finished shell. Optional for extra sparkle.
STEP-BY-STEP DIRECTIONS

- Wash and dry your shells carefully. Rub the shells with a soft brush and let them air dry.
Take your time here. Dirt and oils stop crystals from sticking well. Use warm soapy water and a soft toothbrush if needed. Set the shells on a towel and wait until they feel fully dry to the touch. - Prepare a calm workspace with a towel or tray on your table and all materials within easy reach.
Place jars on the tray so any drips stay on the towel. Keep the borax, spoon, and a pencil ready, and make sure an adult will handle the hot steps. - Boil enough water and measure three tablespoons of borax for each cup of hot water until the solution is clear.
An adult should heat the water. Add borax slowly and stir until you no longer see grit. The solution looks like clear tea when mixed correctly. - Add a drop or two of food coloring if desired, and stir gently.
Use small amounts. Strong color can hide the crystals. Stir slowly to avoid creating air bubbles that cling to the shells. - Tie each shell with string or wire, suspend them in the jars, ensuring they do not touch the sides.
Secure the string to the shell so it hangs steady. Lay a pencil across the jar and drape the string over it. The shell should float in the middle of the jar and not touch the glass. - Pour the borax solution over the shells gently until they are submerged.
Pour slowly to avoid disturbing the shell. Fill the jar until the shell is covered by about half an inch to an inch of solution. - Let the jars sit undisturbed in a still place until crystals form, preferably overnight.
Choose a spot away from drafts, open windows, and pets. You will see crystals forming along the shell edges and on the string as the jar cools and evaporates slightly. - Carefully lift the shells using tweezers or gloves, let excess solution drip off, and set them on a towel to dry.
Lift straight up to avoid scraping crystals. Let the shells sit until they stop dripping and feel dry to the touch. - If you want a cleaner look, rinse the shells lightly with cool water and let them dry completely.
A gentle rinse removes loose borax crystals and powdery residue. Rinse quickly and set them back on the towel to finish drying. - Display and enjoy your crystal seashells as beautiful keepsakes.
Place them on a shelf, in a shallow bowl, or on a window sill where they can catch light. If you like, add a light dusting of mica for extra shimmer.
The Simple Science or Skills at Work

This project uses simple crystal chemistry. Borax dissolves in hot water and carries lots of borate molecules. As the water cools and a bit evaporates, those molecules come together and form crystal structures. Shell surfaces give crystals a place to start growing, which is why clean, dry shells help so much.
Kids practice fine motor skills when they tie string around shells and hang them. They build patience, because this project asks them to wait and observe a slow change. It also teaches cause and effect add more borax and you typically get more crystals, disturb the jar and the growth can change.
On a sensory level you will notice the solution feel slightly slippery if touched and the shells gaining a gritty texture as crystals collect. The visual reward of sparkly growth helps reinforce careful work and gentle handling.
Troubleshooting Common Issues
If the solution looks cloudy instead of clear, it probably has undissolved borax or minerals from the water.
Fix it by warming it gently and stirring until the grittiness disappears. Use tap water that is not hard if possible, or boil and let it settle before adding borax.
If crystals do not form well on the shells, the shells may have oil or dust on them.
Return them to warm, soapy water and scrub gently with a brush, then let them dry completely. You can try the process again with a fresh solution.
If crystals form only on the string or sides and not much on the shell, the shell may have been touching the jar or the string held more nucleation points.
Reposition the shell so it hangs clear of the glass. Smaller bits of string and fibers encourage crystal growth, so switch to thin wire for cleaner results.
If crystals are brittle and fall off easily, the air in the room may be too dry or you removed the shell too quickly.
Let the shell sit longer in a humid spot or wait until the crystals seem firm. Lift slowly and let drips stop before you place the shell on a towel.
If the solution spills or you get borax on your hands, rinse the skin with water and soap.
Borax can irritate sensitive skin. Wear gloves if you have concerns, and keep a damp towel nearby for quick cleanup.
Easy Variations to Try
Try food coloring sparingly for soft pastel shells instead of bold dye.
A single drop in a cup of solution gives a gentle wash of color that highlights crystal edges. This is a subtle change but looks lovely when the crystals catch light.
Use glitter or mica powder inside the jar for extra shimmer.
Sprinkle a tiny pinch into the solution or dust the finished shells after drying. Keep the amount small so it does not cloud the solution.
Hang multiple shells at different heights for a small mobile effect.
Varying heights create layered crystal growth and a more interesting display once dry. Make sure each shell has room so they do not touch.
Try alum instead of borax if that is what you have at home.
Alum works on the same idea but may create slightly different crystal shapes. Follow the same steps and expect similar, lovely results.
Make this a mini-science lesson by labeling jars with the amount of borax used.
Kids can compare which concentration gave the biggest crystals. It keeps the activity simple while adding curiosity and observation.
Storing or Reusing This Project
Store finished crystal shells in a cool, dry place away from moisture.
A glass-front shelf or enclosed display keeps them from getting dusty. If you want a longer-lasting sheen, a light spray of clear acrylic will seal loose crystals; test on a small shell first.
You can reuse jars and leftover solution carefully.
If you have extra solution, an adult can reheat it and add a little more borax to make a fresh batch. Do not put used solution down the sink without diluting with lots of water if your plumbing is sensitive.
Keep supplies together in a box labeled for future projects.
String, spare borax, and a few clean shells make this a quick pull-out activity for another rainy afternoon. Reduce waste by rinsing and drying jars for the next batch.
If you want to store shells between uses, wrap them in tissue and keep them in a small box.
That protects fragile crystals and keeps them from rubbing against each other in storage.
FAQs About DIY Crystal Seashells
Will borax harm my kids if they touch it while we make shells?
I have done this with careful supervision and a clear rule: adults handle the hot water and the borax measuring. If a child gets a small amount on their hands, washing with soap and water removes it. For very young kids or anyone with sensitive skin, use gloves and keep direct handling to a minimum. Borax is not a food, so treat it like any household cleaner and store it out of reach.
How messy is this and how hard is cleanup?
Expect a few drips and a little powder if you scoop borax. A towel under your work and a damp cloth for quick wipes keep the mess small. Jars rinse clean with warm water. If any solution spills on fabric, rinse right away with plain water. I find this activity cleaner than glitter crafts and easy to reset between runs.
Can I use regular table salt instead of borax?
Salt will form crystals but behaves differently and often needs different temperatures and longer time to grow. It tends to give smaller, less stable crystals on shells. Borax or alum will give you more reliable, showy growth on the shells on the first try.
What if our finished shells look uneven or not as sparkly as pictures?
That happens often and it is normal. Crystal growth depends on how clean the shell is, how level the jar sits, how concentrated the solution was, and how long it cooled undisturbed. Small bumps or gaps usually mean you had a little oil on the shell or the jar got bumped. Those shells still look pretty on a shelf and often people like the natural, imperfect look.
How old should kids be to try this?
I have done this with kids around six and up with close adult help. Younger children can take part in safe jobs like rinsing shells and choosing colors, but an adult should do the boiling and handling of hot solution. Use gloves and tweezers if you want less direct contact for older kids who still need supervision.
A Final Helpful Note
This project rewards patience and gentle care. If your first run does not look perfect, you can try again with the same shells after cleaning them, or keep the ones you have as uniquely imperfect keepsakes. The process makes a calm break in a busy day and gives a small, satisfying result to show for your time. Trust your hands, take it slow when you handle hot water, and enjoy the quiet magic of crystals forming.
Conclusion
If you liked the step-by-step method here, you may enjoy a slightly different take on the same idea at KiwiCo’s Crystal Seashells DIY for Beginners, which shows another way to present the finished shells. For a family-friendly science angle with similar materials and clear photos, see Little Bins for Little Hands’ Shell Crystal Craft.
PrintDIY Crystal Seashells

Create beautiful crystal-decorated seashells using borax and water in a fun and educational DIY project.
- Prep Time: 15 minutes
- Cook Time: 480 minutes
- Total Time: 495 minutes
- Yield: 4 servings 1x
- Category: Craft
- Method: DIY
- Cuisine: N/A
- Diet: N/A
Ingredients
- Clean seashells (medium to large)
- 3 tablespoons borax powder (or alum as a substitute)
- Hot water
- Clear glass jars or heatproof cups
- String or thin wire
- Pencils or chopsticks
- Food coloring (optional)
- Tweezers and gloves (optional)
- Spoon
- Tray or towel
- Glitter or mica powder (optional)
Instructions
- Wash and dry your shells carefully, rubbing with a soft brush.
- Prepare a calm workspace with a towel or tray where jars can sit undisturbed.
- Boil enough water and mix 3 tablespoons of borax for each cup of hot water until the solution is clear.
- Add food coloring if desired and stir gently to mix.
- Tie each shell with string or wire, suspend them in the jars without touching the sides.
- Pour the borax solution over the shells until they are submerged.
- Let the jars sit undisturbed until crystals form, preferably overnight.
- Carefully lift the shells using tweezers, let excess solution drip off, and set them on a towel to dry.
- If desired, rinse the shells lightly with cool water and let them dry completely.
- Display and enjoy your crystal seashells as beautiful keepsakes.
Notes
Store finished crystal shells in a cool, dry place. Use gloves when handling borax if concerned about skin irritation.
Nutrition
- Serving Size: 1 shell
- Calories: 0
- Sugar: 0g
- Sodium: 0mg
- Fat: 0g
- Saturated Fat: 0g
- Unsaturated Fat: 0g
- Trans Fat: 0g
- Carbohydrates: 0g
- Fiber: 0g
- Protein: 0g
- Cholesterol: 0mg