

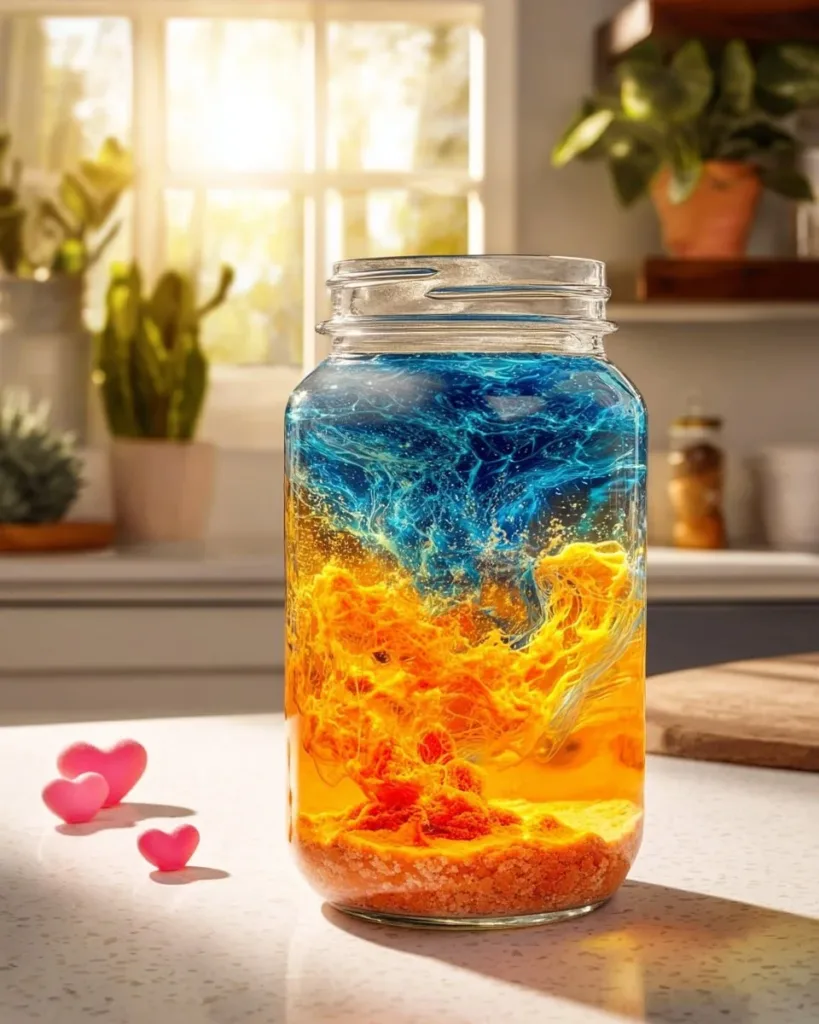
A rainy afternoon, a gap between after-school snacks and bedtime, or a moment when the kids say they want to make something right now those are perfect times for a quick, showy project. Salt Volcano – Stunning Lava Effect in a Jar fits those moments perfectly. It takes things you probably already have in the kitchen, needs only a few minutes to set up, and gives a satisfying, slow-motion lava show that holds attention without much fuss. If you liked our other jar projects, like the rainbow lava lamp in a jar, you will find this one equally charming and even easier to reset for another round.
Why You’ll Love Making Salt Volcano – Stunning Lava Effect in a Jar

This project stays low-prep because you use everyday kitchen items that are quick to gather.
You do not need any special tools or long drying times, so it works when time is short.
It stays approachable even with young helpers because one adult can prep the hot water and pour safely.
It fits real-life schedules: the main set-up takes about ten minutes, then you watch and tweak.
The effect feels dramatic but is reliable, so kids get the wow moment without lots of failed tries.
It stores well if you want to keep a display or reuse liquids, so it does not feel disposable.
A Quick Look Before You Begin
This activity takes about 10 to 20 minutes of hands-on time plus a short rest while the jar layers settle.
You will need a small clear jar and a towel or tray to catch any drips.
Expect a little mess if salt or glitter spills; that is normal and easy to clean up.
Plan a bit of adult supervision for heating water and the first dumps of salt into the jar.
You will sit and watch the reaction in short bursts, adding salt until you like the motion.
Materials You’ll Need
Clear glass jar with lid
Common household item that shows the effect best.
Warm water (about 1 cup)
Heat in the kettle or microwave until pleasantly warm, not boiling.
Liquid food coloring or dilute watercolor ink
A little goes a long way. Pick vivid colors for the best contrast.
Vegetable oil or light mineral oil (about 1 cup)
Kitchen oil works fine. Use light mineral oil if you want a clearer, less scented option.
Table salt (coarse or fine)
Either works. Coarse gives chunkier bursts; fine makes longer streams.
Small spoon or measuring spoon (optional)
Helpful for controlled salt pinches and tidy pouring.
Pipette or dropper (optional)
Nice for adding tiny salt piles or moving colored water drops.
Funnel (optional)
Makes pouring oil neater if your jar throat is narrow.
Tray or towel to catch spills
Essential for quick cleanup and a calm activity space.
Glitter or biodegradable sequins (optional)
Adds sparkle when the water rises. Use small amounts.
Small flashlight or warm lamp for display (optional)
Shines through the jar and makes colors pop in dim light.
STEP-BY-STEP DIRECTIONS

- Warm and color the water. Pour warm water into a bowl, add food coloring, and stir.
Use warm water so the oil and water separate cleanly and the color mixes easily.
Start with a few drops of coloring and add more until the shade looks lively. - Pour the colored water into the jar until it is one-third to halfway full.
Aim for a clean line visible through the glass so the lava pops against the oil.
If you overfill, you have less space for motion; underfill and you lose the rising effect. - Slowly pour the oil into the jar until it covers the water.
Pour gently so the oil sits on top of the colored water in a clear layer.
Leave a little headspace at the top to avoid overflow when salt drops in. - Let the jar rest to allow the layers to settle.
Give it a minute or two so tiny bubbles rise and the layers separate fully.
You want a calm surface before dropping salt for the clearest effect. - Take a small pinch of salt and hold it over the jar.
A small pinch feels right at first; you can add more later.
Hold it just above the oil so you can drop it straight in without grazing the rim. - Gently tip the salt into the oil and watch the colored water rise with it.
Salt sinks through the oil, carrying little blobs of water down and then releasing them.
You will see colorful droplets break free and rise like lava tubes through the oil. - Observe the lava effect and add more salt as desired.
Pause after a few pinches to enjoy the motion before adding more.
If the action slows, a fresh pinch of salt usually brings it back to life. - Experiment with different temperatures and salt sizes for varying effects.
Warm water and coarse salt give faster, chunkier eruptions.
Cooler water or fine salt stretches the rises into slower streams and thinner columns. - Seal the jar to keep the display, or pour liquids into separate containers for reuse.
If you store the jar sealed, little new motion may continue for a short while.
Pour liquids into separate bottles if you want to reuse the oil and colored water later.
The Simple Science or Skills at Work

This project shows basic cause and effect in a very visual way.
Water and oil do not mix and naturally separate because of density.
Salt temporarily pulls colored water through the oil and then lets it go, making the rise.
Kids practice fine motor skills when they pinch salt, pour gently, and steady the jar.
They learn to observe, wait, and predict what small changes do to the motion.
This activity also teaches sensory cues: warm water feels different to pour, oil moves slowly, and the jar makes soft thumps when blobs detach.
Troubleshooting Common Issues
If the oil and water look cloudy or mix slightly, check the temperature.
Warm water helps keep them separate; if you used cold water, try a slightly warmer batch.
If nothing happens when you drop salt, the salt may be too wet or you dropped it into water through a disturbed surface.
Try drying the salt on a plate or sprinkle it from a higher point so it sinks cleanly through the oil.
If the color bleeds into the oil in a blotchy way, the food coloring may be oil soluble or you used too much.
Use a smaller amount of coloring or test a drop in a cup of oil first.
If the jar overflows when you add salt, you probably filled it too full to start.
Empty a little oil into a spare container, then try again with fewer pinches.
If glitter floats and clumps on the oil surface, use less glitter next time and pick biodegradable varieties if you plan to discard the mixture.
Easy Variations to Try
Swap salt sizes for different eruption styles.
Try coarse salt for popping, chunky blobs and fine salt for steady streams.
Add a little glitter or biodegradable sequins for sparkle.
Use tiny amounts and keep them optional to cut down on cleanup.
Make a two-color experiment with two jars side by side.
Use different colors and observe how the motions compare and how long each keeps moving.
Try dim lighting and a flashlight under the jar for a glowing look.
A small lamp or flashlight makes colors more dramatic for a short display.
Pair this with other jar activities on slow afternoons.
For a snowy contrast, try a different jar craft like our magical snowstorm in a jar on another day to show different types of motion and texture.
Storing or Reusing This Project
If you want to keep the display, tighten the lid and store the jar in a cool, stable place.
Motion slows over time, but the jar still makes a pretty decorative object for a day or two.
To reuse materials, pour oil and colored water into separate bottles through a funnel.
Strain out large salt grains and glitter with a mesh if you want cleaner reuse.
Dispose of liquids down a drain with plenty of water if you choose not to save them.
Wipe up spills with a towel and a little dish soap for oily residue.
FAQs About Salt Volcano – Stunning Lava Effect in a Jar
Will this activity make a big mess?
It can drip or scatter salt and glitter, especially when kids are excited.
Lay a towel or tray under the jar and keep a small bowl for used salt to keep things tidy.
Most spills wipe up easily with a damp cloth and dish soap for oil.
Is this safe for young children?
It is safe with supervision, but an adult should handle hot water.
Kids under five will need a steady hand from an adult when adding salt and holding the jar.
Keep small items like glitter out of reach if your child still puts things in their mouth.
Can I use table sugar instead of salt?
You might see some motion, but salt works better because of its weight and how it behaves in oil.
If you only have sugar, try a small test first and be ready for a gentler effect.
How long does the effect last?
Active motion lasts while salt keeps bringing water up through the oil.
It often looks best for the first several minutes, then slows; fresh salt pinches revive it.
If you seal the jar, some tiny movements may continue for a short time, but expect the display to calm.
What if I want to show this to a class or group?
Do the warm water step beforehand and set up multiple jars.
Use trays and paper towels at each station and demonstrate one slow pinch first.
Encourage kids to take turns adding a single pinch so everyone sees the motion.
A Final Helpful Note
You do not need perfect materials or exact measurements to get satisfying results.
Start with what you have and treat the first jar as a fun experiment, not a final showpiece.
Take your time, enjoy watching the motion, and let kids make choices about color and sparkle.
If something spills, use that as a cleanup teachable moment; it keeps the activity relaxed and practical.
Above all, remember that this is about curiosity and a little kitchen magic.
Conclusion
If you want to explore different kinds of salt and textures, consider reading about specialty salts like LAVA SALT – Saltverk for inspiration on how crystals and grain size change how materials behave. For a real-world look at the forces behind volcanic fountains and why rising material behaves dramatically in nature, the USGS explanation is a clear, friendly read at Gases are what drives volcanoes’ spectacular fountains – USGS.gov.
PrintSalt Volcano – Stunning Lava Effect in a Jar

Create your own mesmerizing salt volcano with this fun and easy activity using common kitchen items.
- Prep Time: 10 minutes
- Cook Time: 10 minutes
- Total Time: 20 minutes
- Yield: 1 stunning volcano jar 1x
- Category: Activity
- Method: Demonstration
- Cuisine: Science Experiment
- Diet: N/A
Ingredients
- 1 clear glass jar with lid
- 1 cup warm water
- Liquid food coloring or dilute watercolor ink
- 1 cup vegetable oil or light mineral oil
- Table salt (coarse or fine)
- Small spoon or measuring spoon (optional)
- Pipette or dropper (optional)
- Funnel (optional)
- Tray or towel to catch spills
- Glitter or biodegradable sequins (optional)
- Small flashlight or warm lamp for display (optional)
Instructions
- Warm and color the water by pouring warm water into a bowl and adding food coloring, stirring until the desired shade is achieved.
- Pour the colored water into the jar until it is one-third to halfway full.
- Slowly pour the oil into the jar until it covers the water, leaving a little headspace at the top.
- Let the jar rest for a minute or two to allow the layers to settle.
- Take a small pinch of salt and drop it into the oil, observing the colored water rise with it.
- Add more salt as desired and enjoy the lava effect.
- Experiment with different temperatures and salt sizes for various effects.
- Seal the jar to keep the display or pour the liquids into separate containers for reuse.
Notes
Supervise young children, especially when handling hot water. Use a tray to catch spills and ensure a calm activity space.
Nutrition
- Serving Size: 1 jar
- Calories: 0
- Sugar: 0g
- Sodium: 0mg
- Fat: 0g
- Saturated Fat: 0g
- Unsaturated Fat: 0g
- Trans Fat: 0g
- Carbohydrates: 0g
- Fiber: 0g
- Protein: 0g
- Cholesterol: 0mg