

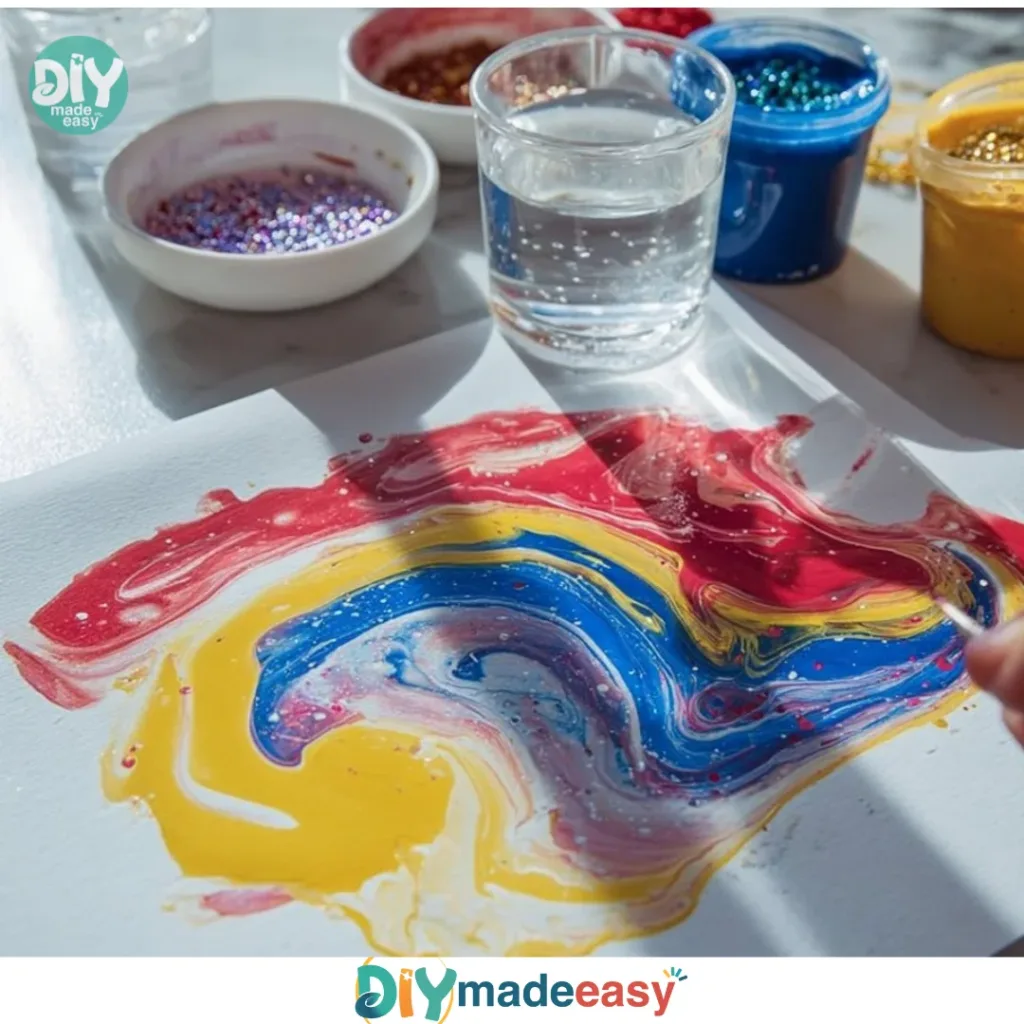
A late-afternoon rainstorm, a quick kitchen setup, and a chorus of “Can we make something now?” Baking Soda Fizzy Painting fits that exact moment. It uses things you already have on the counter and comes together while the kettle cools. You mix a soft baking soda paste, tint it with food color, paint it on watercolor paper, and add vinegar to watch colorful fizzing patterns bloom. It feels like a small magic trick that kids control, and it cleans up without a special trip to the craft store.
If you want projects that give a clear science moment plus a keepable piece of art, this one delivers. It’s playful and tactile, it teaches cause and effect, and it usually sparks that proud smile when a painting bubbles into something unexpected. If your kids love the fizz here, try our baking soda volcano for another hands-on reaction that’s just as dramatic and simple.
Why You’ll Love Making Baking Soda Fizzy Painting

This activity works for busy families because it takes minutes to set up and uses easy ingredients. You mix once, split the paste into small cups, and color each cup in seconds. The only “special” item is watercolor paper, but regular paper will do in a pinch for testing.
It stays approachable because kids can control the fizz. They decide how much paste to paint and where to drop the vinegar. That keeps the mood playful and reduces the need for constant adult corrections.
It proves reliable. The baking soda and vinegar reaction happens every time if the amounts are roughly right. You will get fizz even if the paste is thicker or thinner, though texture changes the look. Because it uses household items, you can restart a spot or add more color without hunting for supplies.
A Quick Look Before You Begin
This project usually takes 20 to 40 minutes from start to finish, depending on how detailed you get with painting and drying time. Most of that is watching the fizz and adding layers. Setup takes about five minutes. Cleanup takes another five to ten minutes.
Expect a medium mess level. You get colored paste on the tray and maybe a few drops of vinegar on the table. Use a plastic tray to keep everything contained and wipe it down right away. Adults will need to help with mixing and pouring the vinegar into a small cup or dropper bottle for safety and control.
Kids can manage the painting and the vinegar drips on their own with supervision. For preschoolers you will likely do the mixing and give close guidance when the vinegar comes out. Older kids can experiment more independently and make more deliberate fizz patterns.
Materials You’ll Need
1 cup Baking soda
common household item
1 cup Water
tap water works fine
1 cup White vinegar
used for the fizz reaction
Food coloring (liquid or gel)
adds bright color; gel gives stronger hues
Small cups or containers
for mixing and holding colors
Paintbrushes or droppers
brushes for painting, droppers for controlled fizz
Watercolor paper
best for holding texture; thicker paper helps
Plastic tray
keeps the mess contained and easy to clean
STEP-BY-STEP DIRECTIONS

- Mix 1 cup baking soda with 1 cup water in a bowl until mostly smooth.
Stir until the lumps mostly disappear but keep the paste a little grainy for texture.
You want a spreadable paste, not a runny liquid. - Pour or spoon the paste into several small cups, leaving room to stir in food coloring.
Use a few tablespoons per cup depending on how many colors you want.
Leave enough space so you can stir without spilling. - Add a few drops of food coloring to each cup and stir gently.
Start with two or three drops and add more for deeper color.
Gel colors need less and mix in with a small stir. - Set the watercolor paper on the tray and place the vinegar in a separate small cup or dropper bottle.
Put the tray where it is easy for kids to reach but not to bump into.
A dropper bottle gives more control than pouring. - Use a paintbrush or dropper to apply the colored baking soda mixture to the paper.
Paint dots, lines, or puddles of paste — the thicker the paste, the bolder the texture.
Work in sections if you want staged fizz effects. - Drip a little vinegar onto the painted areas and observe the fizz.
Add vinegar slowly so you can enjoy the bubbling and color mixing.
The fizz shows immediately and lasts a few seconds to a minute depending on amount. - Continue adding colored paste and vinegar, experimenting with fizz patterns.
Try layering colors or letting one color fizz into another to see what happens.
Kids love repeating and refining their techniques. - Let the paper sit flat to dry.
Drying may take several hours depending on paste thickness.
When dry, the surface will feel slightly rough where the paste reacted.
The Simple Science or Skills at Work

This project blends simple chemistry and hands-on skills. The fizz happens because baking soda, a mild base, reacts with vinegar, an acid. When they meet, they release carbon dioxide gas as tiny bubbles. That gas lifts the paste and moves color in fun ways.
Kids practice fine motor skills while they scoop paste into cups, stir colors, and use a brush or dropper. Dropping vinegar in a controlled way helps with hand-eye coordination. Painting the paste on the paper uses the same wrist and finger control as watercolor painting, so it supports early art skills too.
The activity also teaches cause and effect in an immediate, visual way. Kids see that more vinegar creates more fizz, and thicker paste makes a different texture. Those small discoveries build curiosity and confidence without a heavy lecture.
If you want a different but related hands-on fizz moment, try the balloon baking soda experiment for another take on measuring and reaction control.
Troubleshooting Common Issues
If the paste looks too watery, it will spread and make faint fizz marks.
Fix it by stirring in a little more baking soda a teaspoon at a time until it thickens.
A thicker paste gives more texture and holds color better.
If nothing fizzes, check the vinegar.
Vinegar can weaken if it sat open for a very long time, or if the paste got rinsed accidentally.
Use a fresh cup of white vinegar and drip a tiny bit directly onto baking soda paste to test.
If colors look muddy when fizzing together, try spacing colors further apart.
Let one color fizz and dry a bit before adding a second color nearby.
You can also use lighter colors first and add darker colors as accents.
If the paper buckles or tears, the paste is likely too wet or thick in one spot.
Use watercolor paper or thicker stock and spread paste in thinner layers.
Let each layer dry partially if you want stronger, crisper shapes.
If kids overdo the vinegar and make a lot of runoff, pause and blot with a paper towel.
Teach them to drip slowly from the dropper tip rather than squeezing hard.
A plastic tray underneath catches most drips and makes cleanup simple.
Easy Variations to Try
Try dot fizzing for controlled bursts: paint many small dots of paste and drip vinegar in the center of each dot for a polka-dot effect.
This works well for preschoolers learning aim and control.
Make a fizz marble texture: spread a thin, even layer of paste and add splashes of multiple colors, then drip vinegar in a line to create a streak of fizzed color.
When dry, it gives a mottled, marbled look.
Seasonal shapes: use a small stencil or pre-draw shapes on the paper, then paint within the lines with the paste.
Drip vinegar on different parts to create a bubbly surface that still reads as a seasonal design.
Group gallery: set up several small papers and assign each child a color or technique.
When dry, tape them together for a collaborative gallery wall.
Make it a slow-dry piece: let one layer fizz and dry completely, then add more paste and color on top for textured, layered art.
This takes longer but gives a dramatic, relief-like finish.
Storing or Reusing This Project
Leftover paste stores briefly in a closed container in the fridge.
Use it within a day or two; it loses its puff and freshness after that.
Stir before using again because separation can happen.
Food coloring cups can be covered and reused for another quick session in the same day.
Label cups or use a cookie sheet to keep them steady.
If you plan frequent repeats, keep a small amount of paste reserved to refresh colors.
Vinegar you don’t use can return to the cupboard, but keep it sealed to maintain strength.
If you use a dropper bottle for vinegar, rinse it between uses if you added color or paste by mistake.
A quick rinse under warm water clears most residue.
The watercolor paintings make good keepsakes once dry, though the raised texture may make them less suitable for flat framing without pressing.
To save flat, press the dry painting under a heavy book for a day.
Use a clear spray fixative if you want to protect the surface from smudging over time.
Baking Soda Fizzy Painting

A fun and educational art project combining baking soda and vinegar to create fizzy reactions on watercolor paper.
- Prep Time: 5 minutes
- Cook Time: 15 minutes
- Total Time: 20 minutes
- Yield: Variable (depends on the amount of paste used)
- Category: Craft
- Method: Painting
- Cuisine: N/A
- Diet: N/A
Ingredients
- 1 cup Baking soda
- 1 cup Water
- 1 cup White vinegar
- Food coloring (liquid or gel)
- Small cups or containers
- Paintbrushes or droppers
- Watercolor paper
- Plastic tray
Instructions
- Mix 1 cup baking soda with 1 cup water in a bowl until mostly smooth, leaving it slightly grainy for texture.
- Pour or spoon the paste into several small cups.
- Add food coloring to each cup and stir gently.
- Set the watercolor paper on the tray and prepare vinegar in a dropper bottle for control.
- Use a paintbrush or dropper to apply the colored paste to the paper.
- Drip vinegar onto painted areas and observe the fizz.
- Experiment with different patterns and colors.
- Let the paper dry flat for several hours.
Notes
Encourage kids to experiment and enjoy the unpredictability of the fizzing reaction. Use a plastic tray for easy cleanup.
Nutrition
- Serving Size: 1 project
- Calories: N/A
- Sugar: N/A
- Sodium: N/A
- Fat: N/A
- Saturated Fat: N/A
- Unsaturated Fat: N/A
- Trans Fat: N/A
- Carbohydrates: N/A
- Fiber: N/A
- Protein: N/A
- Cholesterol: N/A
FAQs About Baking Soda Fizzy Painting
Will this activity stain clothes or furniture?
It can, especially with strong gel food coloring. I have seen bright colors transfer if kids wear white shirts or lean their arms in the paste. Use aprons or play clothes and protect the table with a plastic tray or an old towel. If a spill happens, blot quickly with a damp cloth and mild soap; fresh stains lift much more easily than dried ones.
Is this safe for young children to do?
Yes, with supervision. The ingredients are common household items and non-toxic, but vinegar can sting eyes and skin if splashed. I keep a close hand on droppers for toddlers and do the mixing. For independent play, preschoolers do fine with a parent nearby and the vinegar in a dropper bottle rather than a cup.
Can I substitute ingredients if I don’t have watercolor paper or gel coloring?
You can use regular drawing paper for practice, but expect more buckling and longer drying time. Liquid food coloring works perfectly; gel gives richer color with less product. I prefer watercolor paper when I want a finished piece to keep, but you do not need it to explore the activity.
How long will the art take to dry and keep?
Drying depends on paste thickness. Thin layers dry in a few hours; thick textured spots can take overnight or longer. Once fully dry, the painting keeps well, though it may be slightly crumbly at the highest texture peaks. Pressing under a book for a day reduces the raised effect if you prefer a flatter finish.
What if the reaction is too small or too big?
Tiny fizz? Add a bit more vinegar slowly. Too much fizz? Use smaller drops and less vinegar, or dab with a dry paper towel to remove excess liquid. The balance depends on paste thickness and how much vinegar you apply, and you learn the feel with a couple of controlled tries.
A Final Helpful Note
This project succeeds when you embrace experimentation and small mistakes. Expect uneven results at first; that’s part of the fun. Encourage kids to adjust one thing at a time—thicker paste here, more vinegar there—so they learn what changes the outcome. Keep cleanup simple with a tray and a damp cloth, and treat the finished pieces as proud test runs that might become gallery-level later.
Trust the simplicity: mix, color, paint, drip, and watch. If you want another fizz activity to keep the momentum going, our baking soda and vinegar fireworks guide has a similar wow factor and easy setup.
Conclusion
If you want more ideas that pair art with chemistry, see this clear tutorial on Fizzy Art – Baking Soda Paint – Typically Simple for another visual approach to baking soda paint. For a slightly different take and more background on fizzing baking soda paint techniques, I also recommend Fizzing Baking Soda Paint – fun art & science activity for kids.