

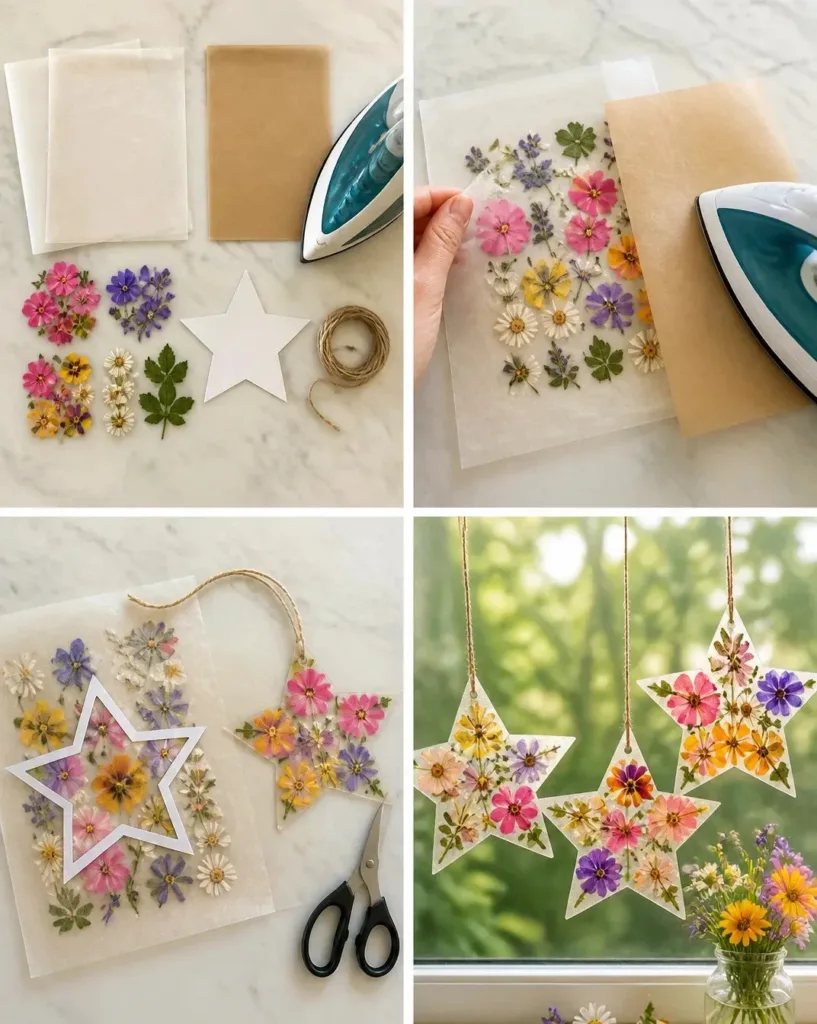
Making the wildflower wax paper window stars can be the perfect way to brighten any room, especially during those busy afternoons when kids want to create something beautiful. The simple gathering of pressed flowers and leaves evokes joy and creativity. These lovely stars become stunning decorations that shimmer in the sunlight, inviting the nature indoors. If you’re looking for an engaging activity that allows little hands to explore artistry while connecting with nature, learning how to make wildflower wax paper window stars is a delightful choice. You may also find How To Make A Butterfly Craft From Paper Plates useful.
Why This How to Make Wildflower Wax Paper Window Stars Works So Well

You may also find How To Make Magical Spinning Toy From Paper Strips useful.
This project is exceptionally appealing for its low-prep nature. With just a few materials that you likely have at home, it’s an approachable and reliable way to share a crafting experience with children. The whole process invites creativity without demanding extensive setup or cleanup, making it perfect for real-life schedules. Plus, the result a collection of colorful stars offers a fun display that can add charm to any window. Just imagine those vibrant colors filtering sunlight into your child’s space. You may also find How To Make Rainbow Paper Plate Sun Catcher useful.
A Quick Look Before You Begin
Creating these window stars won’t take much time at all, usually around an hour or so, including prep and cooling. The materials are easy to set up and can typically be found in your kitchen or craft drawer. Expect minimal mess, but do cover your surface to catch any stray petals or wax. Although you will need adult supervision for the ironing step, children can take the lead in arranging flowers and cutting out the stars. You may also find How To Make A Lightning Storm In A Jar useful.
Materials You’ll Need
- 2 sheets wax paper
- Pressed flower petals (common household item)
- Dried leaves (common household item)
- Parchment paper (optional, but helpful for protecting your iron)
- Iron (adult supervision required)
- Star template (easy to create from any paper)
- Cotton string (easy substitute for hanging)
This straightforward list ensures that you have everything at hand to create your beautiful window stars with ease.
Step-by-Step Directions
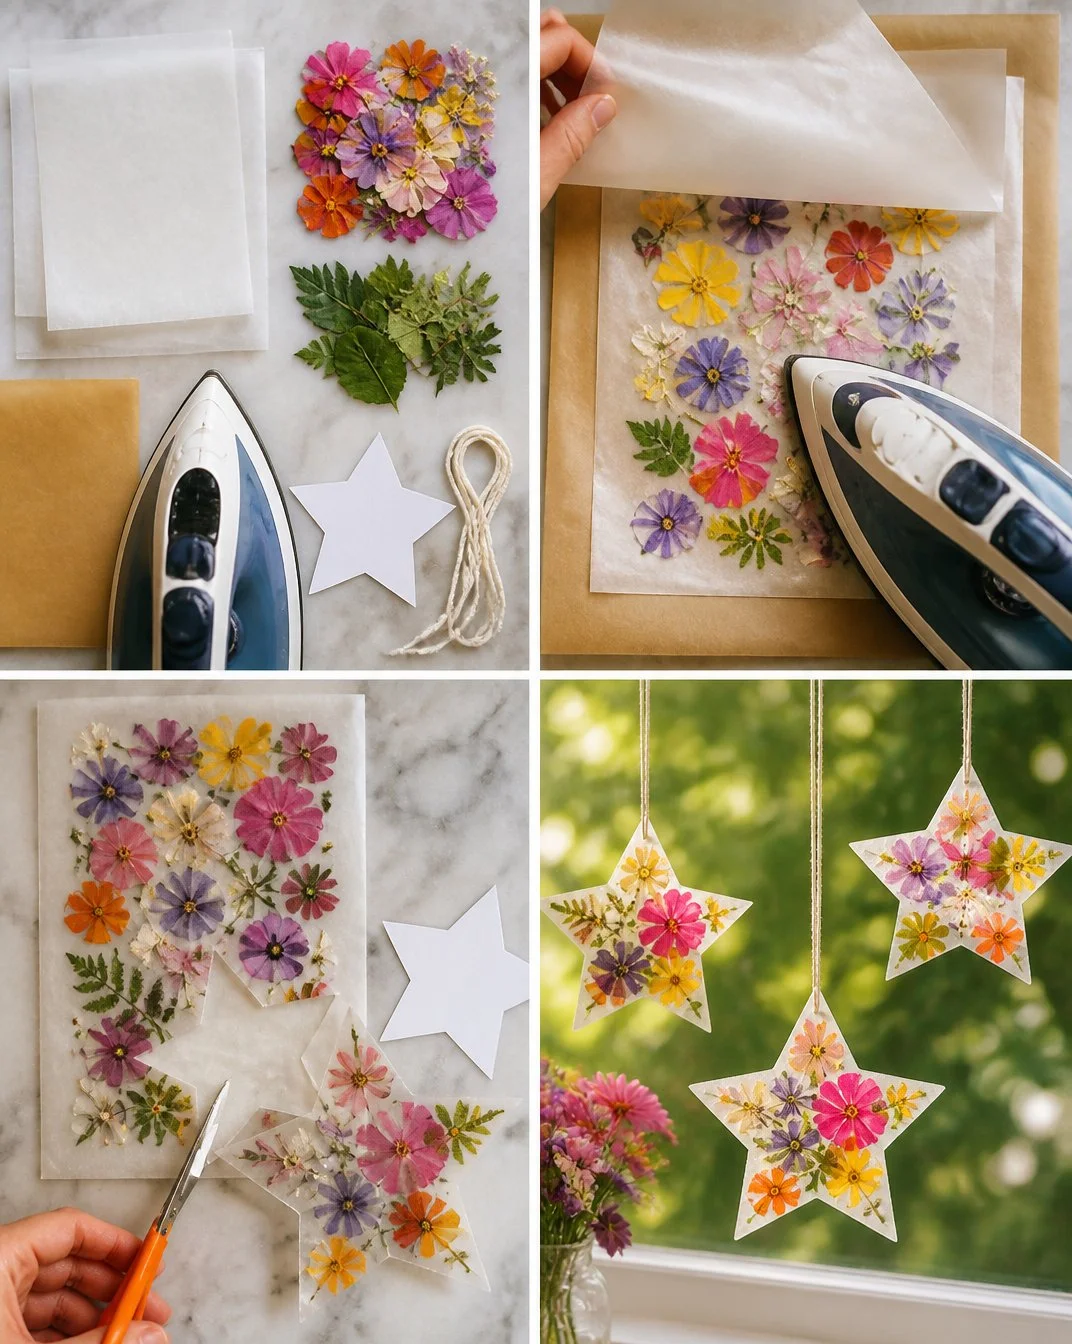
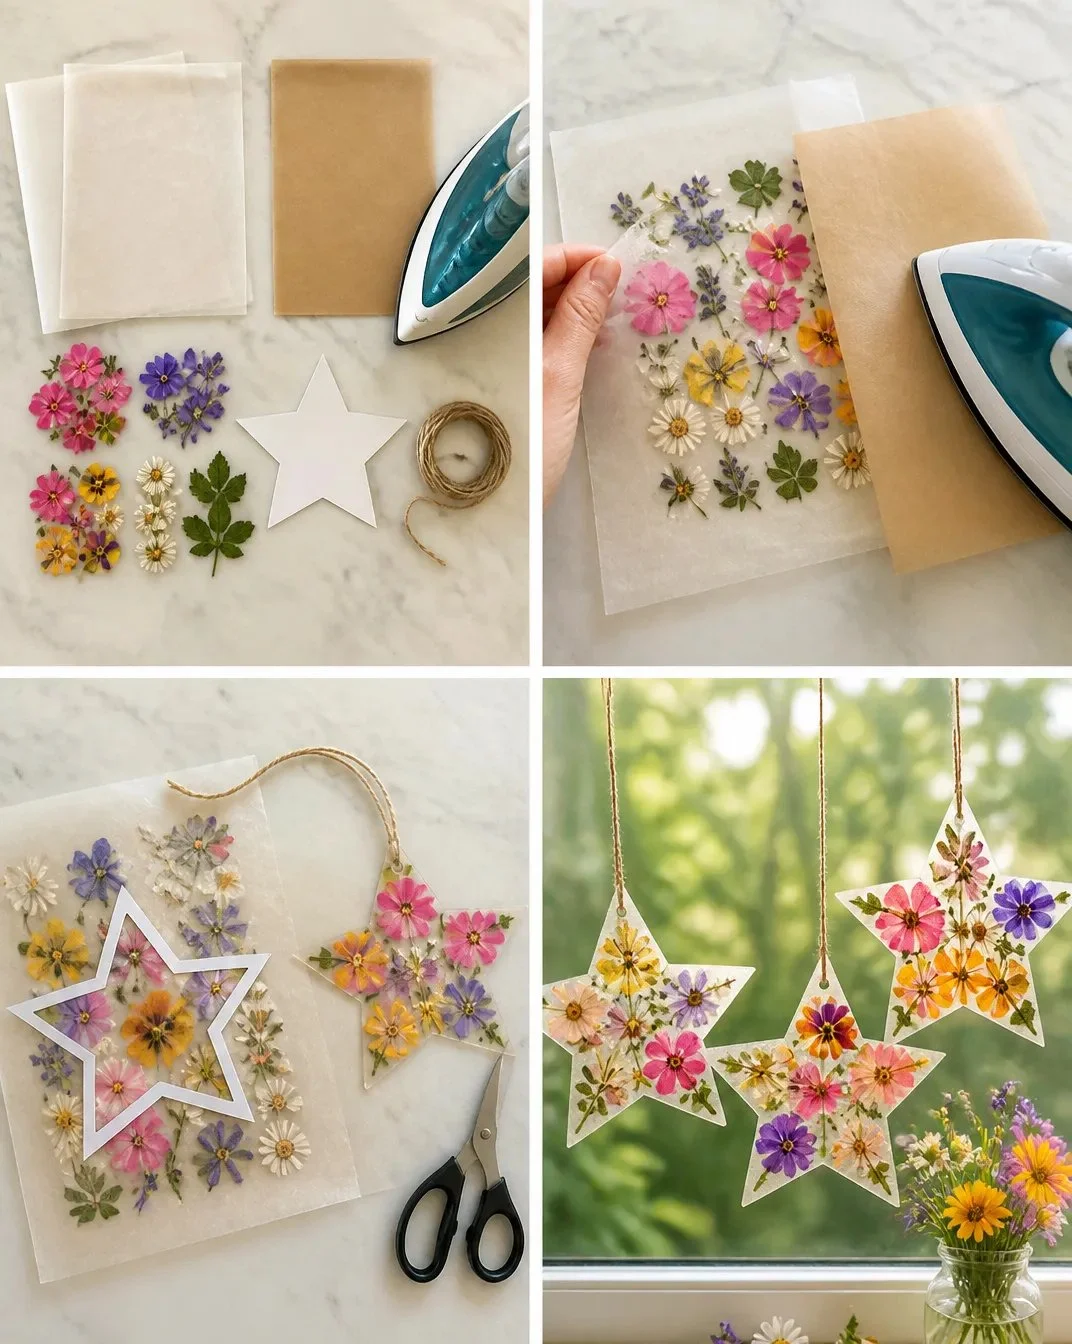
Begin by placing one sheet of wax paper on a protected ironing surface. This surface should be clean and free of items to ensure ease of working.
Scatter the pressed flower petals and dried leaves over the wax paper, arranging them however you desire. Feel free to get creative!
Next, gently cover your floral arrangement with the second sheet of wax paper.
Now, place a piece of parchment paper over the wax paper. This acts as a protective layer for your iron and prevents any wax from sticking to it.
With adult supervision, take a warm iron and briefly press down on the parchment paper. Move the iron around to ensure the wax-paper layers bond together without overheating any specific spot.
After pressing, allow the star sheets to cool completely. This might take a few minutes, giving you time to prepare for the next step.
Once cool, use your star template to trace and cut out star shapes from the bonded wax paper, creating as many as you like.
For each star, make a small hanging hole at one end. Then, thread a piece of cotton string through the hole to create a loop for hanging.
Finally, hang your stars near a sunny window to enjoy the colorful display!
The Learning Behind This DIY
While making wildflower wax paper window stars, children exercise fine motor skills as they work with petals and wax paper. Arranging the flowers promotes creativity and spatial awareness, as they learn how to make something beautiful with what nature provides. This activity also introduces basic concepts of bonding materials through heat. Ensuring supervision during the ironing process teaches kids about safety and the cause-and-effect relationship between temperature and wax melting.
Troubleshooting Common Issues
When honing your star-making skills, you might encounter a few bumps along the way. If the wax paper doesn’t bond properly after ironing, it can be due to either insufficient heat or time. Ensure the iron is warm enough, and allow enough pressing time without leaving it in one location. If the pressed flowers seem to fade or lose shape, it’s likely due to over-pressing, which can be frustrating, but it’s all part of the learning process.
Easy Variations to Try
To turn up the creativity a notch, consider these easy variations. You can use different shapes instead of stars, like hearts or circles, to fit specific holidays or occasions. During seasonal changes, try using petals or leaves that match the time of year. For a more tactile experience, you can explore layering different colors of wax paper underneath for a stained glass look!
Storing or Reusing This Project
Once completed, you can store the wildflower stars safely by placing them in a box or bag away from direct sunlight, helping to maintain their vibrancy. When recycling materials, the wax paper can often be reused for such crafts, reaffirming the importance of reducing waste whenever possible while enjoying art projects.
FAQs About How to Make Wildflower Wax Paper Window Stars
Can kids substitute materials for this project?
Absolutely! You can use any types of paper or even other decorative items.Lastly, many ask about the expected results. The stars may not be perfect, which is part of the charm! Encouraging creativity leads to unique designs and experiences.
Conclusion
Conclusion
Creating wildflower wax paper window stars is not just a fun craft; it also allows for creative expression while connecting with nature. Each star becomes a piece of art that brightens up your home. For those looking for additional crafting inspiration, you can explore
Window Stars, Making Folded Stars from Colored Papersor check out exciting options from
Waldorf Window Stars Paper – Bella Luna Toys. Enjoy making your stars and the joy they bring!
PrintWildflower Wax Paper Window Stars
Create beautiful wildflower wax paper window stars that brighten any room and invite nature indoors.
- Prep Time: 15 minutes
- Cook Time: 15 minutes
- Total Time: 30 minutes
- Yield: 4 stars 1x
- Category: Crafting
- Method: Ironing
- Cuisine: N/A
- Diet: N/A
Ingredients
- 2 sheets wax paper
- Pressed flower petals
- Dried leaves
- Parchment paper (optional)
- Iron (adult supervision required)
- Star template (from paper)
- Cotton string
Instructions
- Begin by placing one sheet of wax paper on a protected ironing surface.
- Scatter the pressed flower petals and dried leaves over the wax paper.
- Cover your floral arrangement with the second sheet of wax paper.
- Place a piece of parchment paper over the wax paper.
- Press down on the parchment paper with a warm iron to bond the wax-paper layers together.
- Allow the star sheets to cool completely.
- Trace and cut out star shapes from the bonded wax paper using your star template.
- Create a small hanging hole at one end of each star and thread a piece of cotton string through it.
- Hang your stars near a sunny window to enjoy the colorful display!
Notes
Ensure adult supervision during the ironing process and cover your work surface to catch any stray petals or wax.
Nutrition
- Serving Size: 1 star
- Calories: 0
- Sugar: 0g
- Sodium: 0mg
- Fat: 0g
- Saturated Fat: 0g
- Unsaturated Fat: 0g
- Trans Fat: 0g
- Carbohydrates: 0g
- Fiber: 0g
- Protein: 0g
- Cholesterol: 0mg